
The complete guide
Learn FrameOsu on the actual screens
This is the whole editing path in one place: add material, build manually or with Auto Reel and templates, turn media into parts, arrange parts and transitions, create reusable joins, build titles and overlays, shape music, preview the result and export it. Desktop visitors see captures of the running Mac app; phone visitors see the same path in the real iPhone layout.
Choose a numbered point to open its explanation on the screenshot. Close it with ×, or choose a name below to return to that point.
The complete guideLearn FrameOsu on the actual screens
01 Your whole reel on one screen
The editor keeps the result, the ingredients and their timing together. The preview shows what the reel looks like now; Sources holds its ingredients; the lanes below show what the finished reel will play.
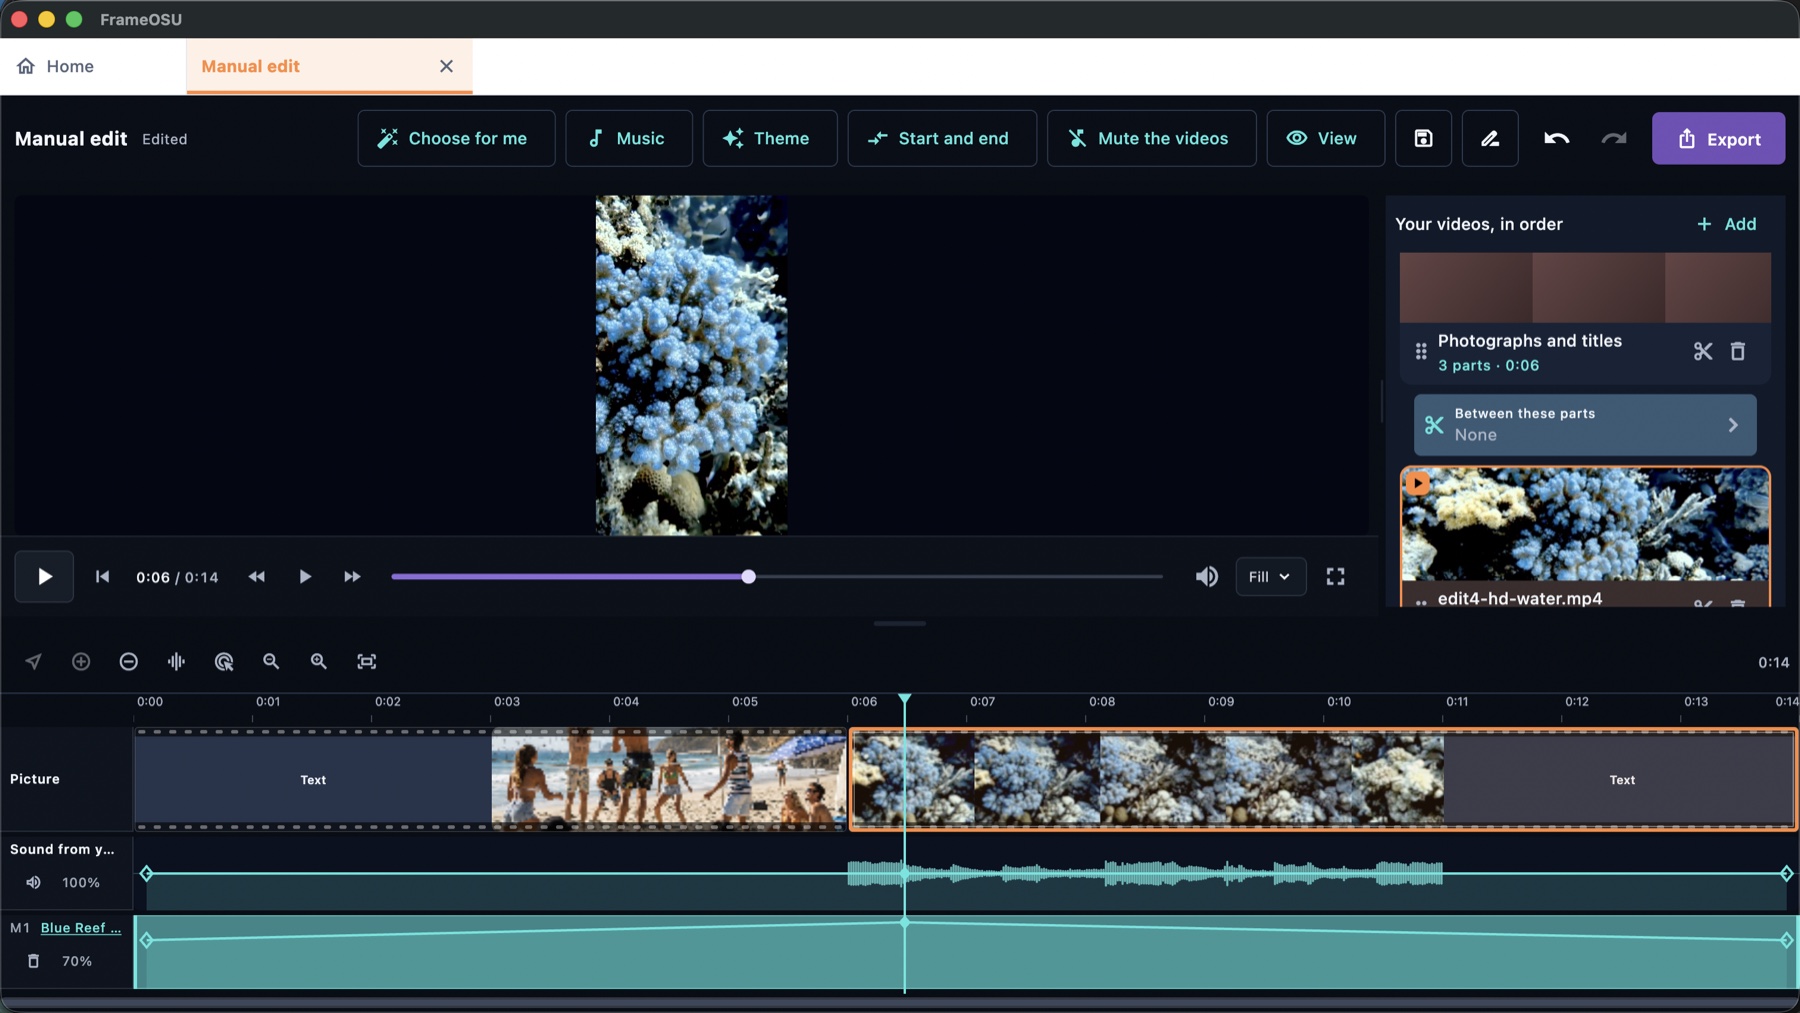
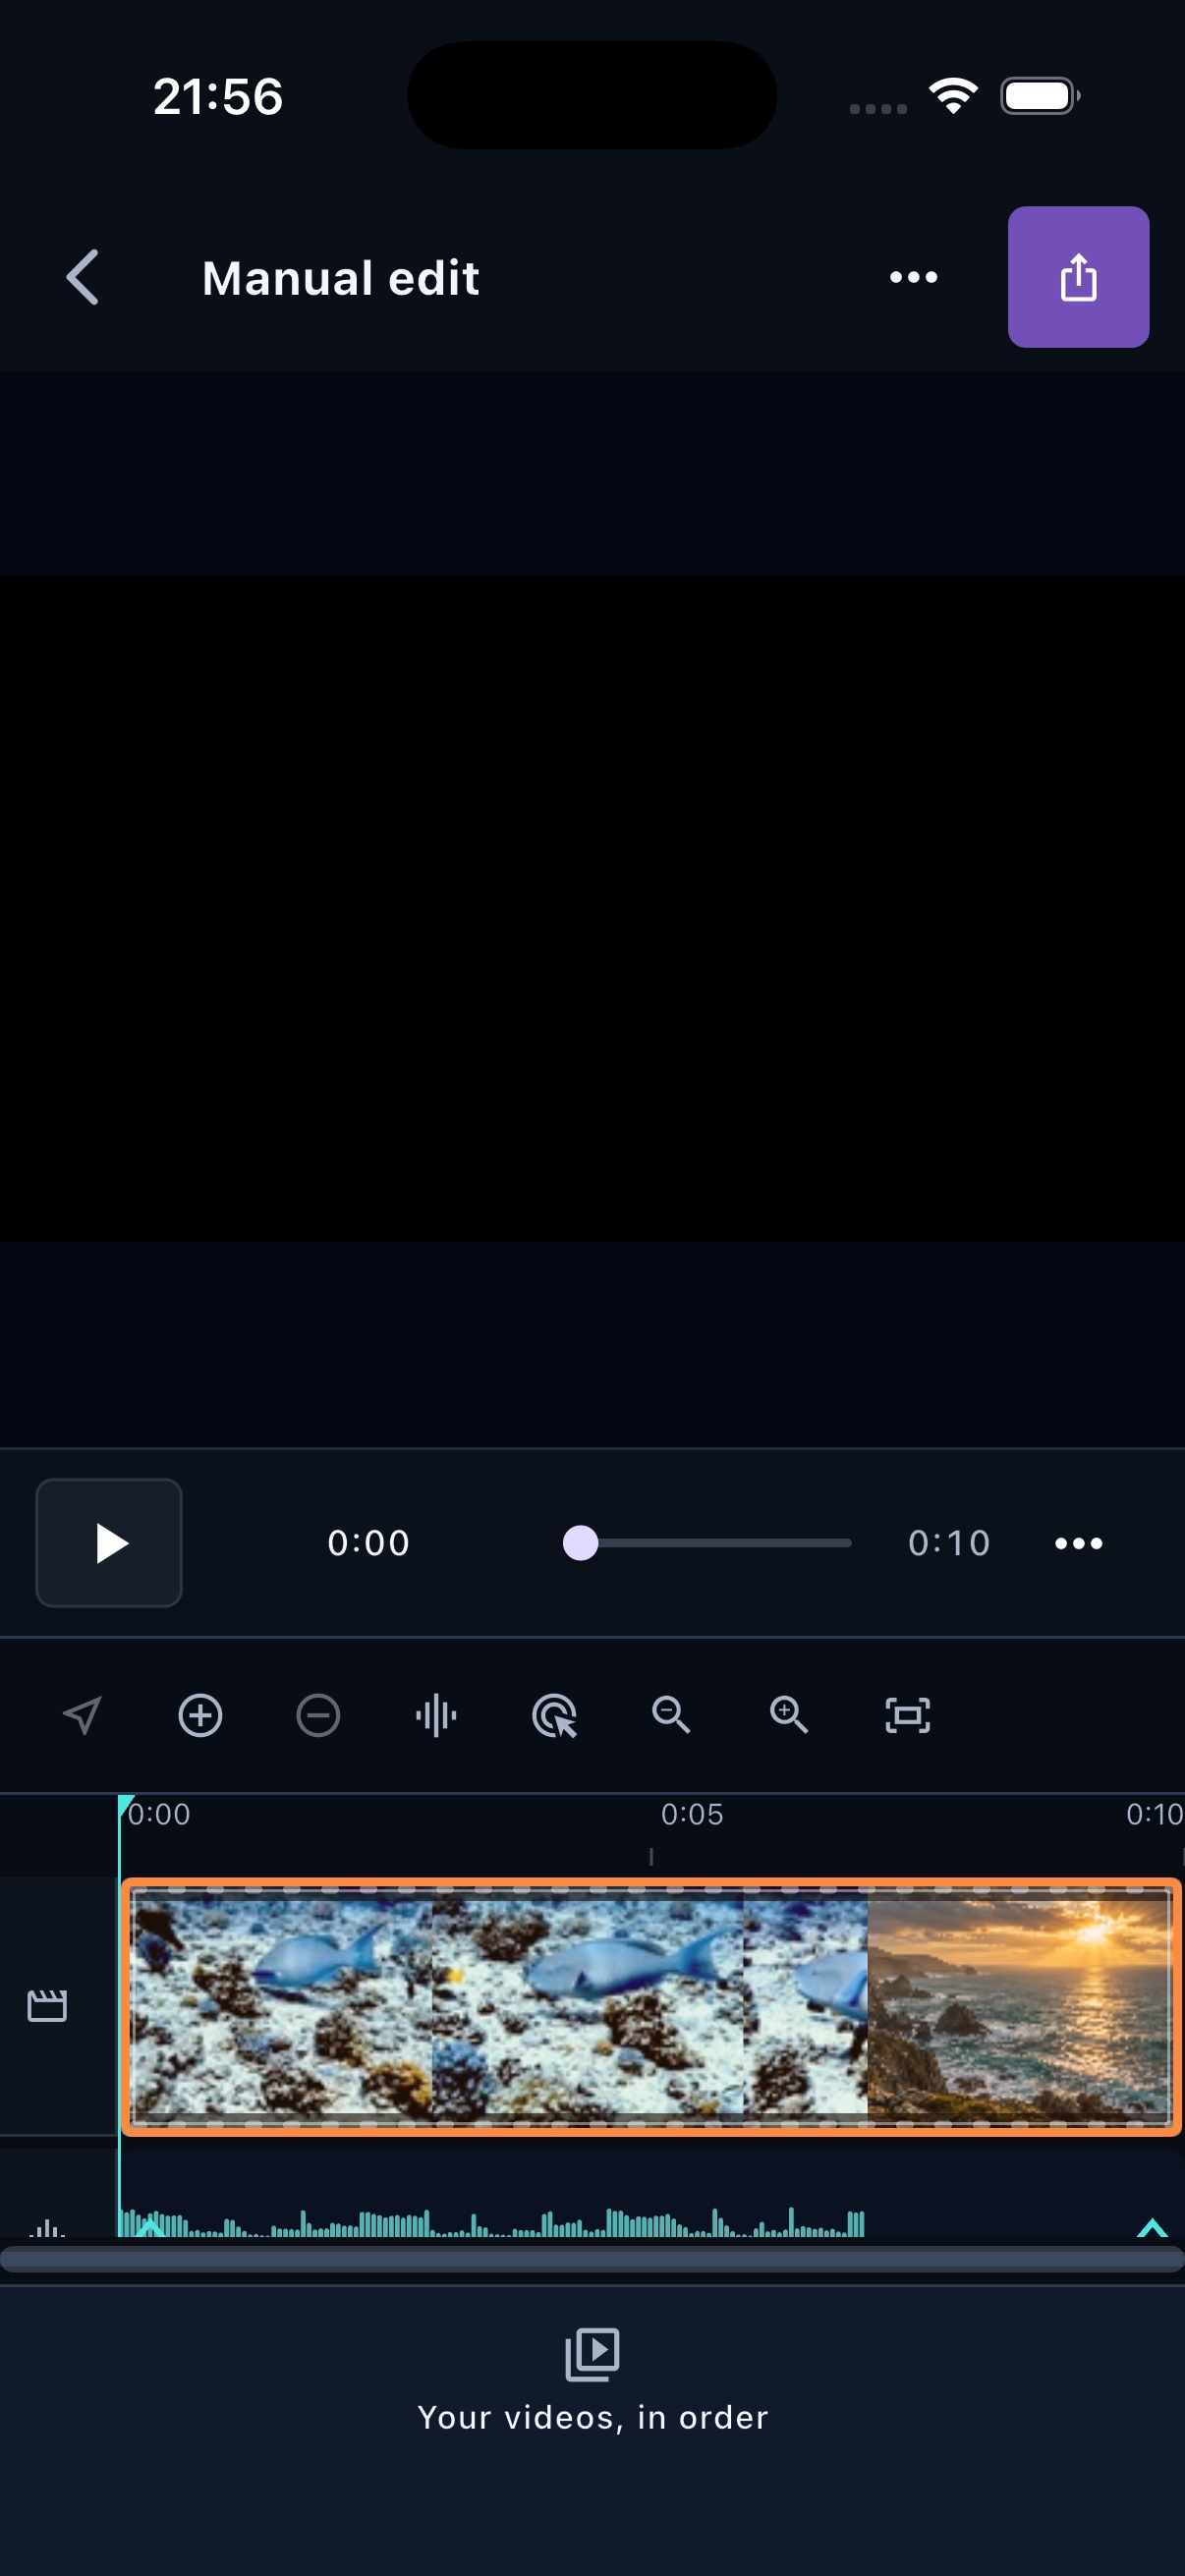
One real project in the main editor: titles, a photograph, video parts and a shaped music bed are all visible on the same fourteen-second clock.On a phone, the preview and timeline share the screen while the ordered source list opens from the bottom dock. Whole-reel tools sit in the three-dot menu and Export stays at the top. 02 Add the right kind of source
Add begins with one useful distinction: a video is something you cut into chosen ranges; an empty source is a container for still images and titles.
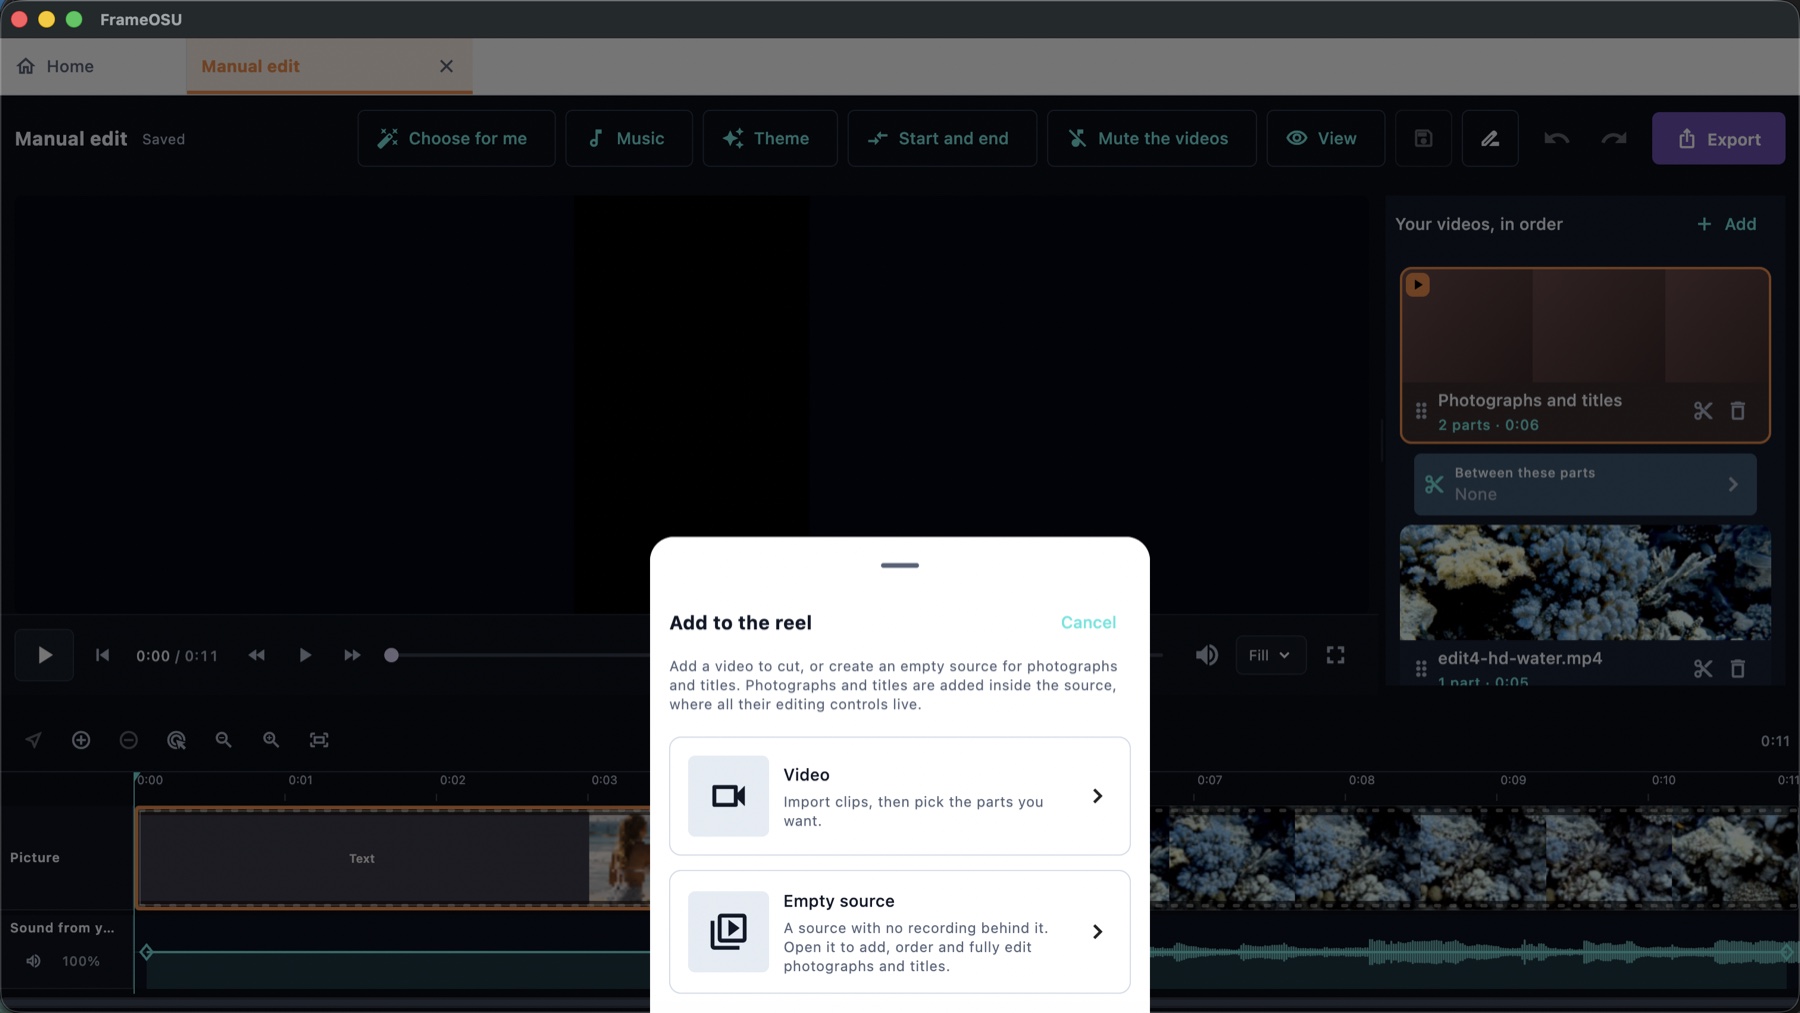
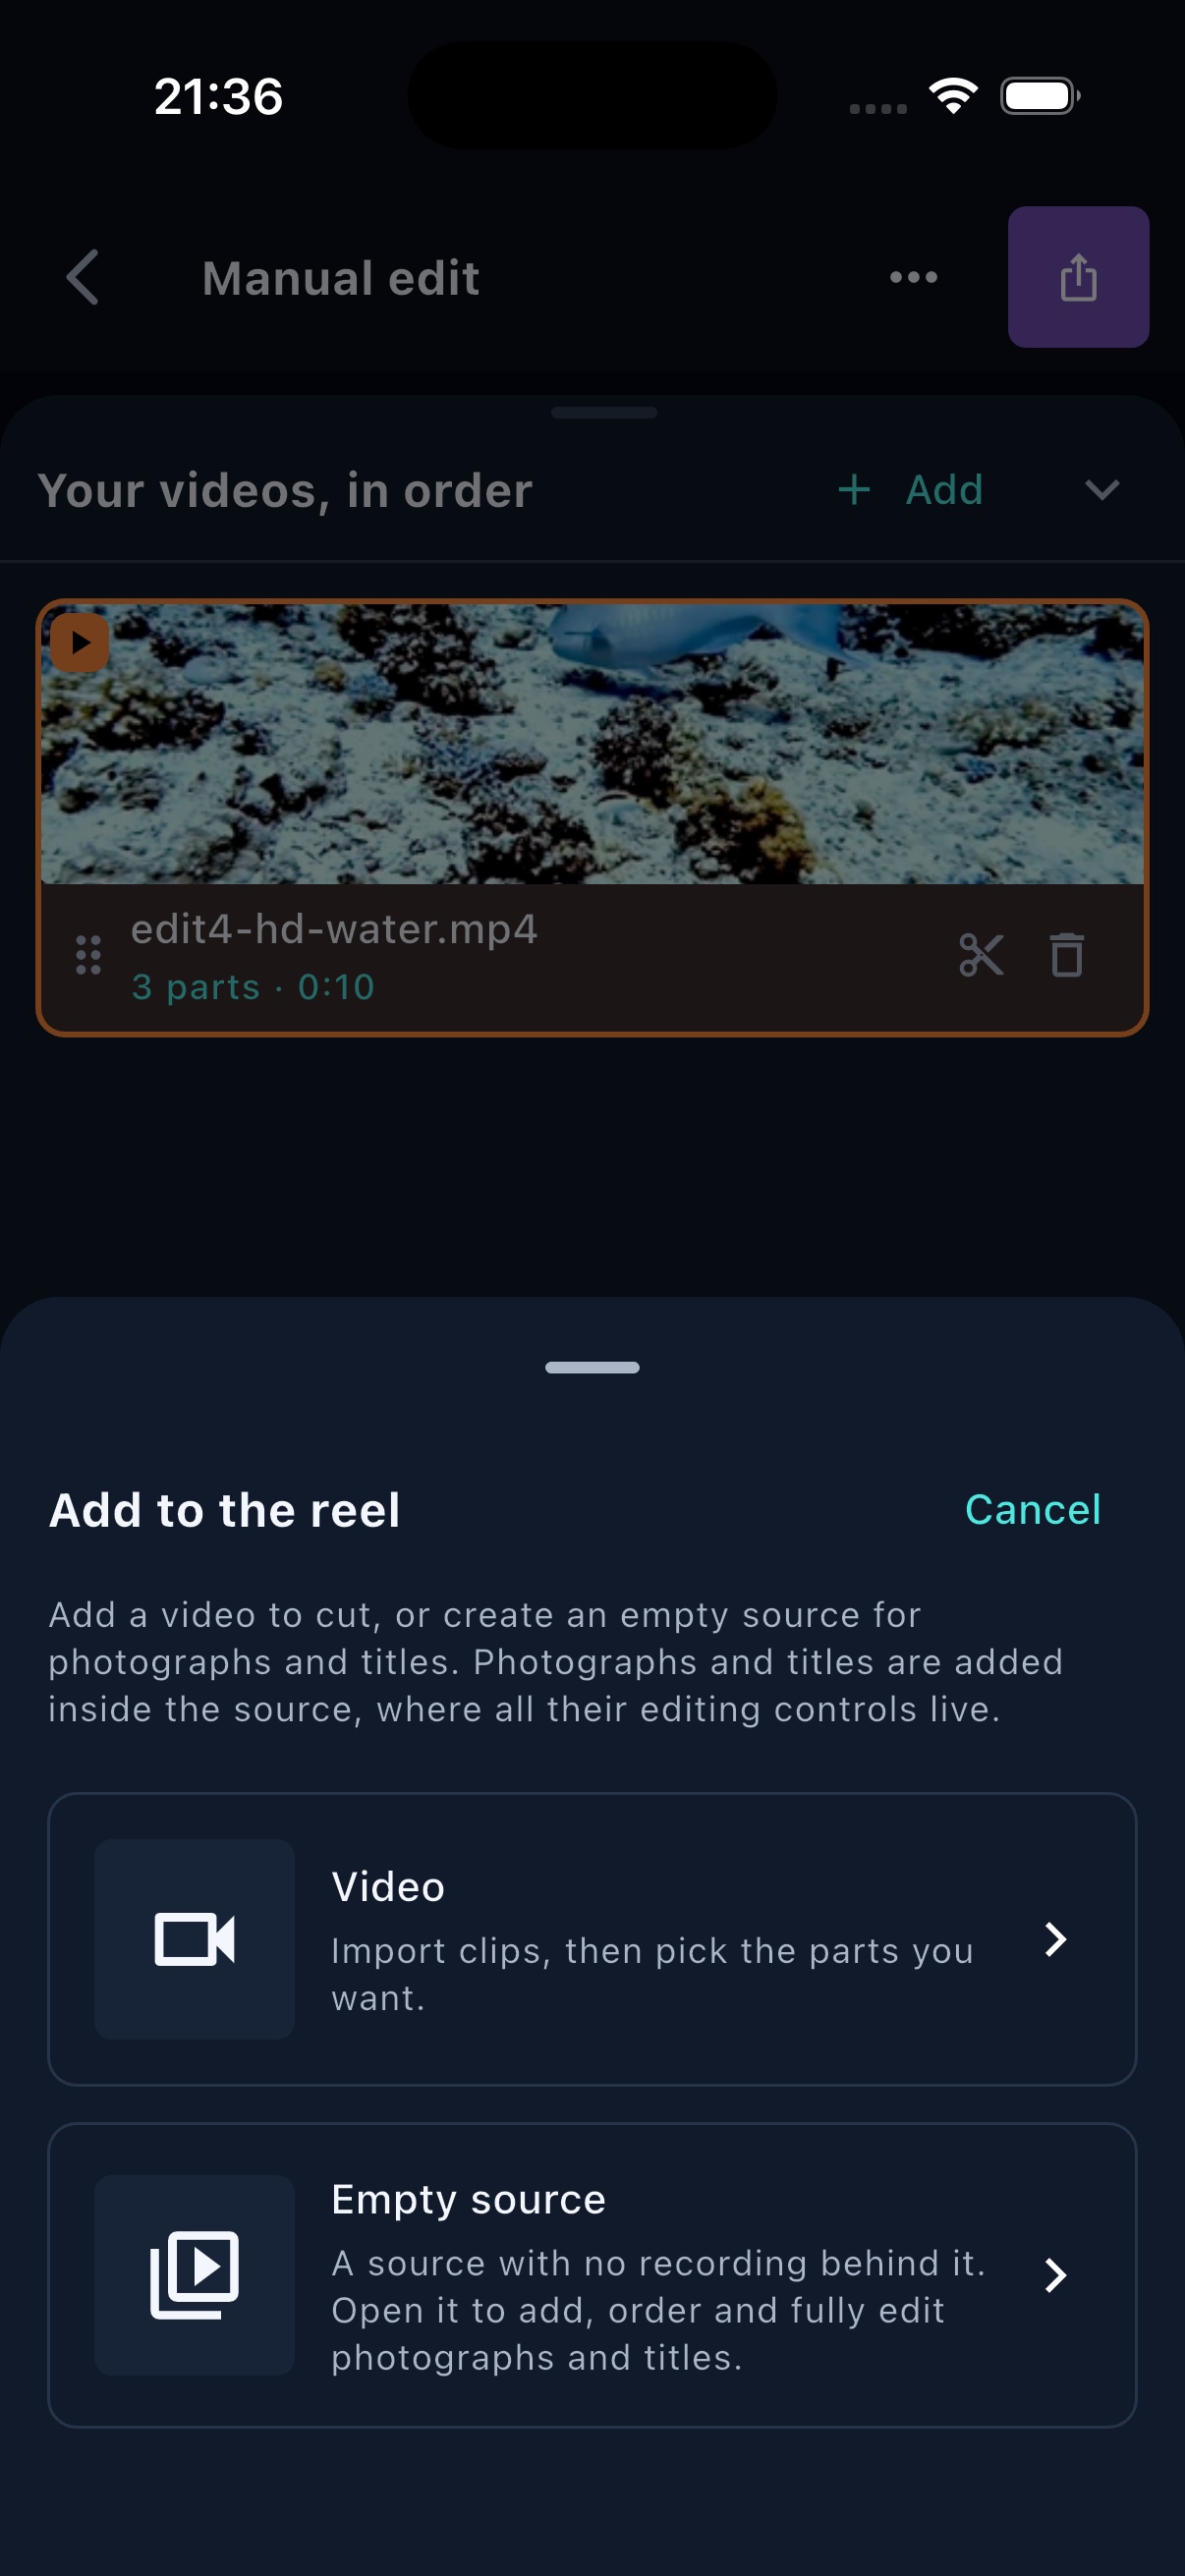
The first fork is explicit: cut a video, or create a source that holds photographs and titles.The phone presents the same explicit choice in a bottom sheet: import a recording to cut, or make a source for photographs and titles. 03 Images, titles and overlays
The plus menu inside a source adds four different kinds of part. The first two take their own turn in the reel; the last two sit over an existing picture.
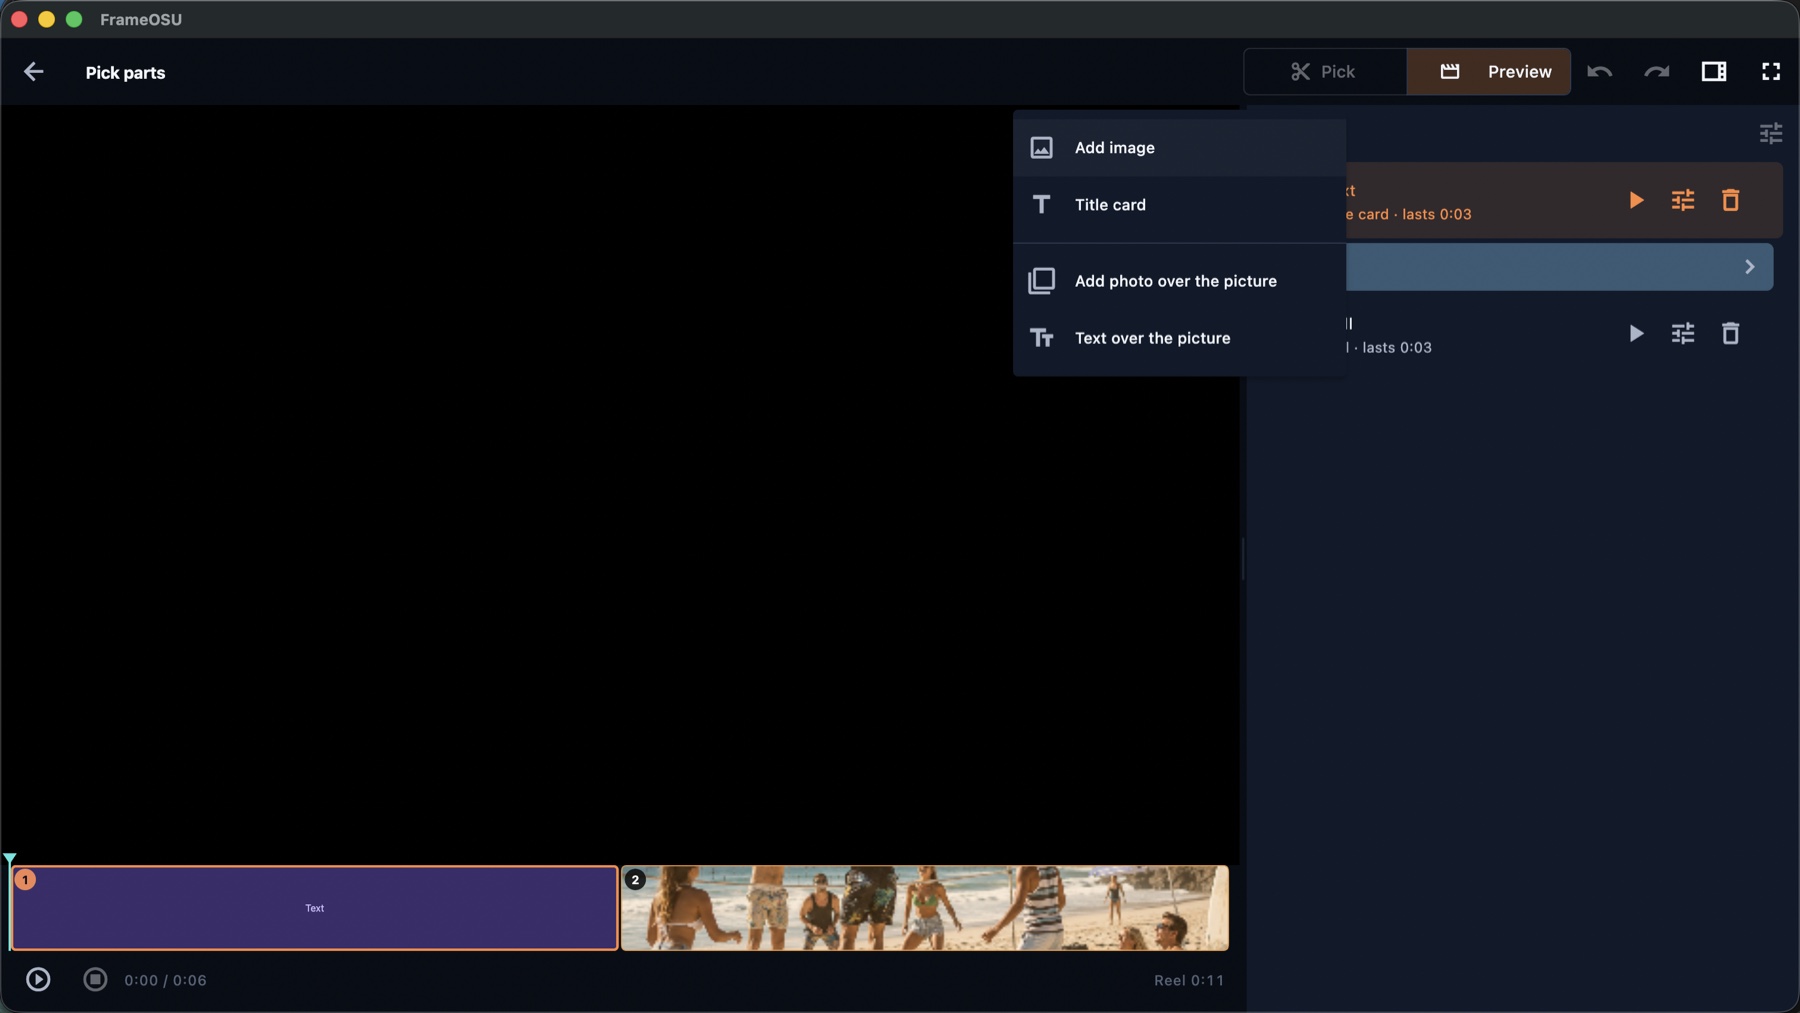
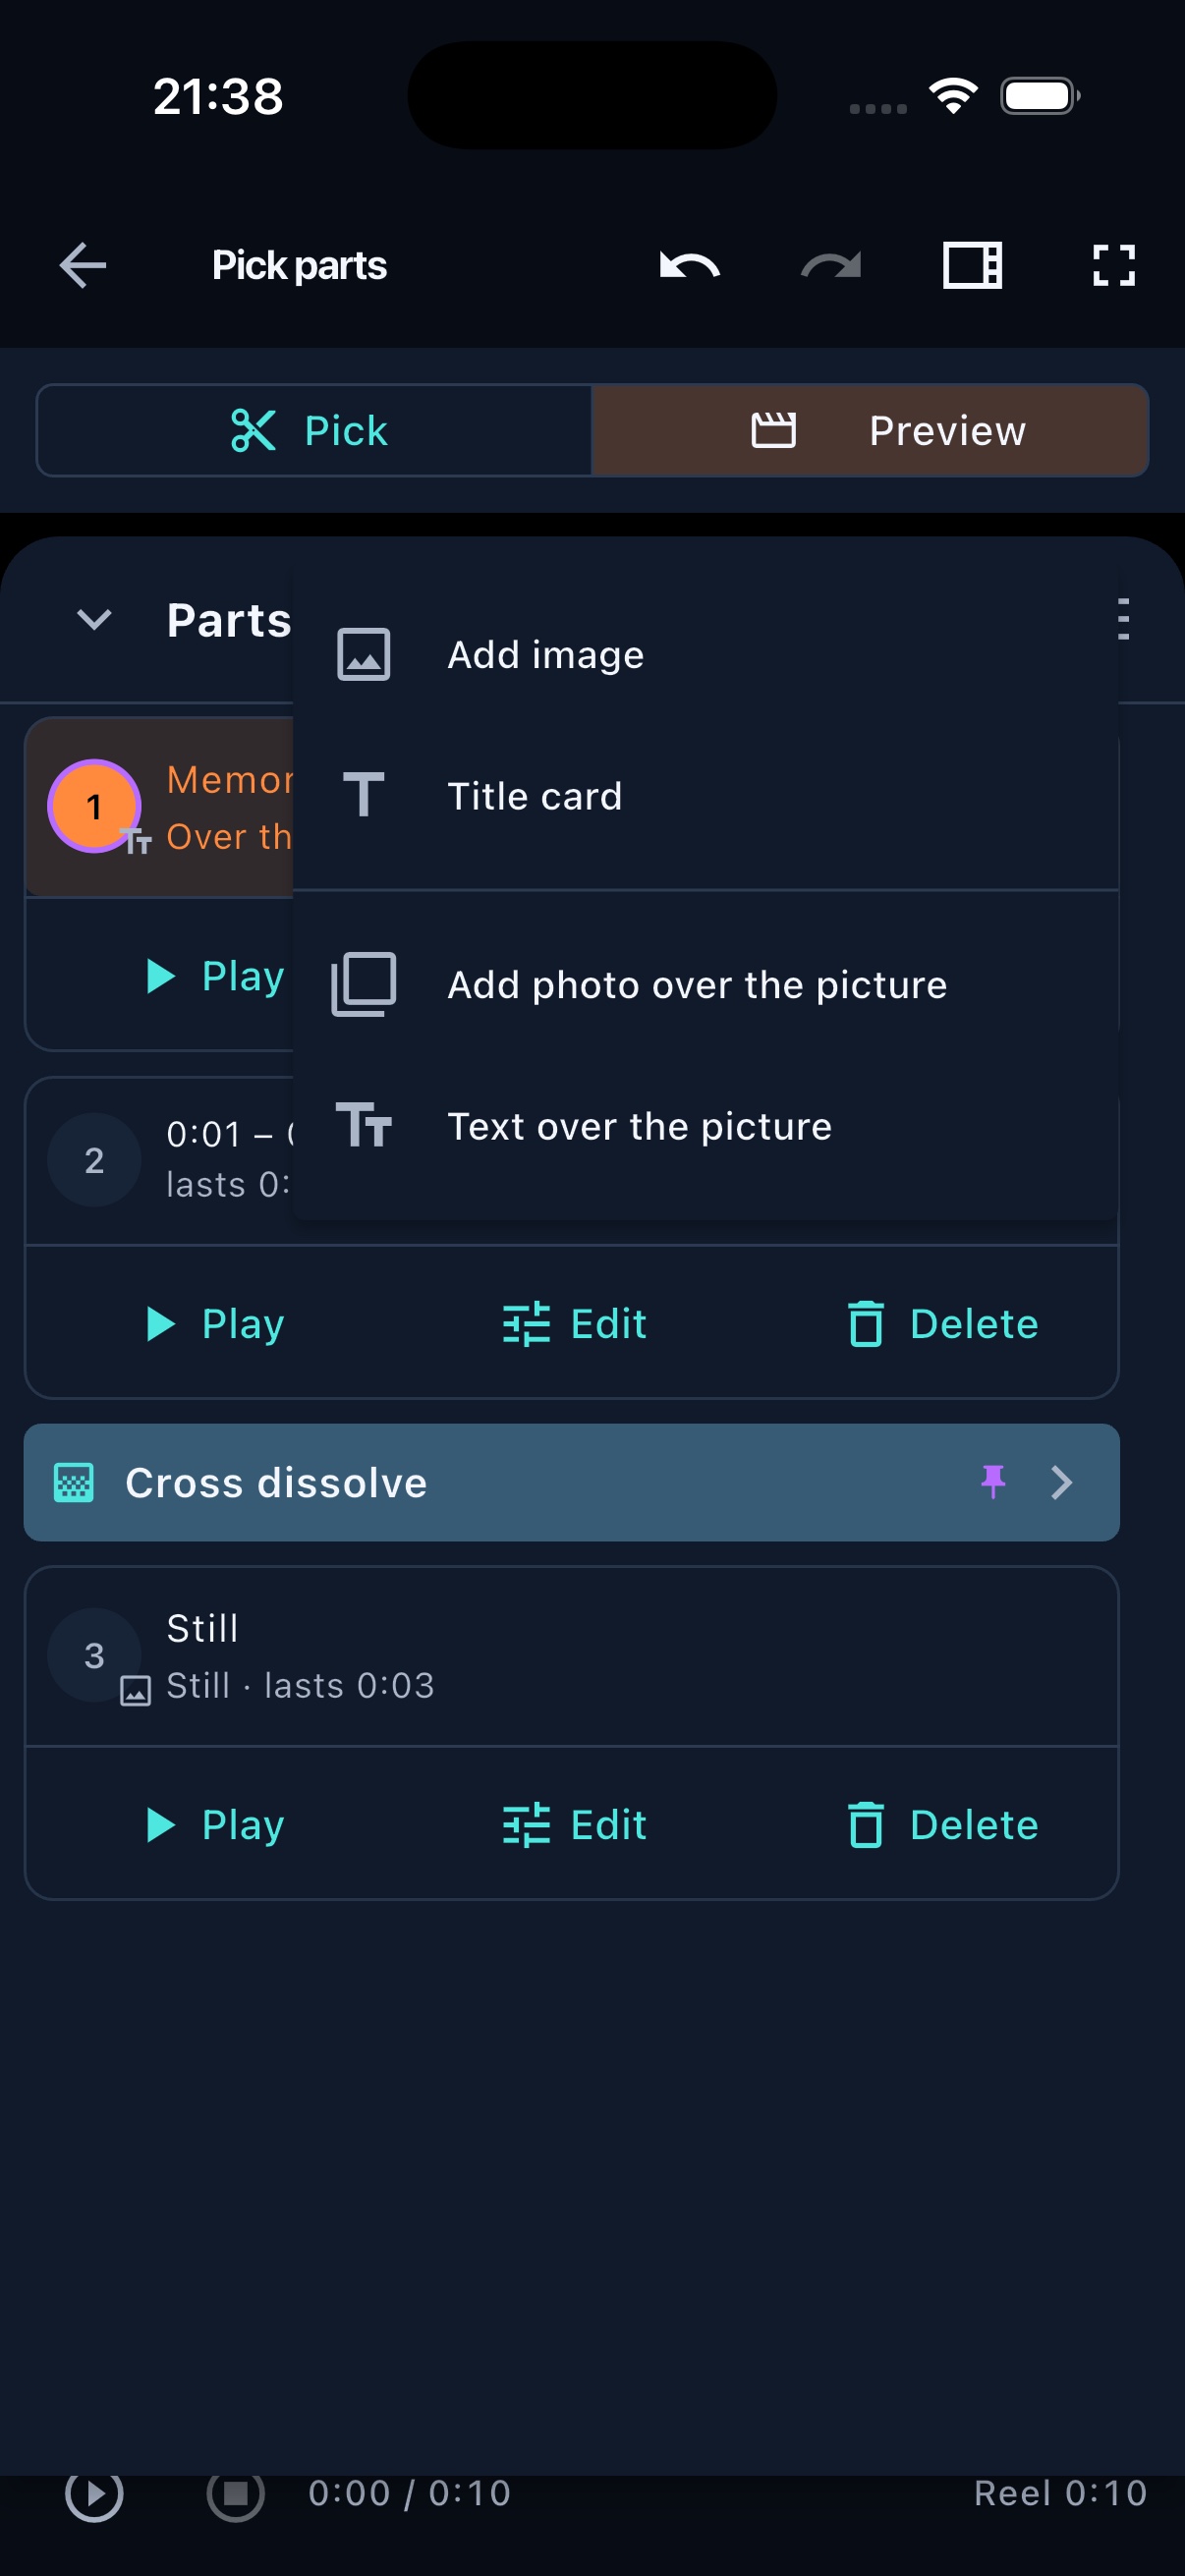
The plus menu separates full parts from overlays, so an image or title can either own time or share somebody else's picture.On a phone, open the Parts panel and press Add to this video. Its menu still separates full parts from photo and text overlays. 04 Pick parts by highlighting time
A part is a selected span of a source. Press on the filmstrip, drag across what you want and let go. Repeat to take several moments from the same recording.
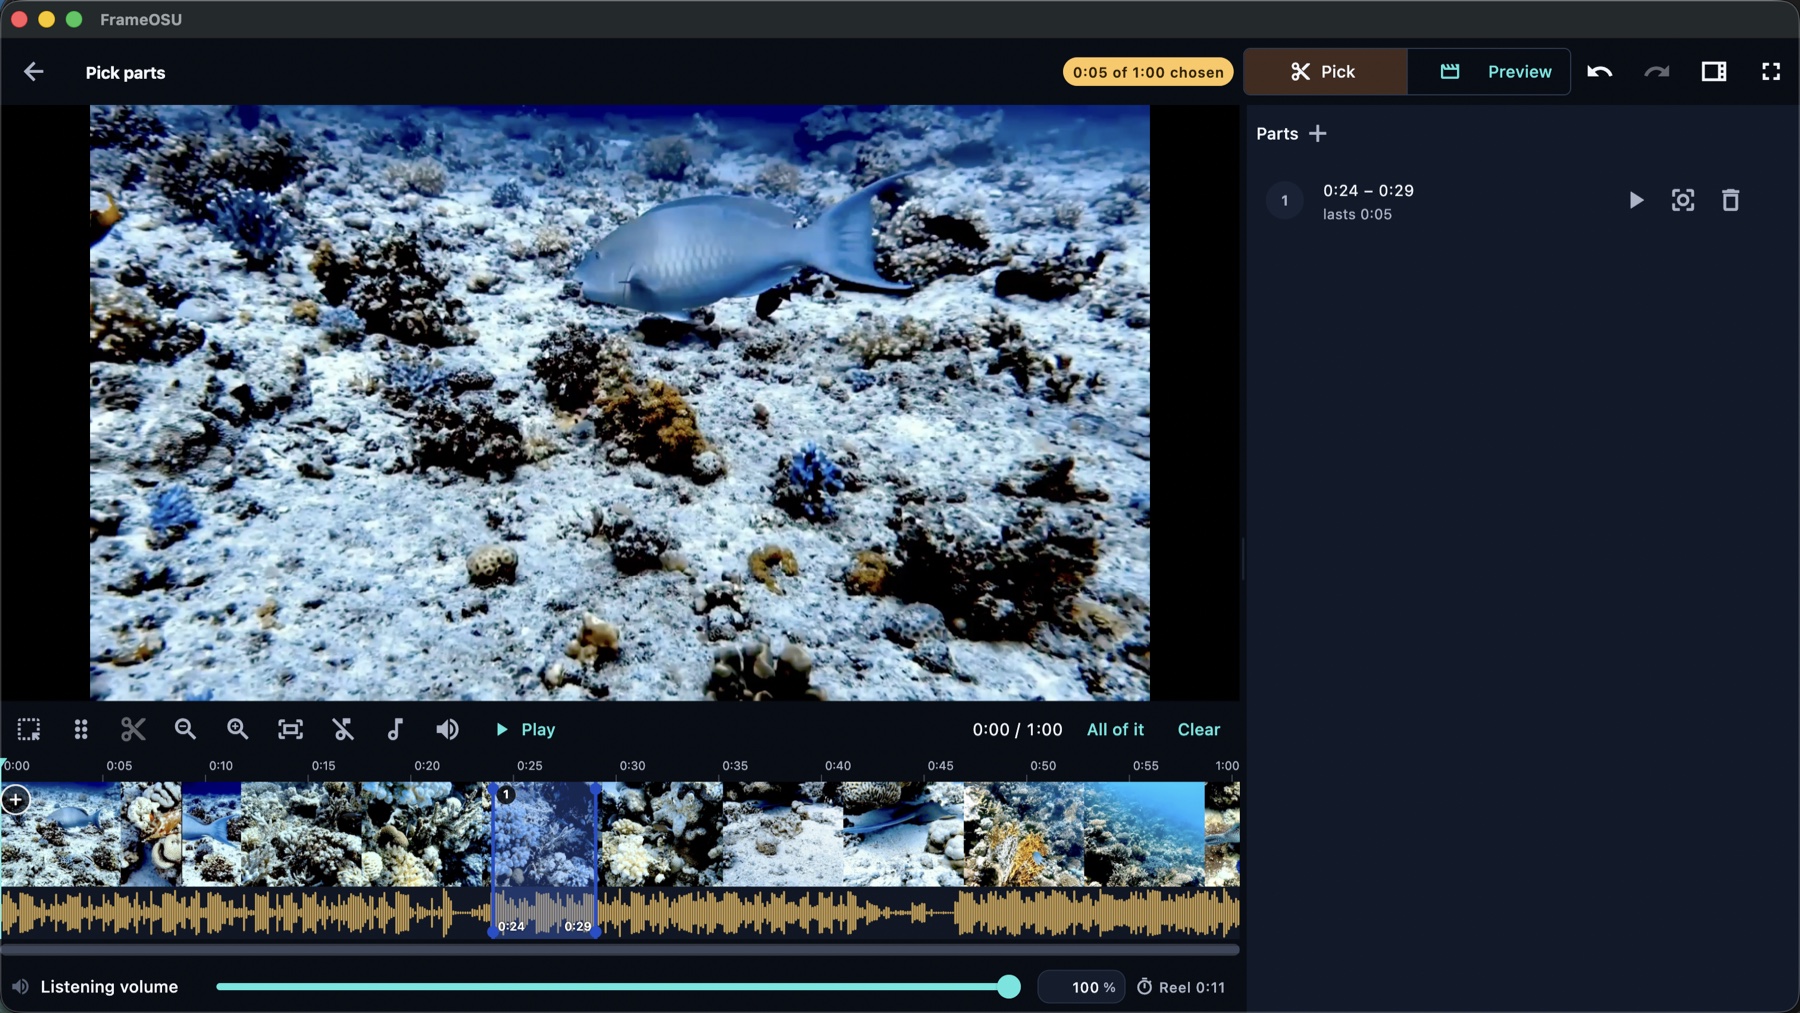
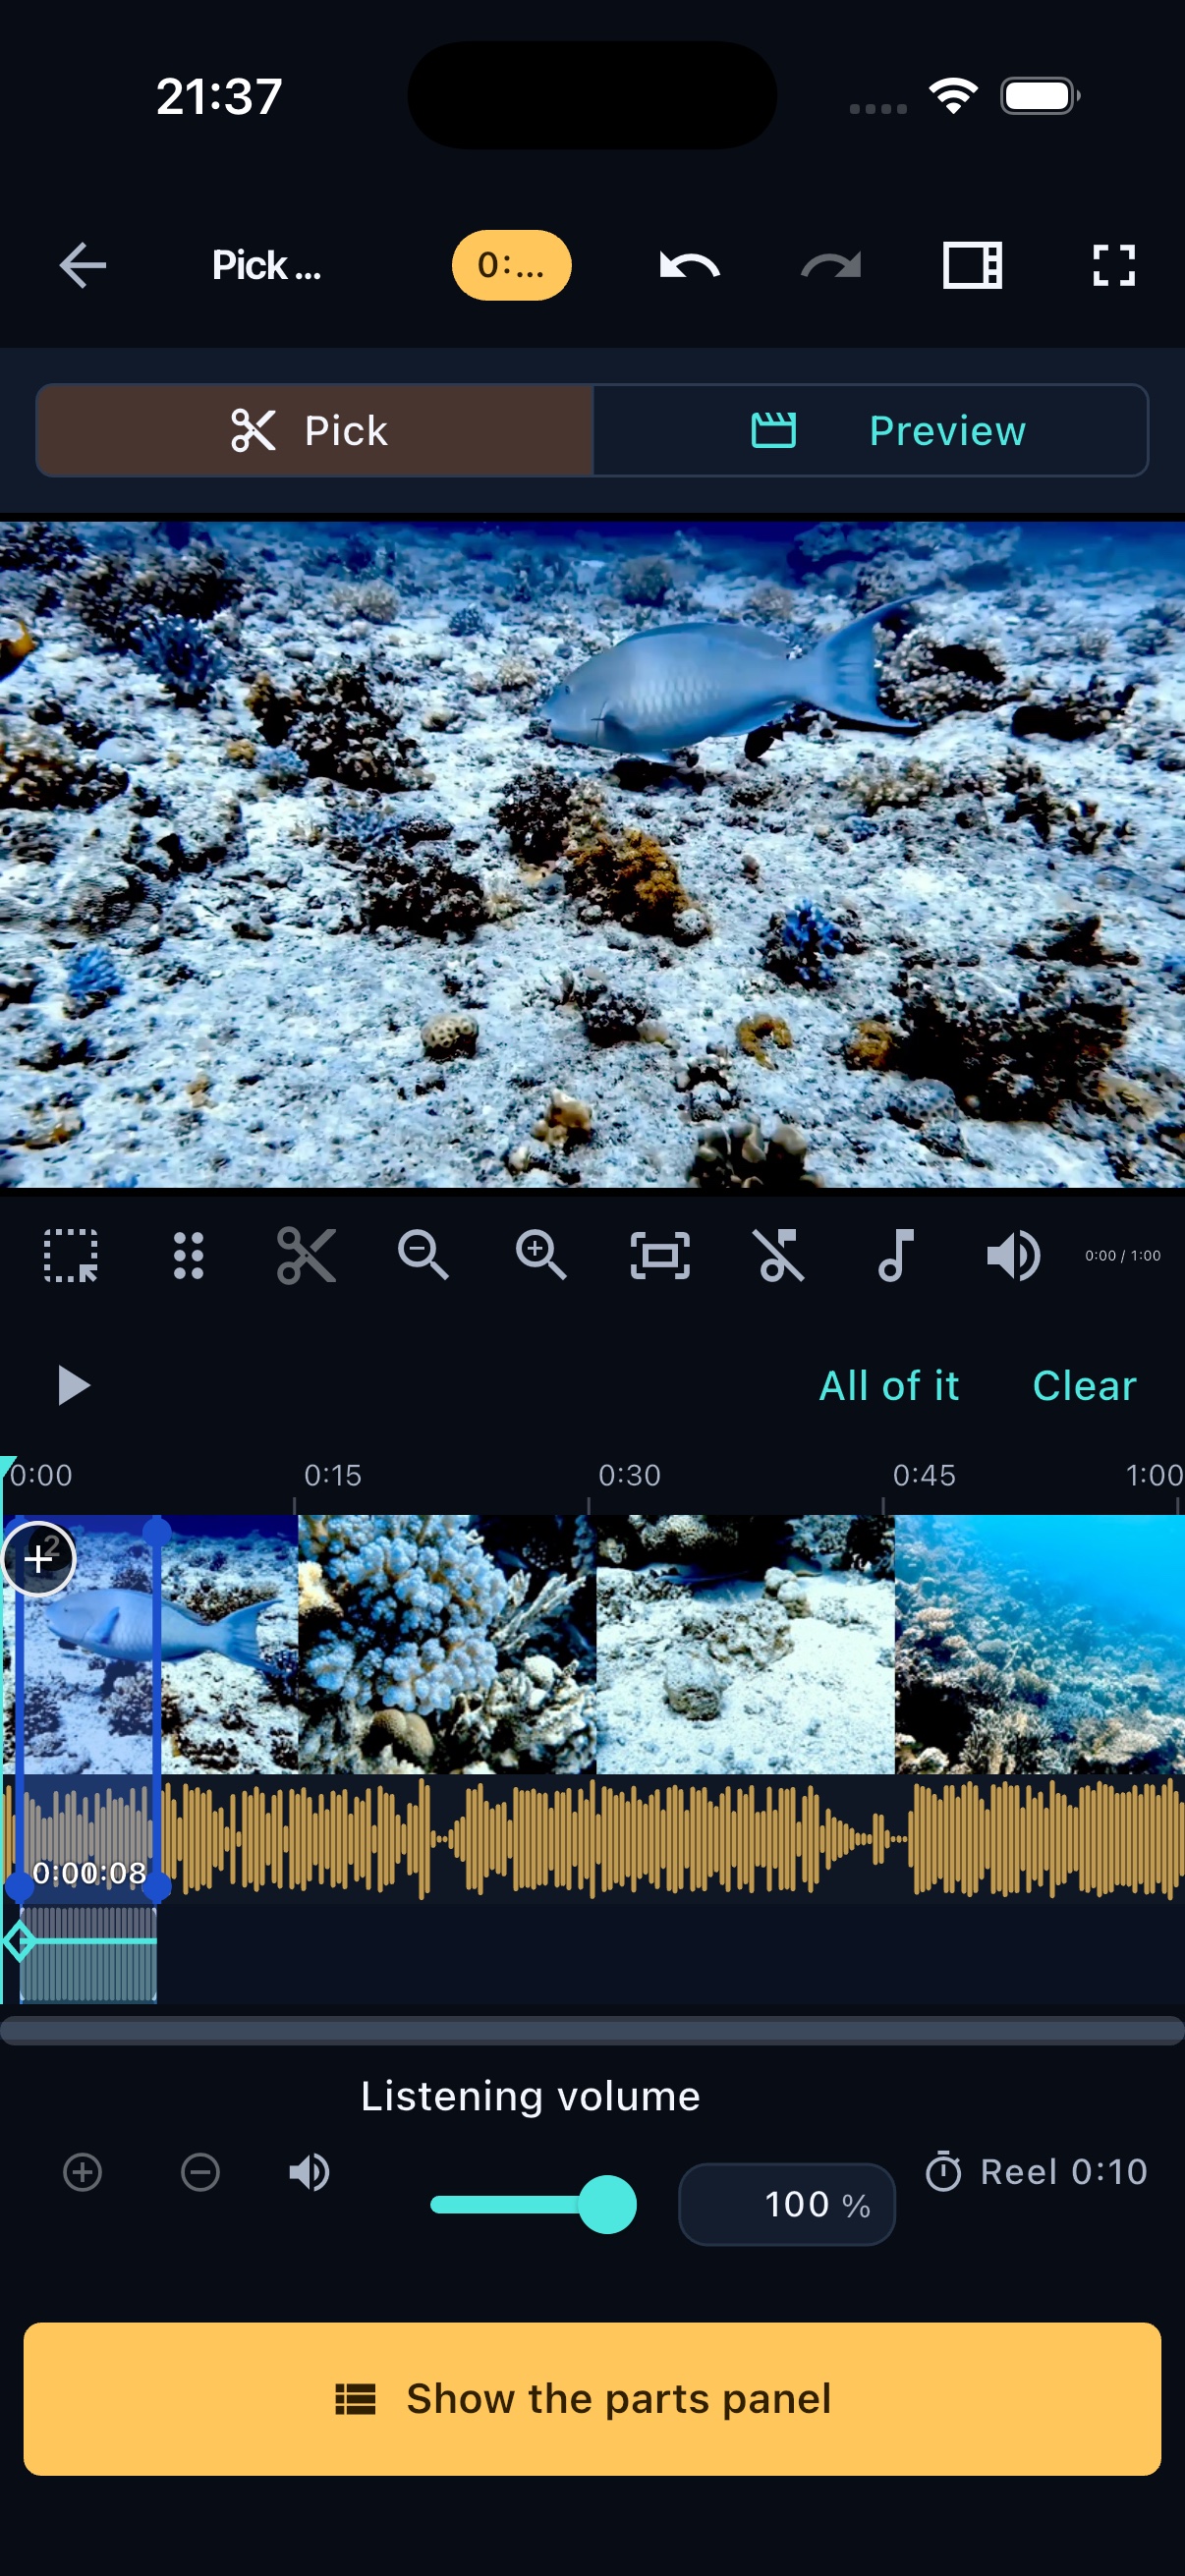
Five seconds selected out of a one-minute recording. The same 0:24–0:29 range appears on the strip and in the numbered card.The phone keeps frames, waveform, selection, listening volume and the Parts panel in one vertical Pick workspace. Here the visible range begins at 0:00 and lasts eight seconds. 05 Preview the cut, not the leftovers
Preview stops showing the unused recording and turns the bottom strip into the reel sequence. It is the quickest way to check whether a choice works next to its neighbours.
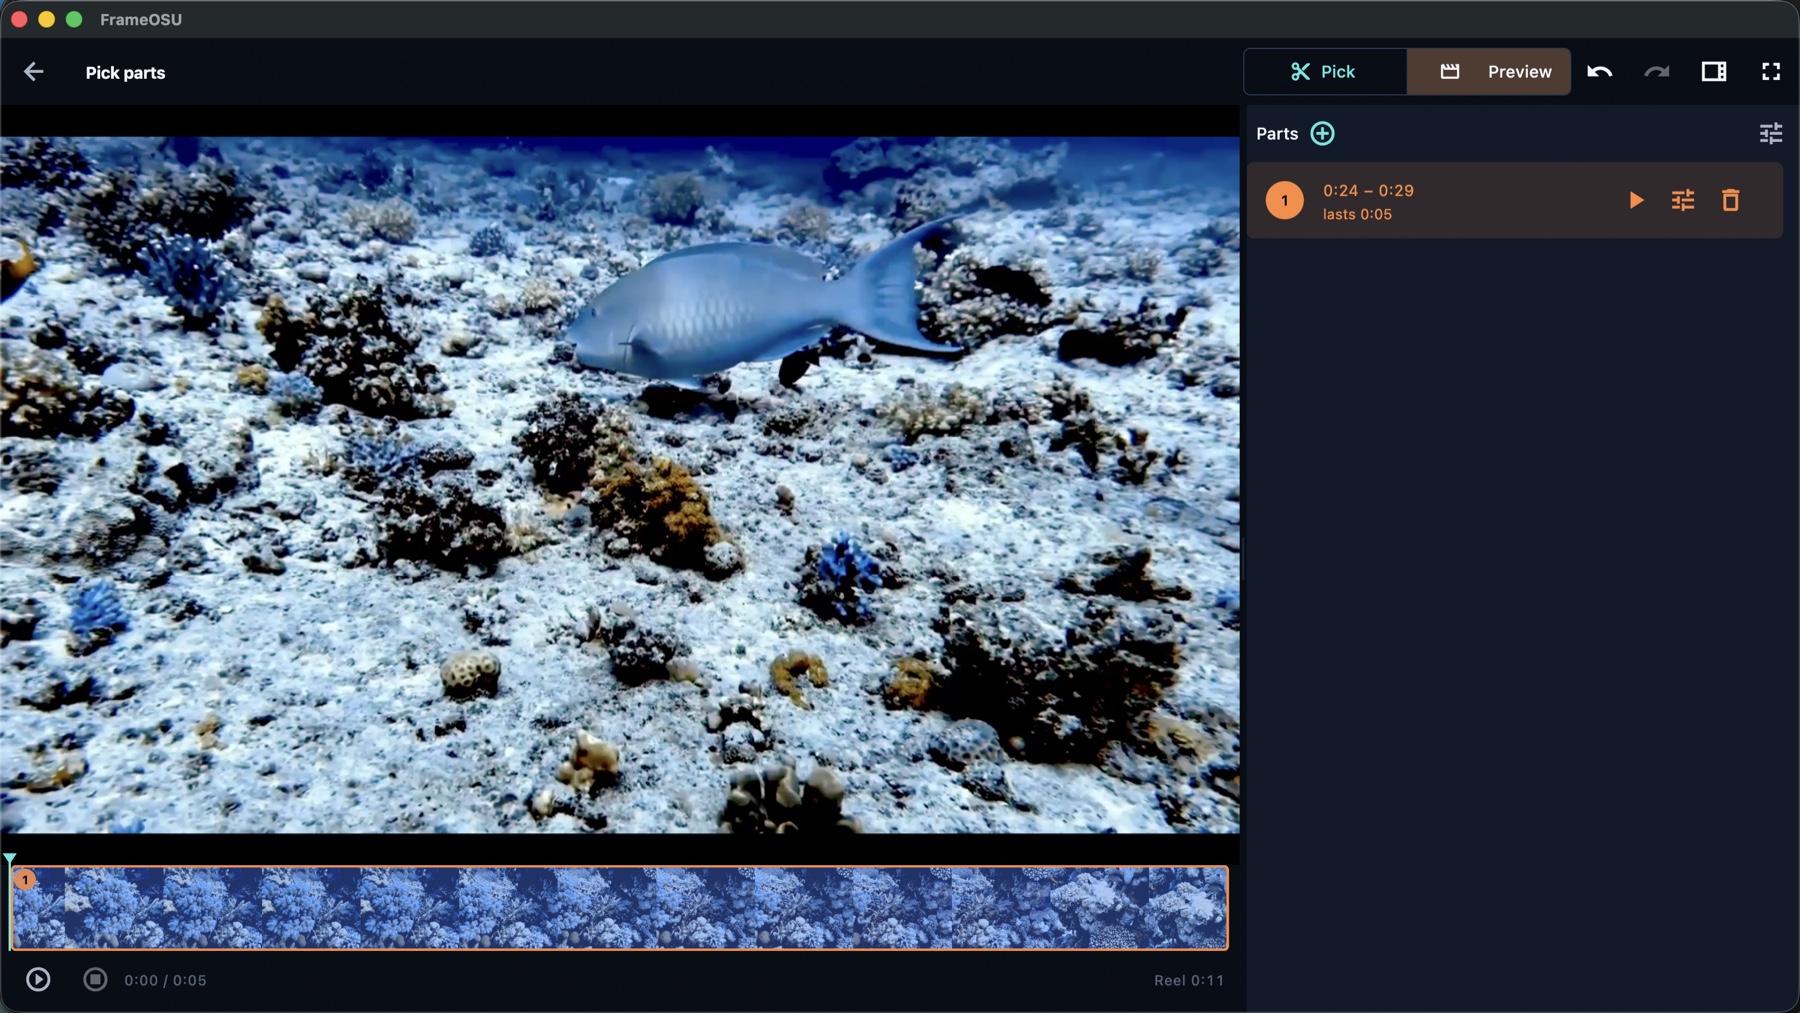
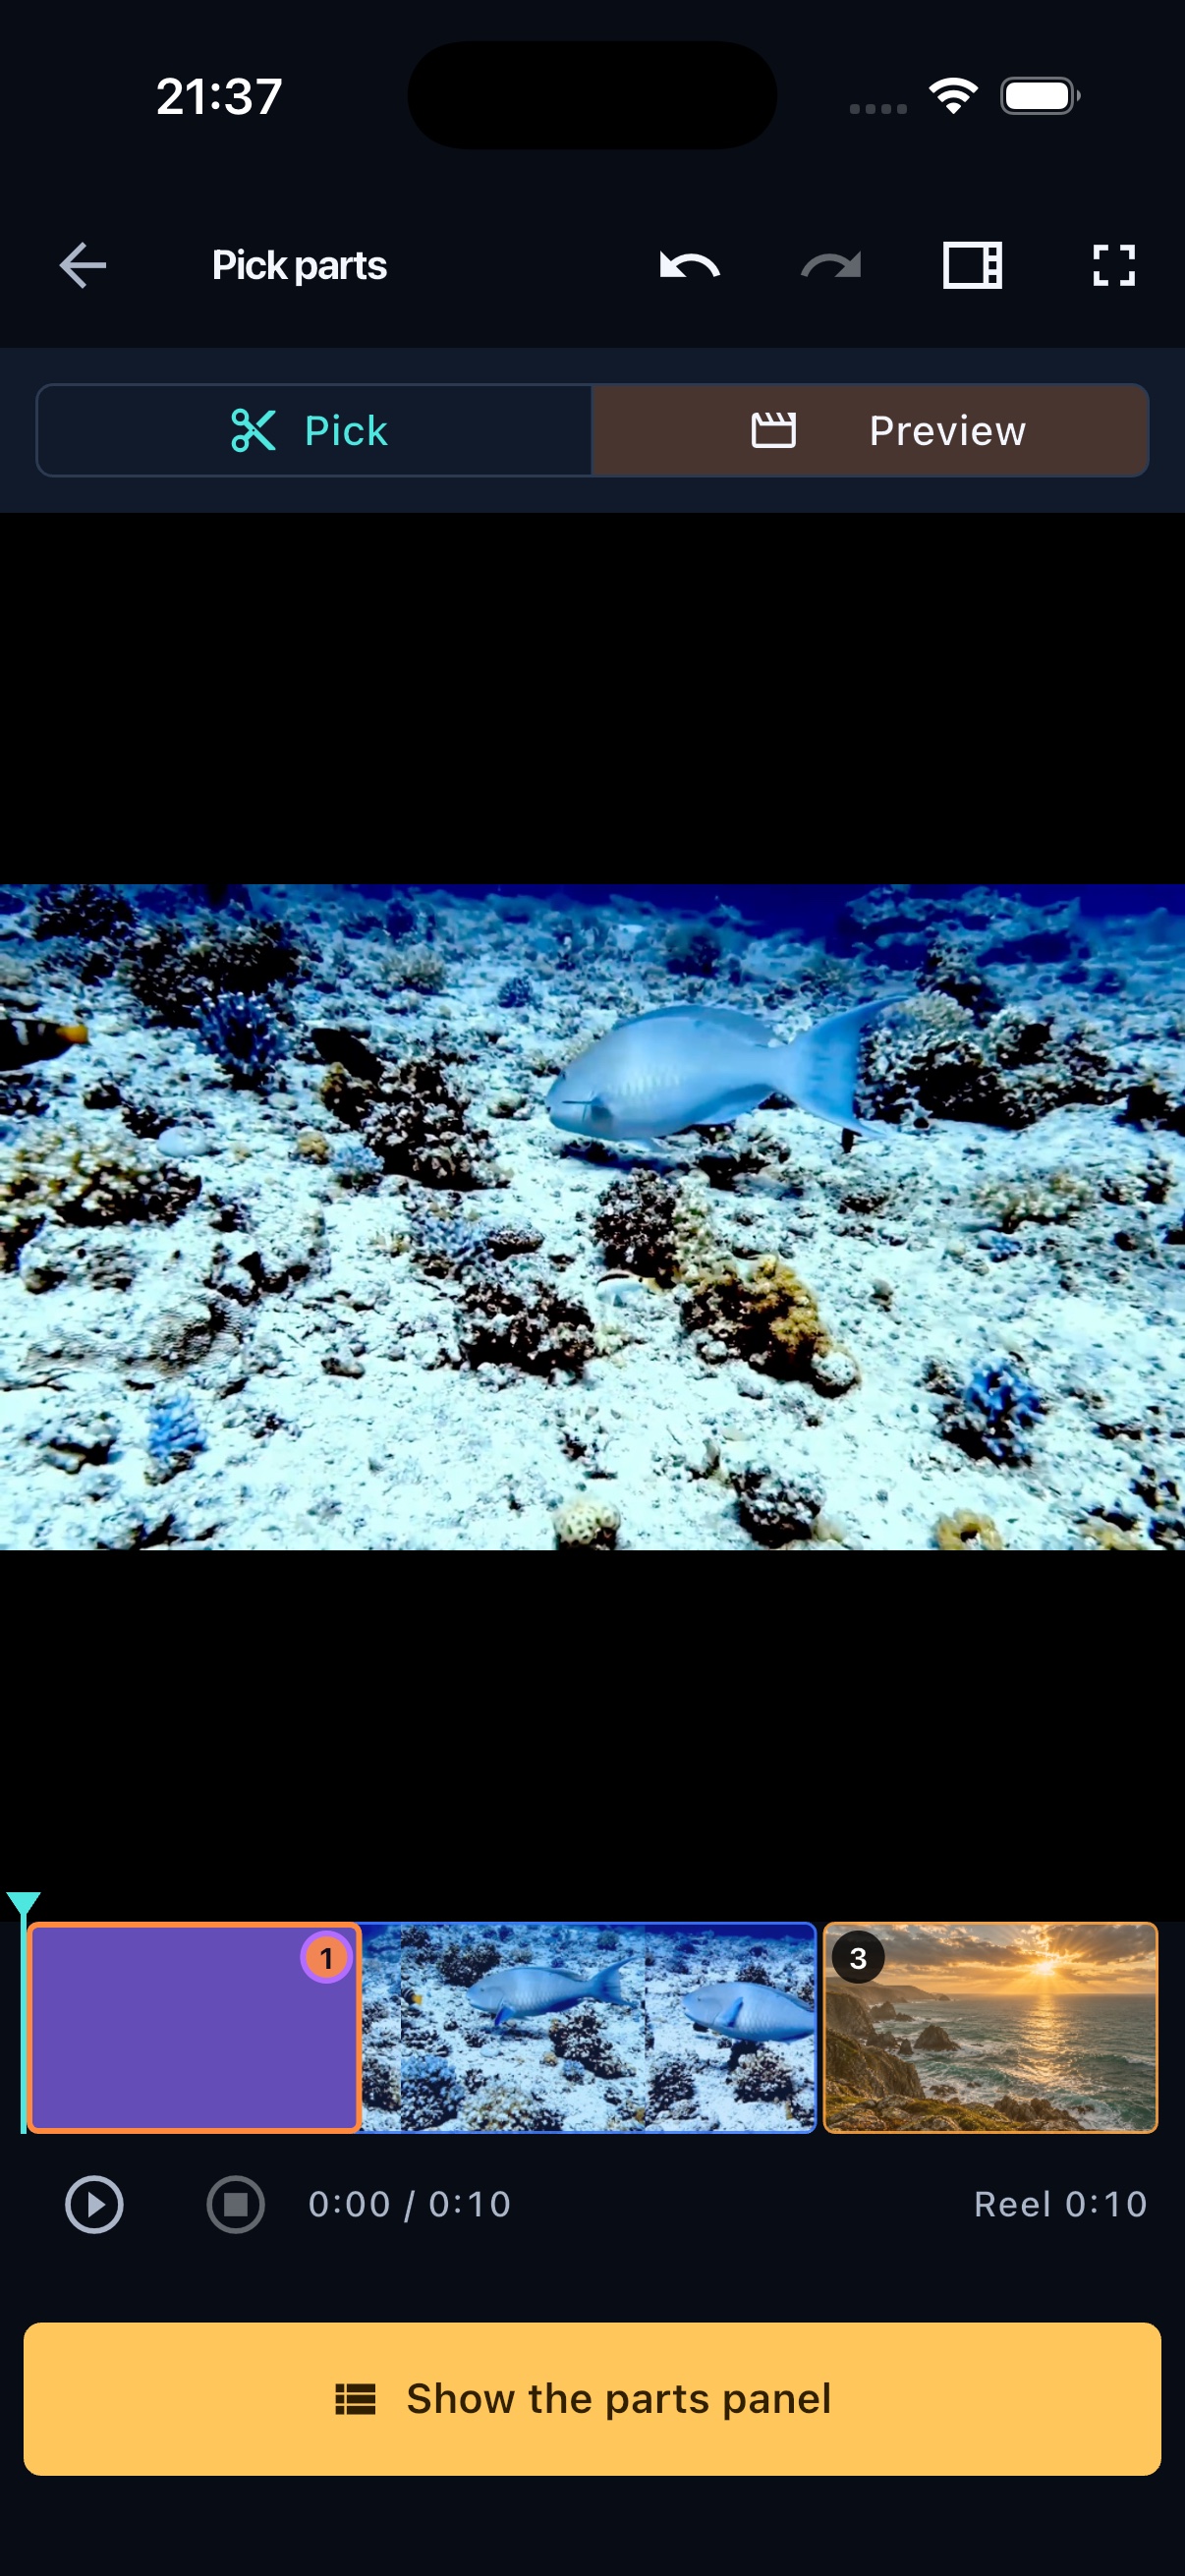
Preview condenses a one-minute source to the five seconds the reel will actually use.Preview gives the chosen material most of the phone screen. Its compact strip and reel clock remain below, and the editable Parts panel is one tap away. 06 Order the parts; shape the joins
The reel is a numbered sequence of parts. Between every neighbouring pair is a junction: a separate object that decides how picture A becomes picture B.
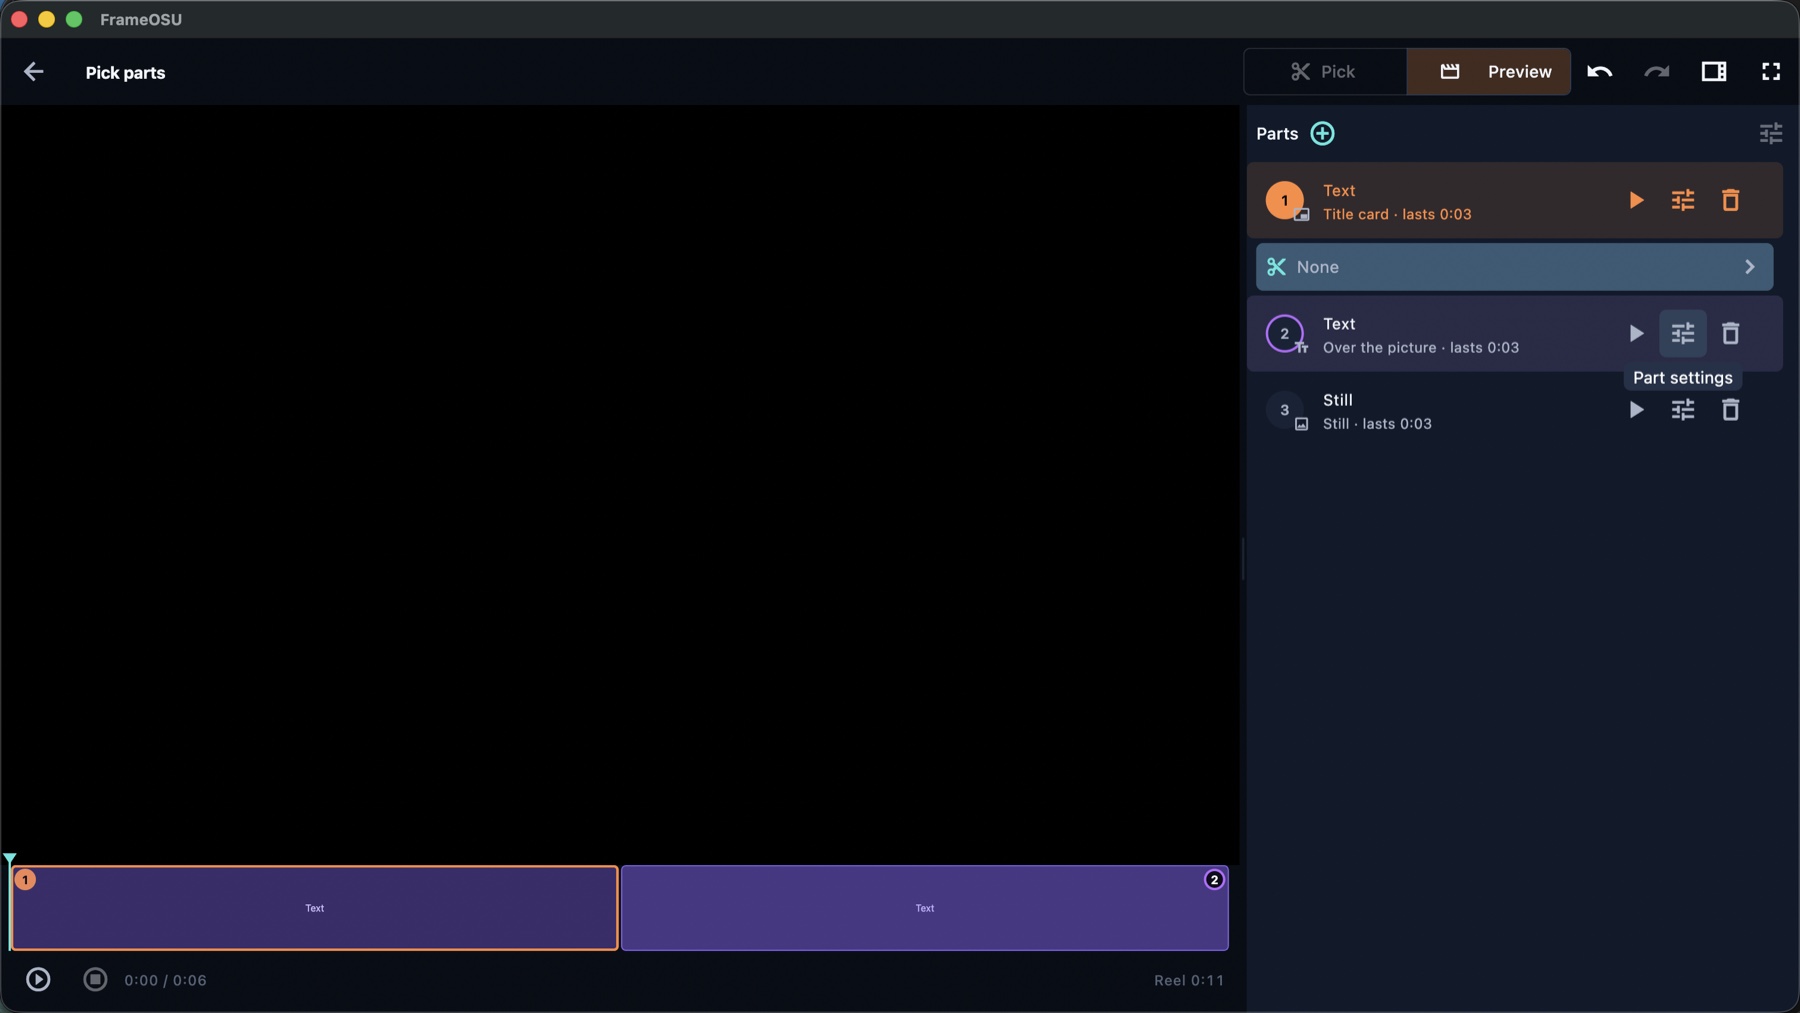
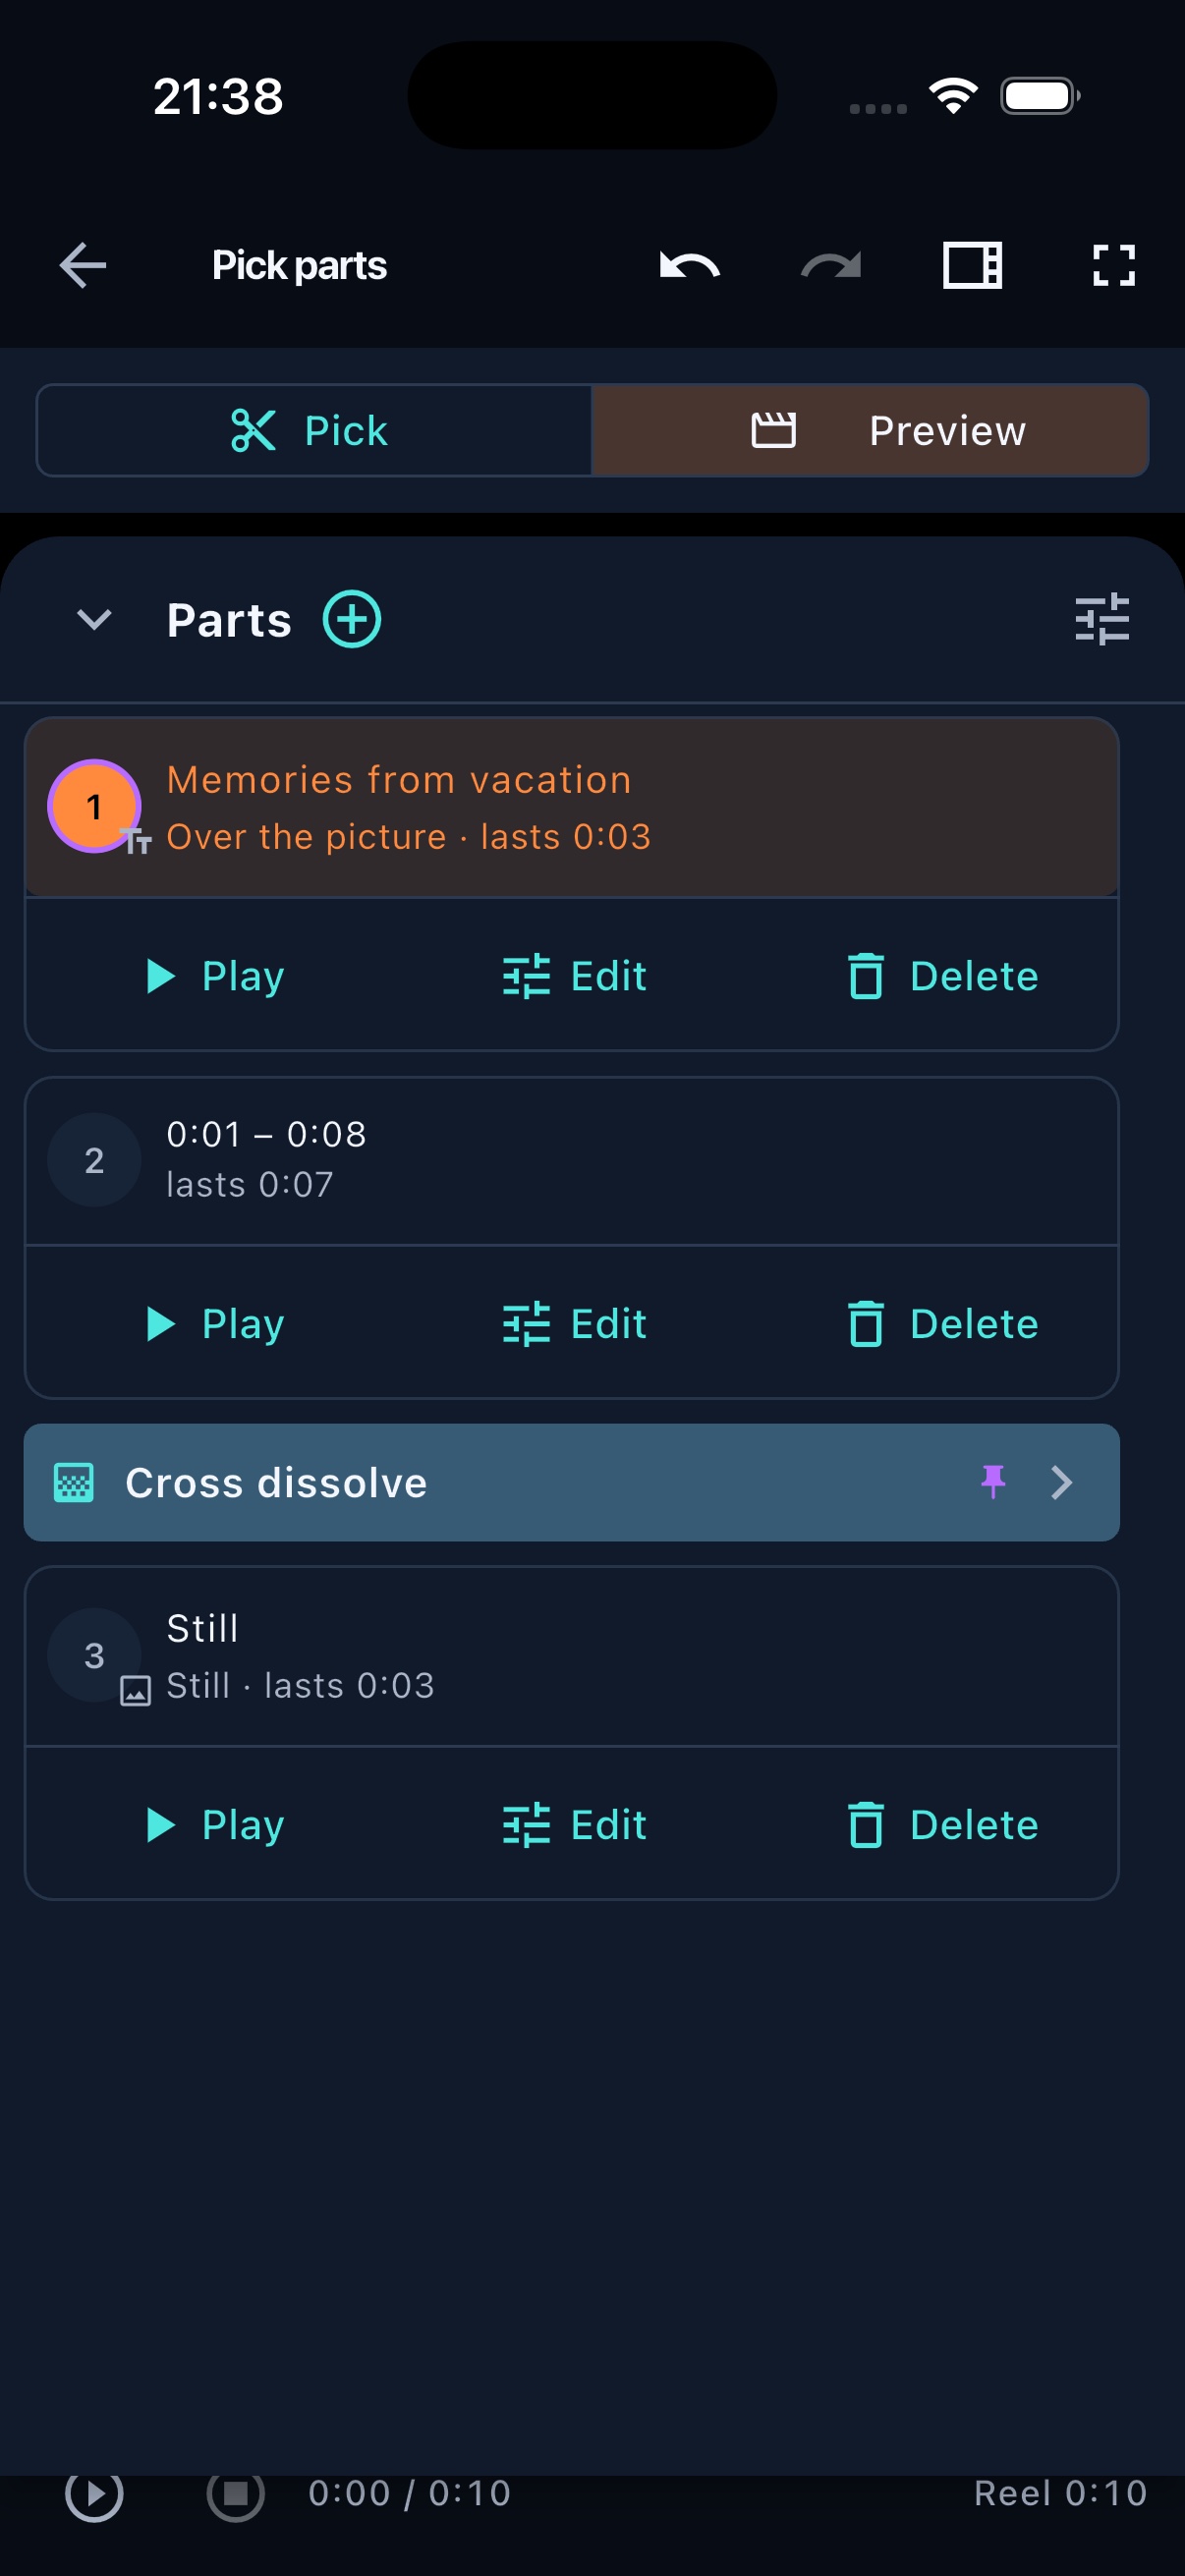
Parts own the content; junctions own the change between them. The cards and numbered strip stay visible together in playing order.The phone stacks three ordered part cards and their pinned Cross dissolve junction. Play, settings and delete actions stay directly on each card. 07 Add and shape a title
A title is not a note floating outside the video. It is a rendered visual part, so its timing, placement, colour and animation are visible in preview and exported into the picture.
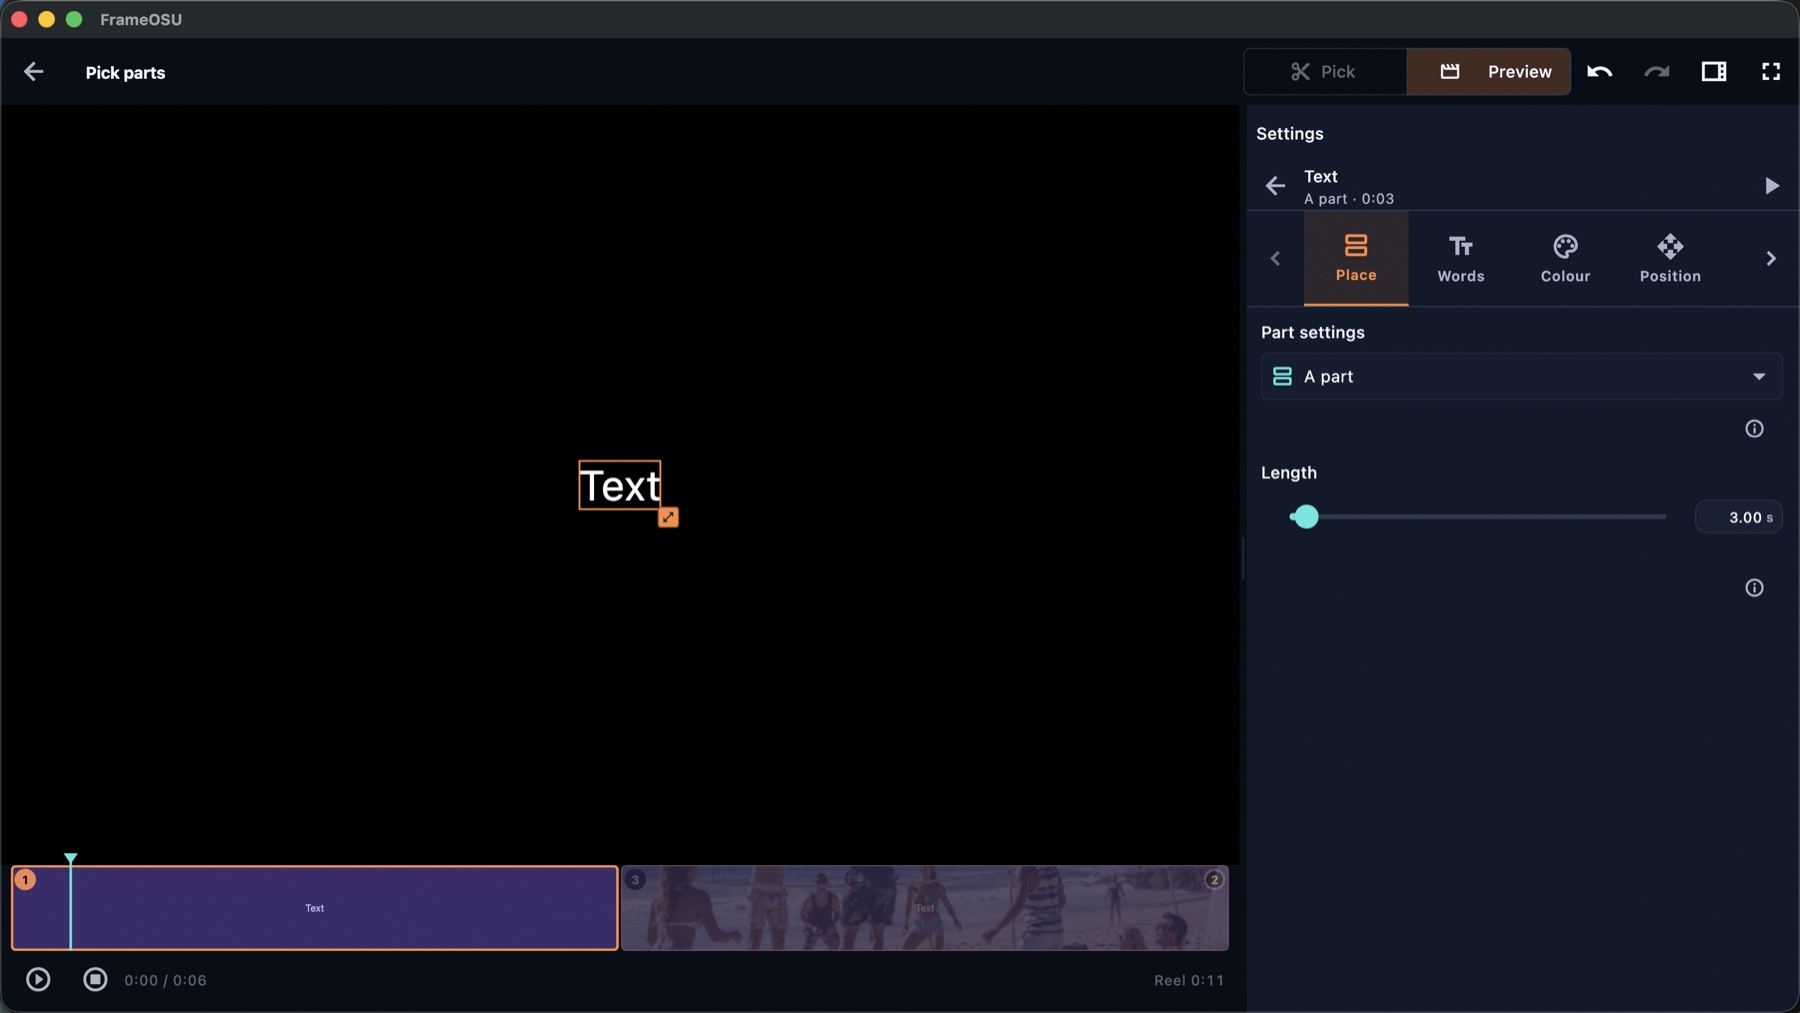
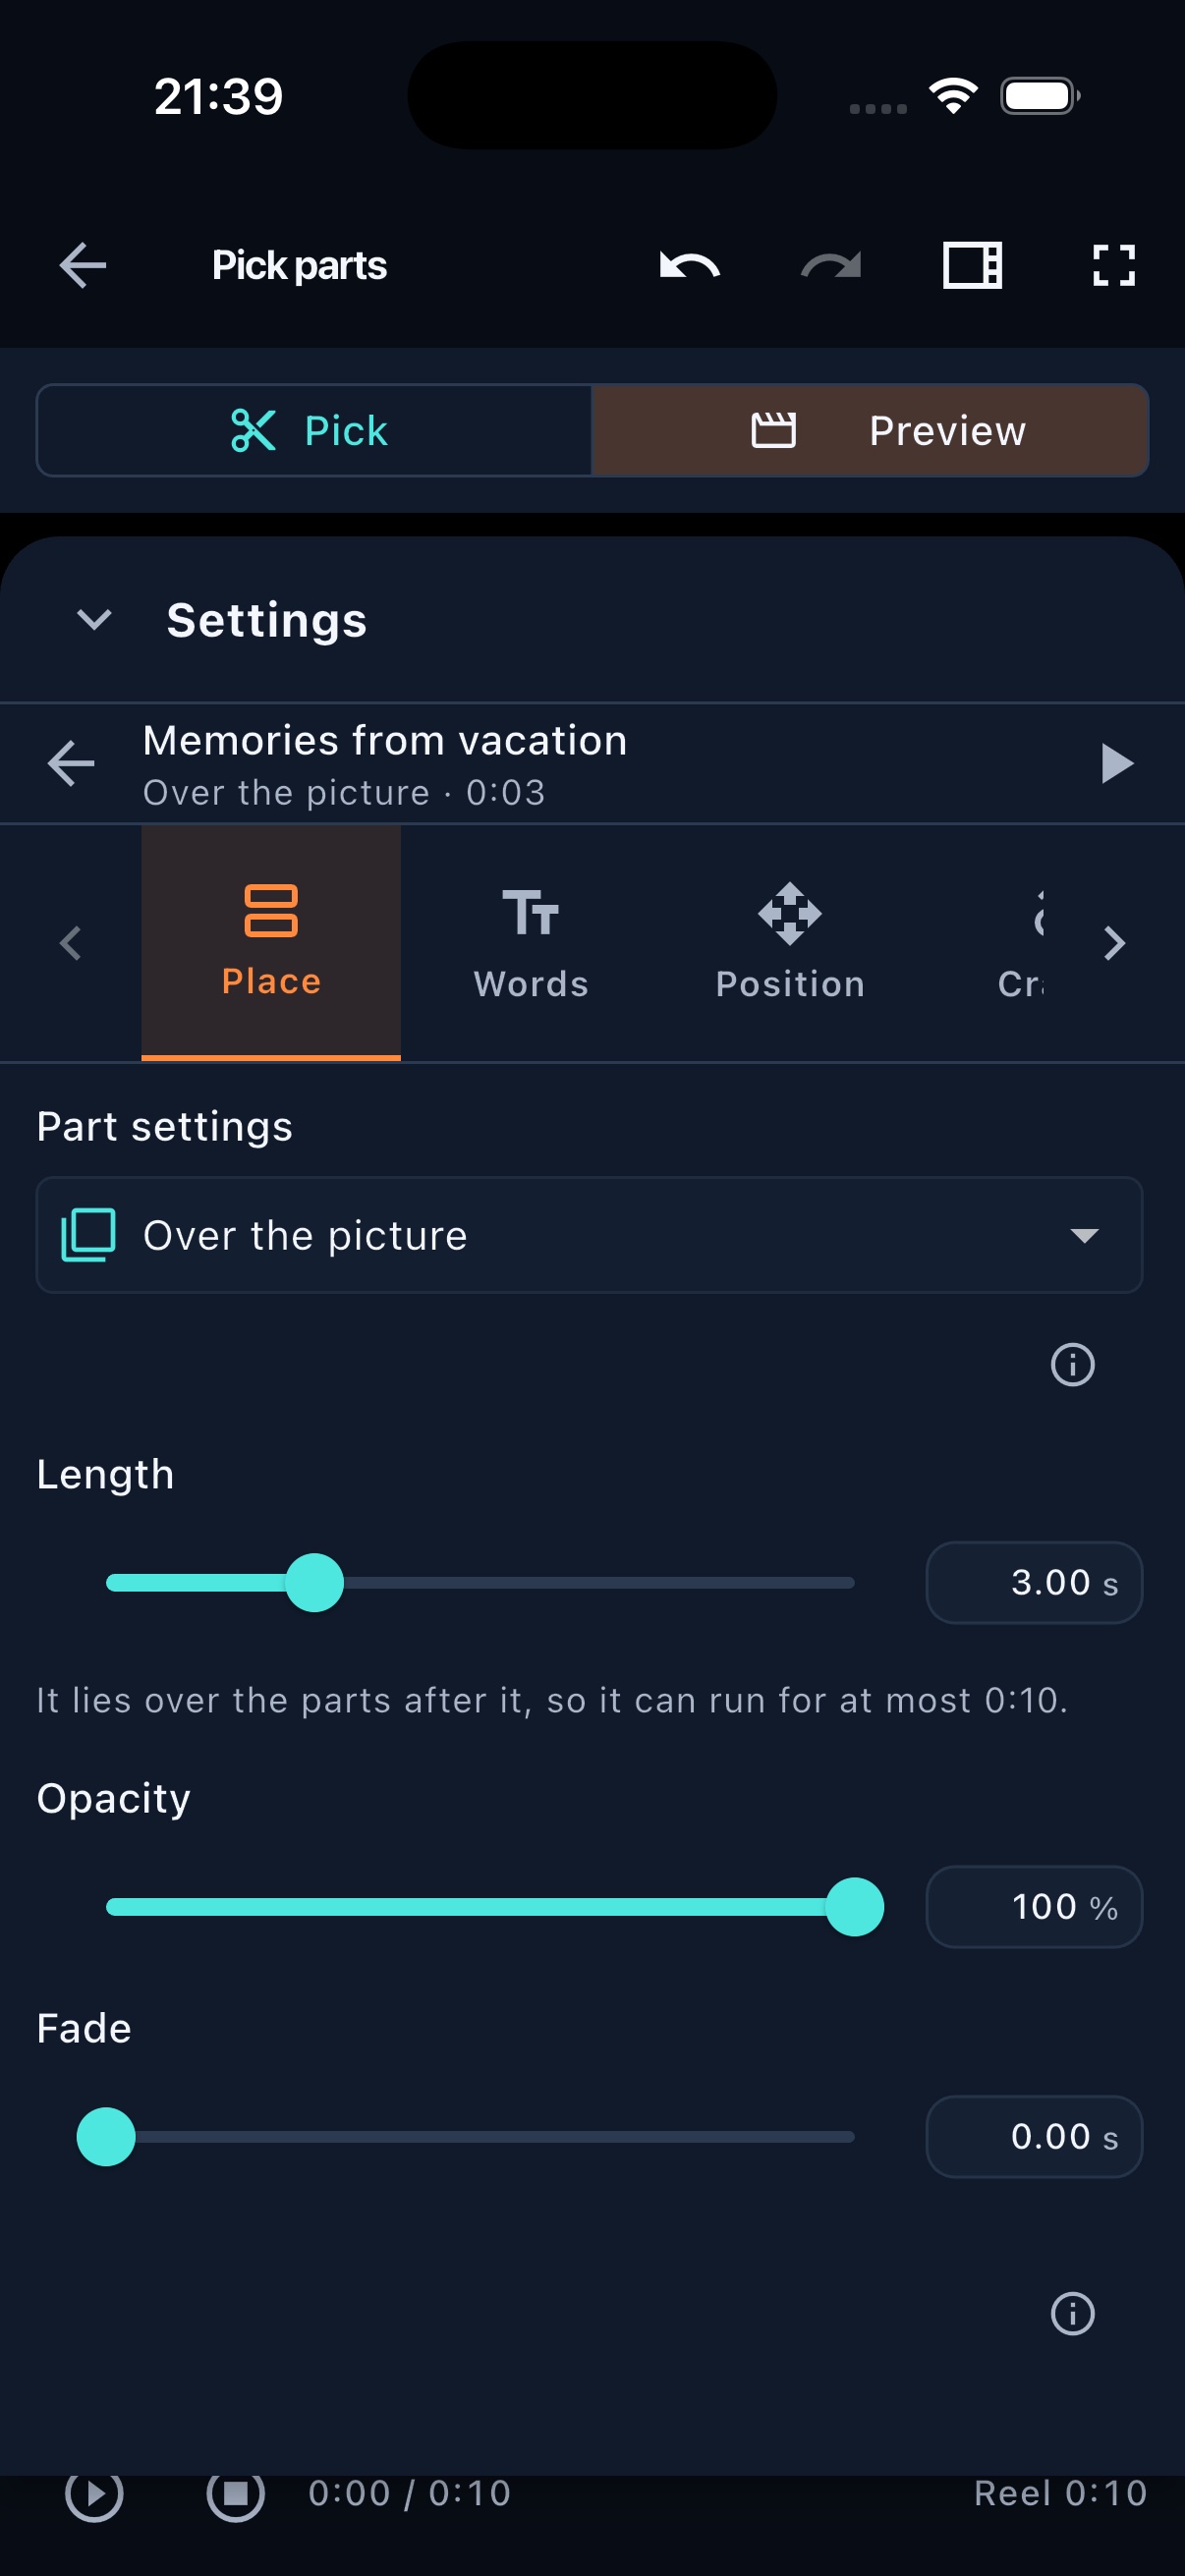
A three-second title card, selected on the canvas and represented as an ordinary numbered part below.On a phone, the same text tools also edit overlays. This three-second layer sits over the picture and exposes its length, opacity and fade below the settings rail. 08 Crawl is a feature of its own
Crawl is the large title-animation system: words travel over a fixed-perspective plane, with presets, direction, travel or hold behaviour, row effects and timing controls. This screen is only the top of that panel.
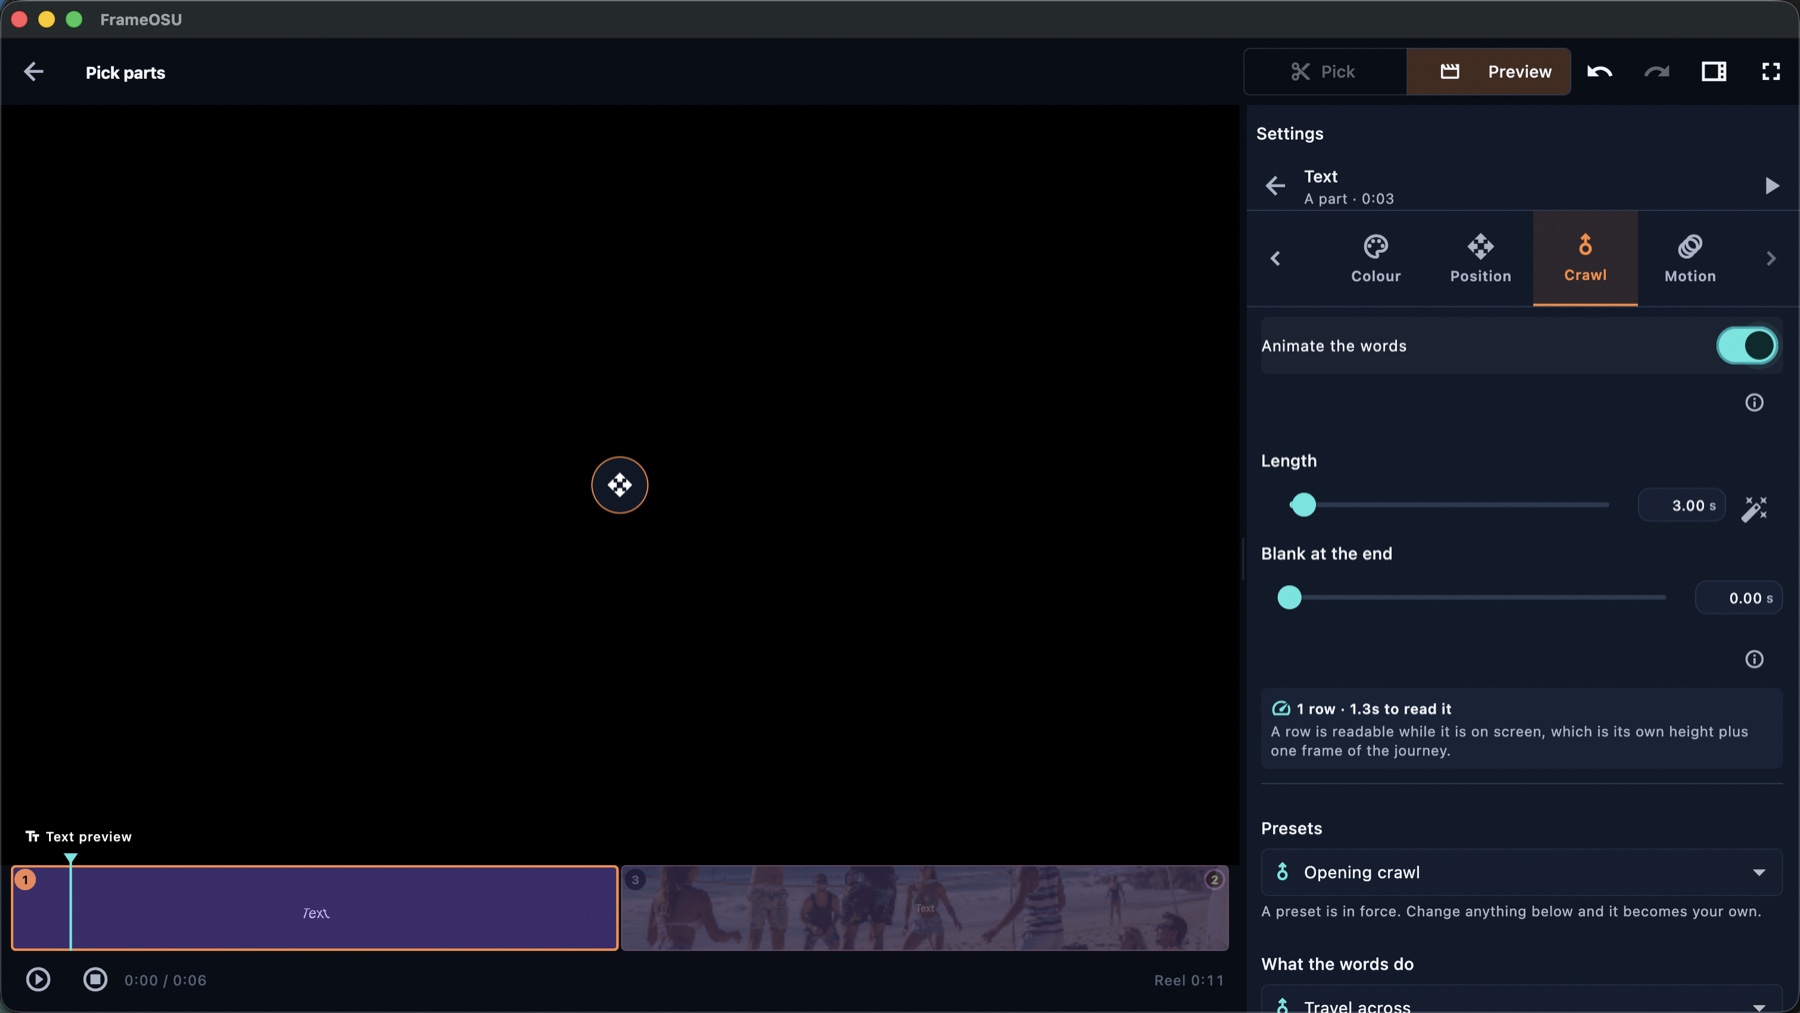
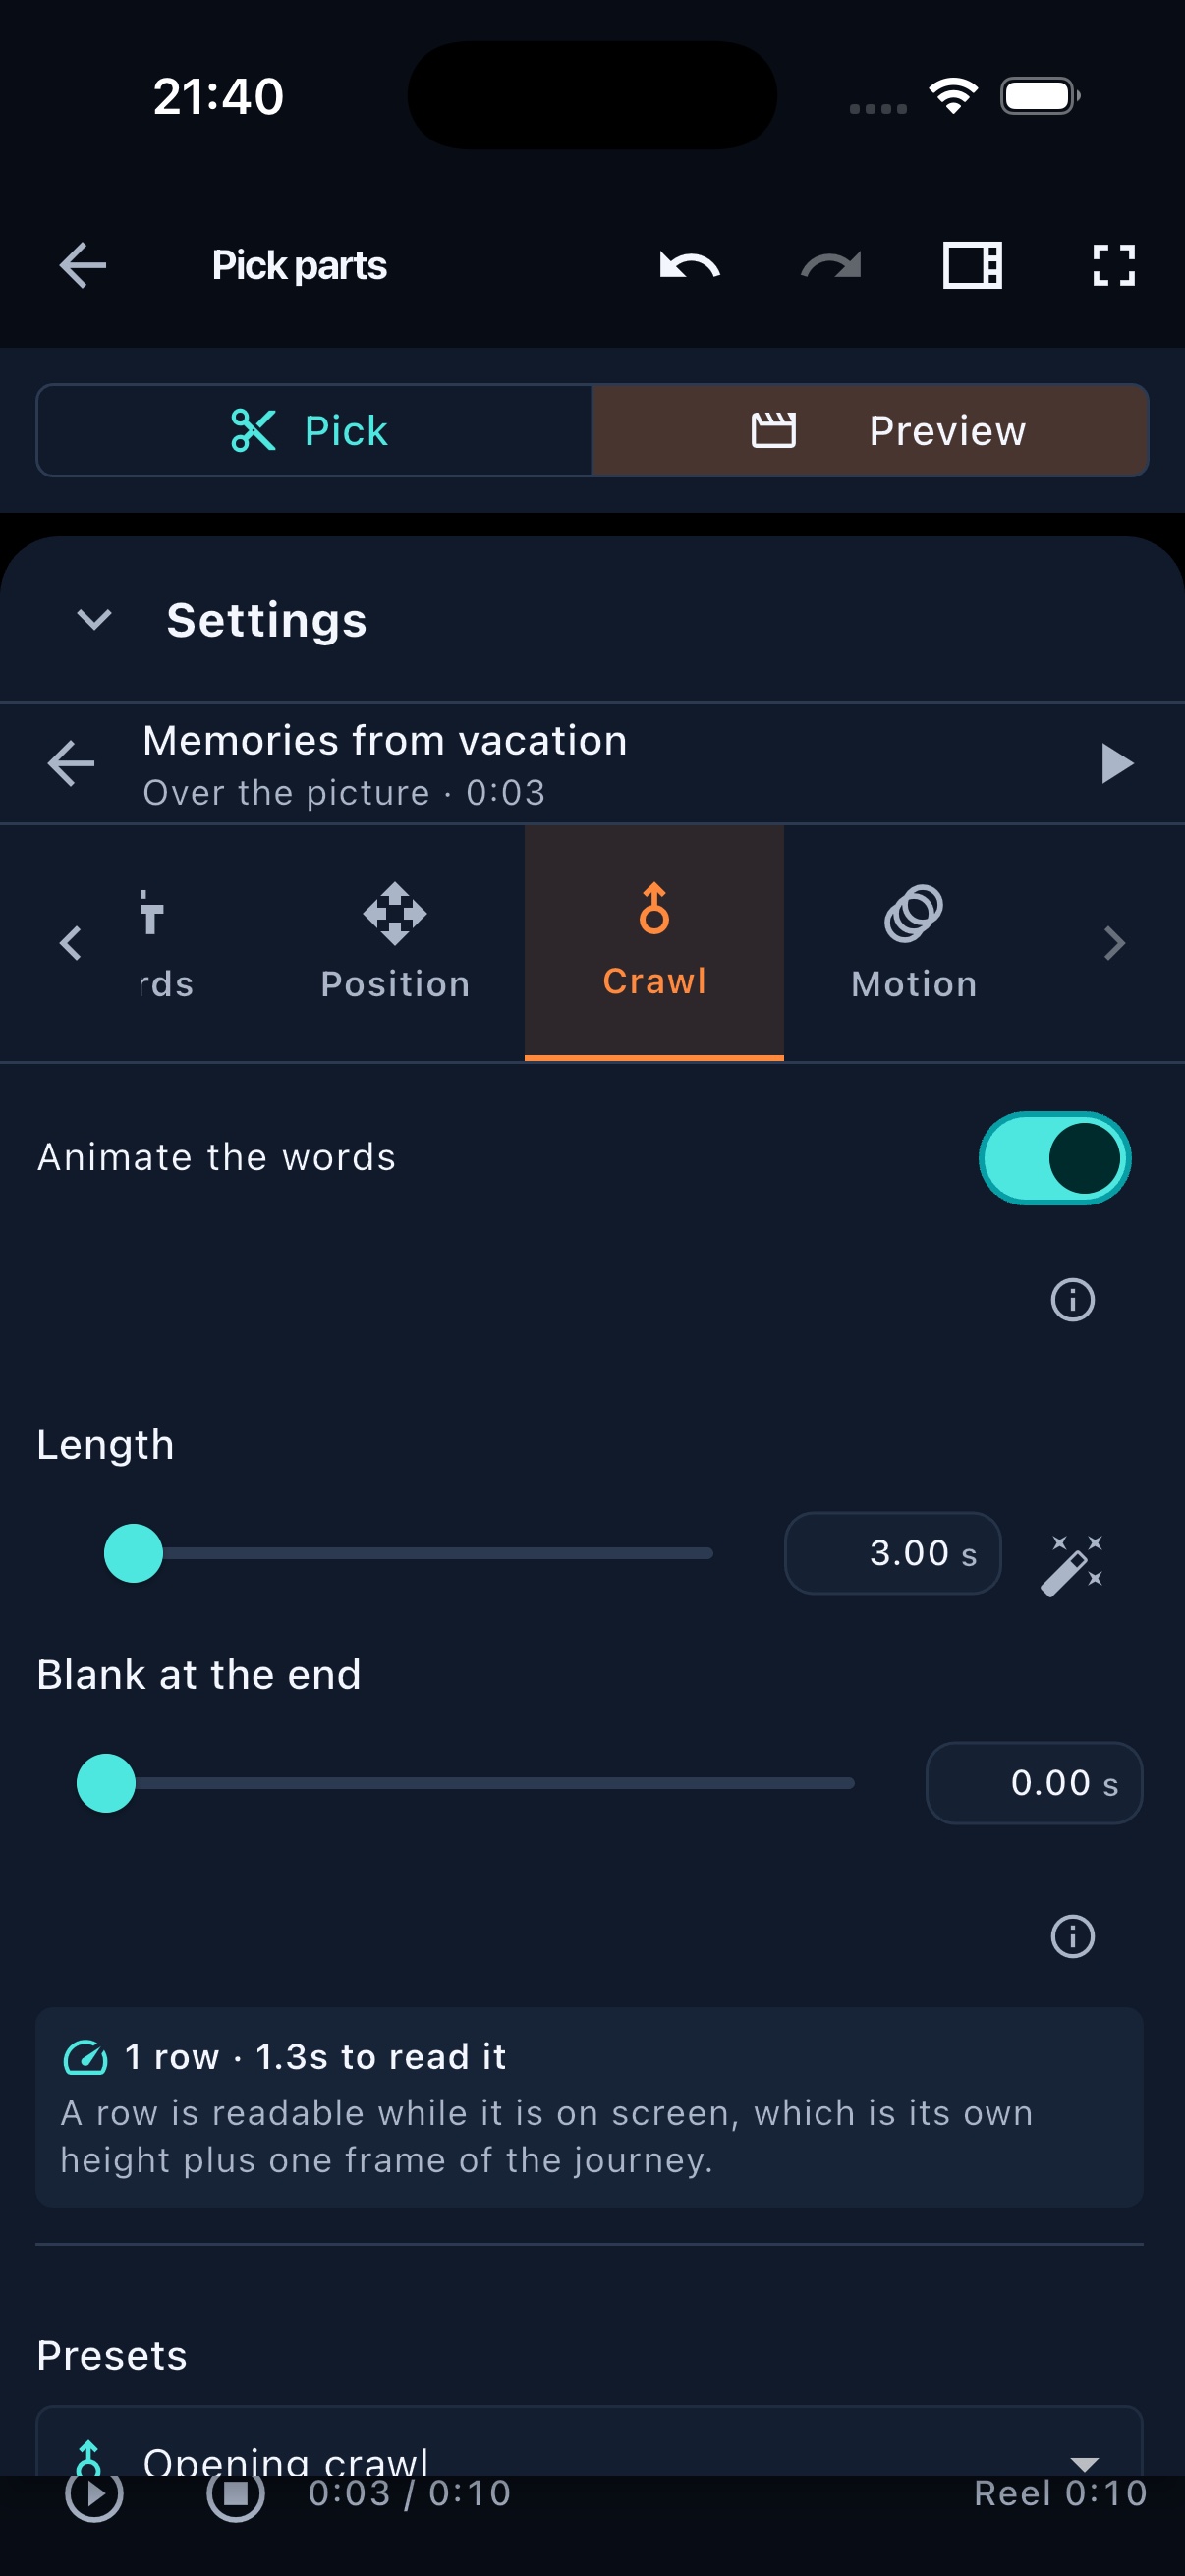
Crawl enabled on a title. The panel reports one row and 1.3 seconds of readable time before the detailed motion controls.Crawl fills the phone settings panel when it is enabled: timing, blank tail, readability guidance and presets appear before the deeper movement controls below. 09 Choose a bed, then draw its level
Music can come from the bundled catalogue, a downloaded public-domain track or a file you import. More than one bed can live in a reel, each on its own lane.
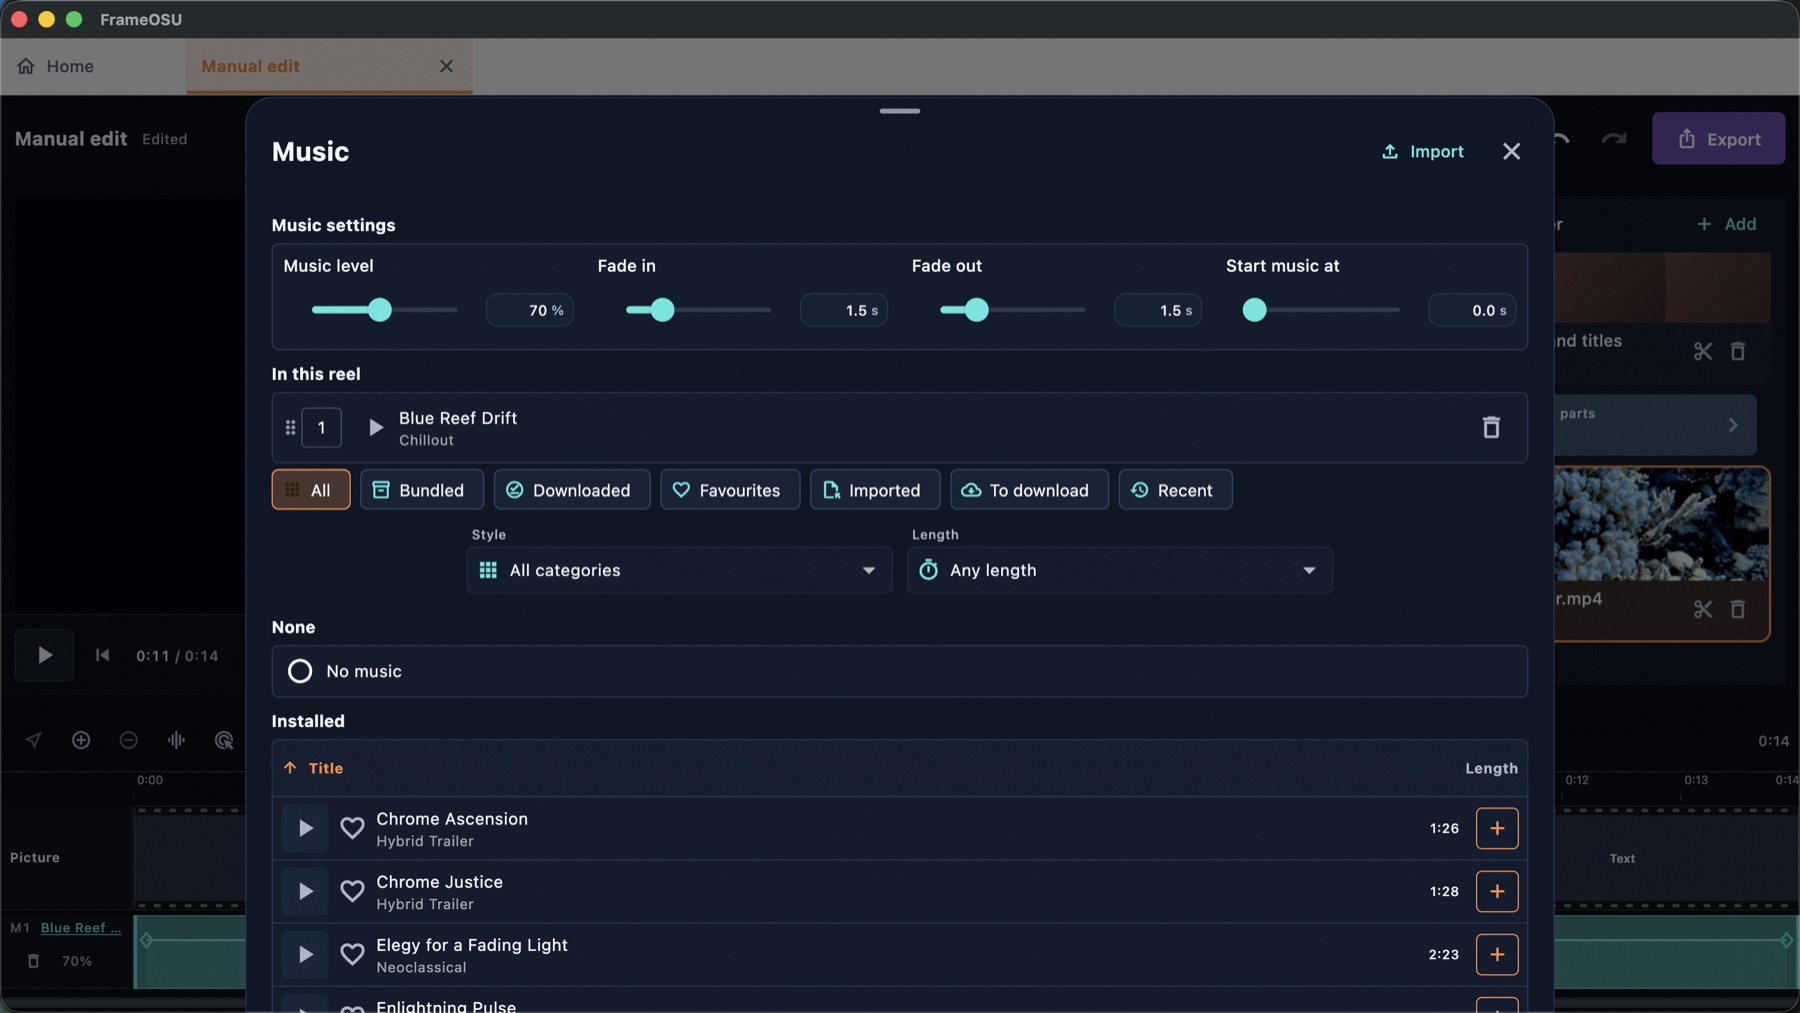
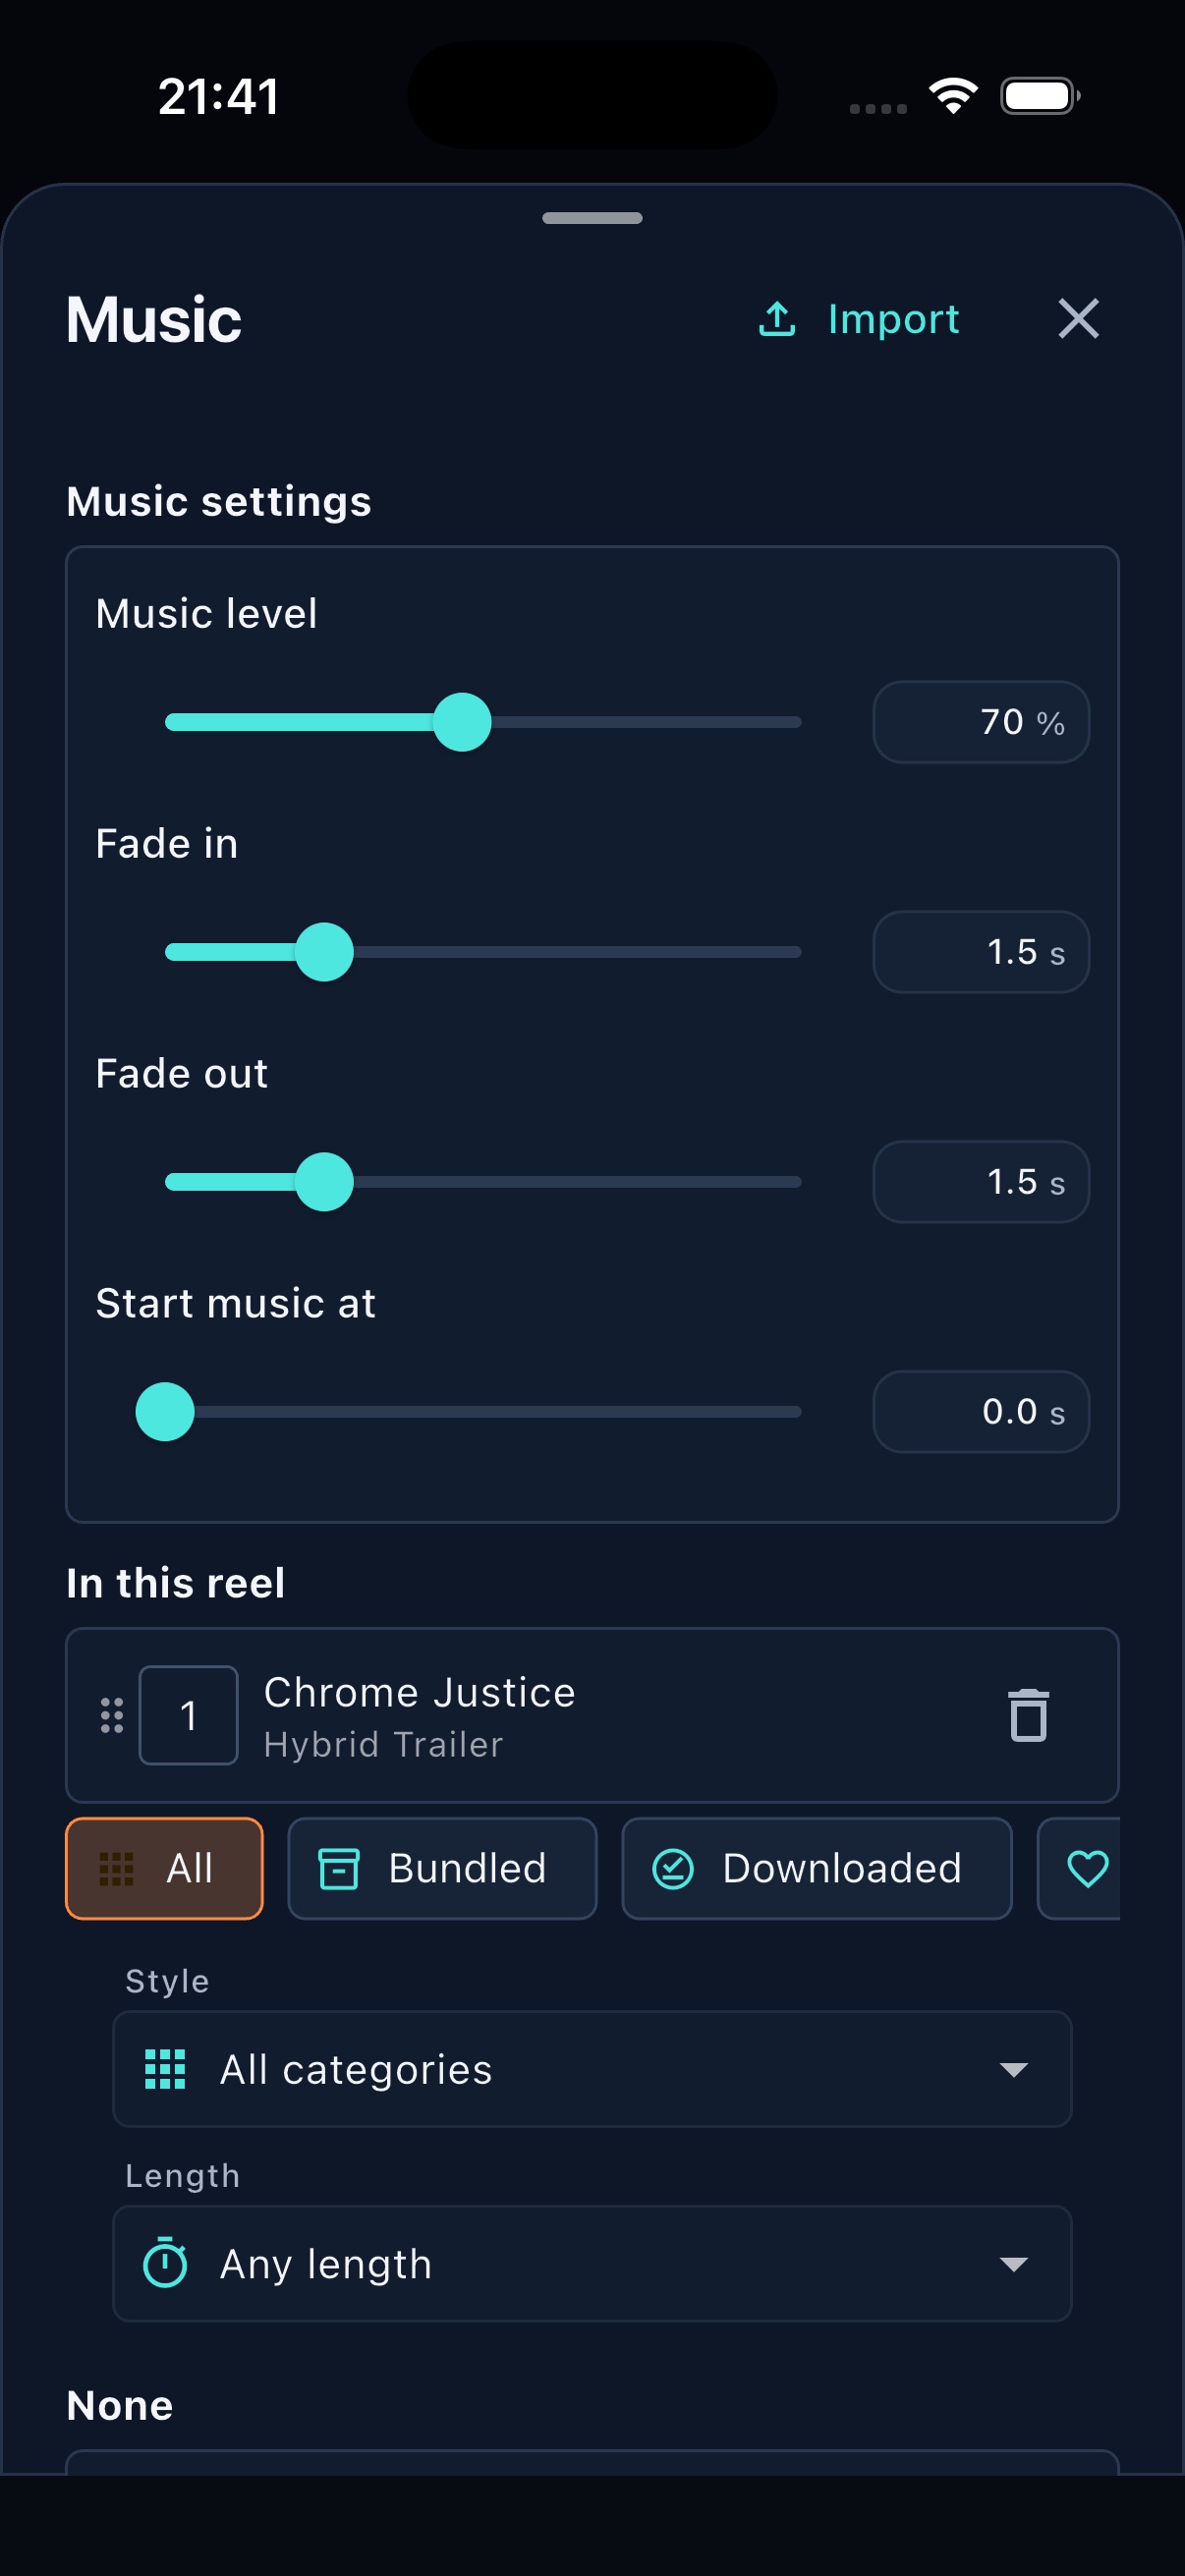
Blue Reef Drift has been added at 70% with 1.5-second fades. The timeline behind the sheet gives it its own M1 lane.The mobile Music sheet puts the selected bed's mix controls first, its In this reel card next and the filterable library underneath. 10 Tune transitions at the junction
Open the blue row between two parts to design that one junction. A theme can choose joins across a reel, but a junction you choose yourself stays pinned through later automatic passes.
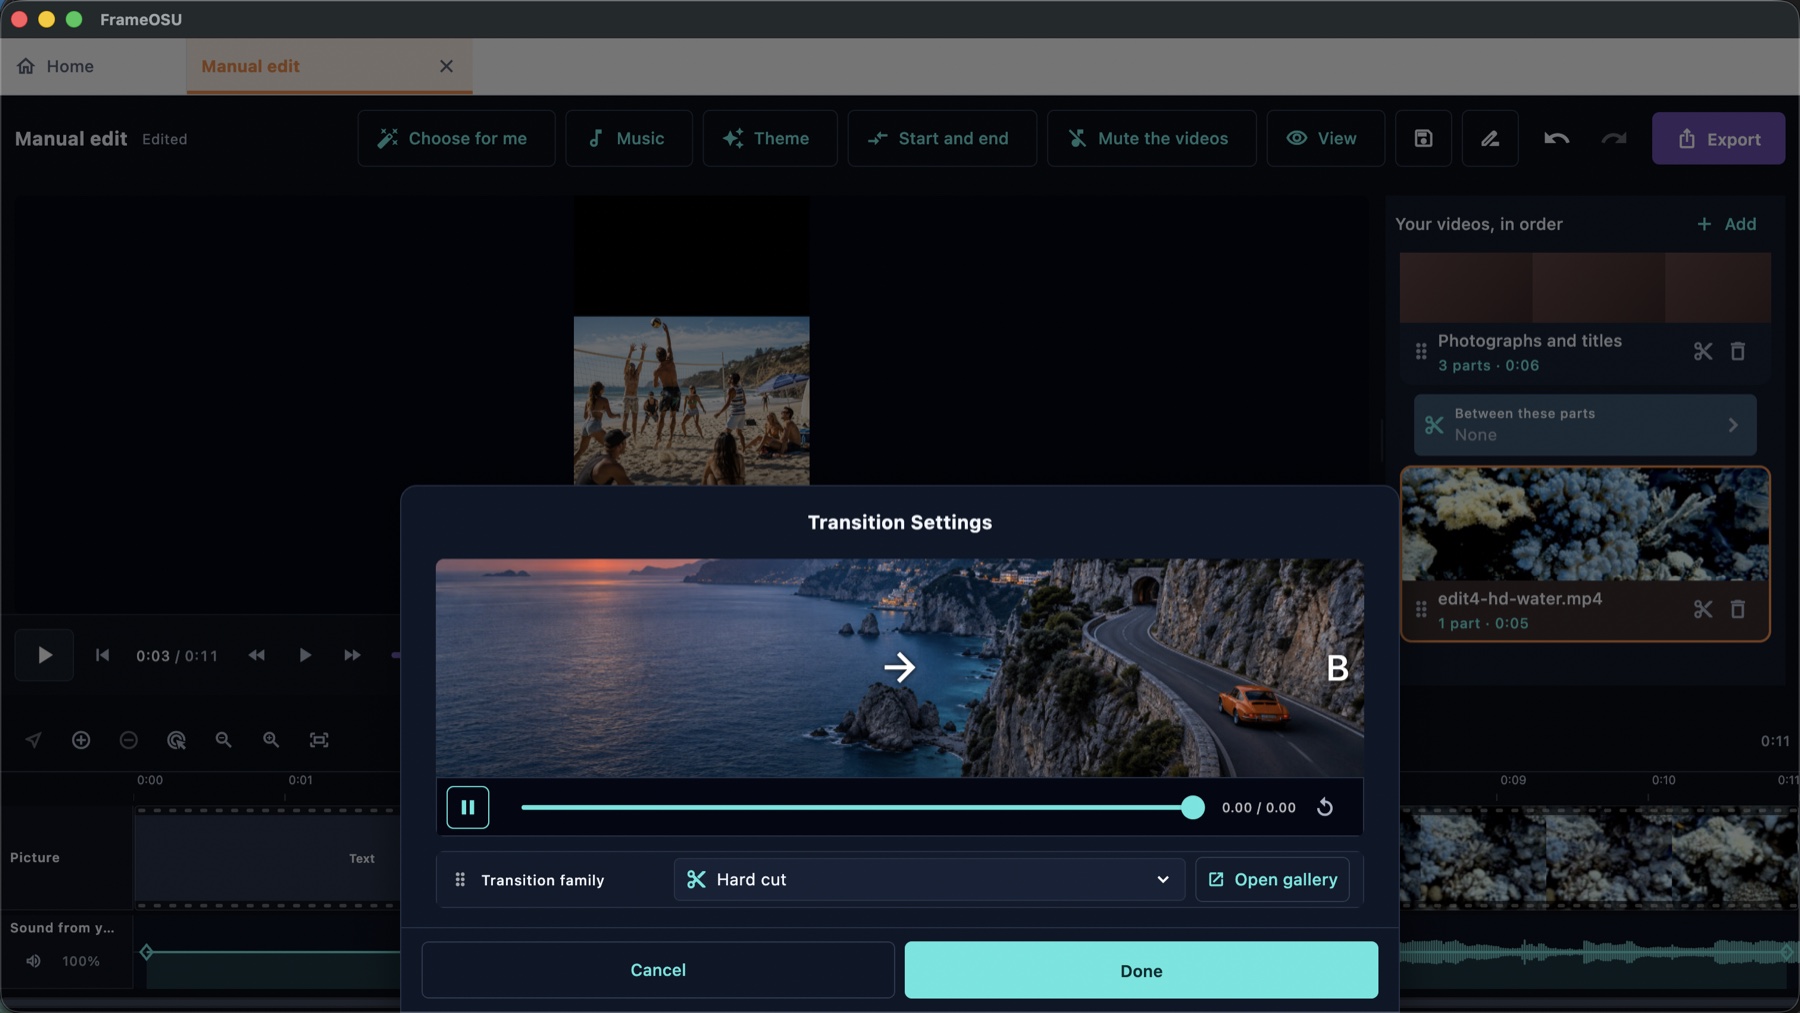
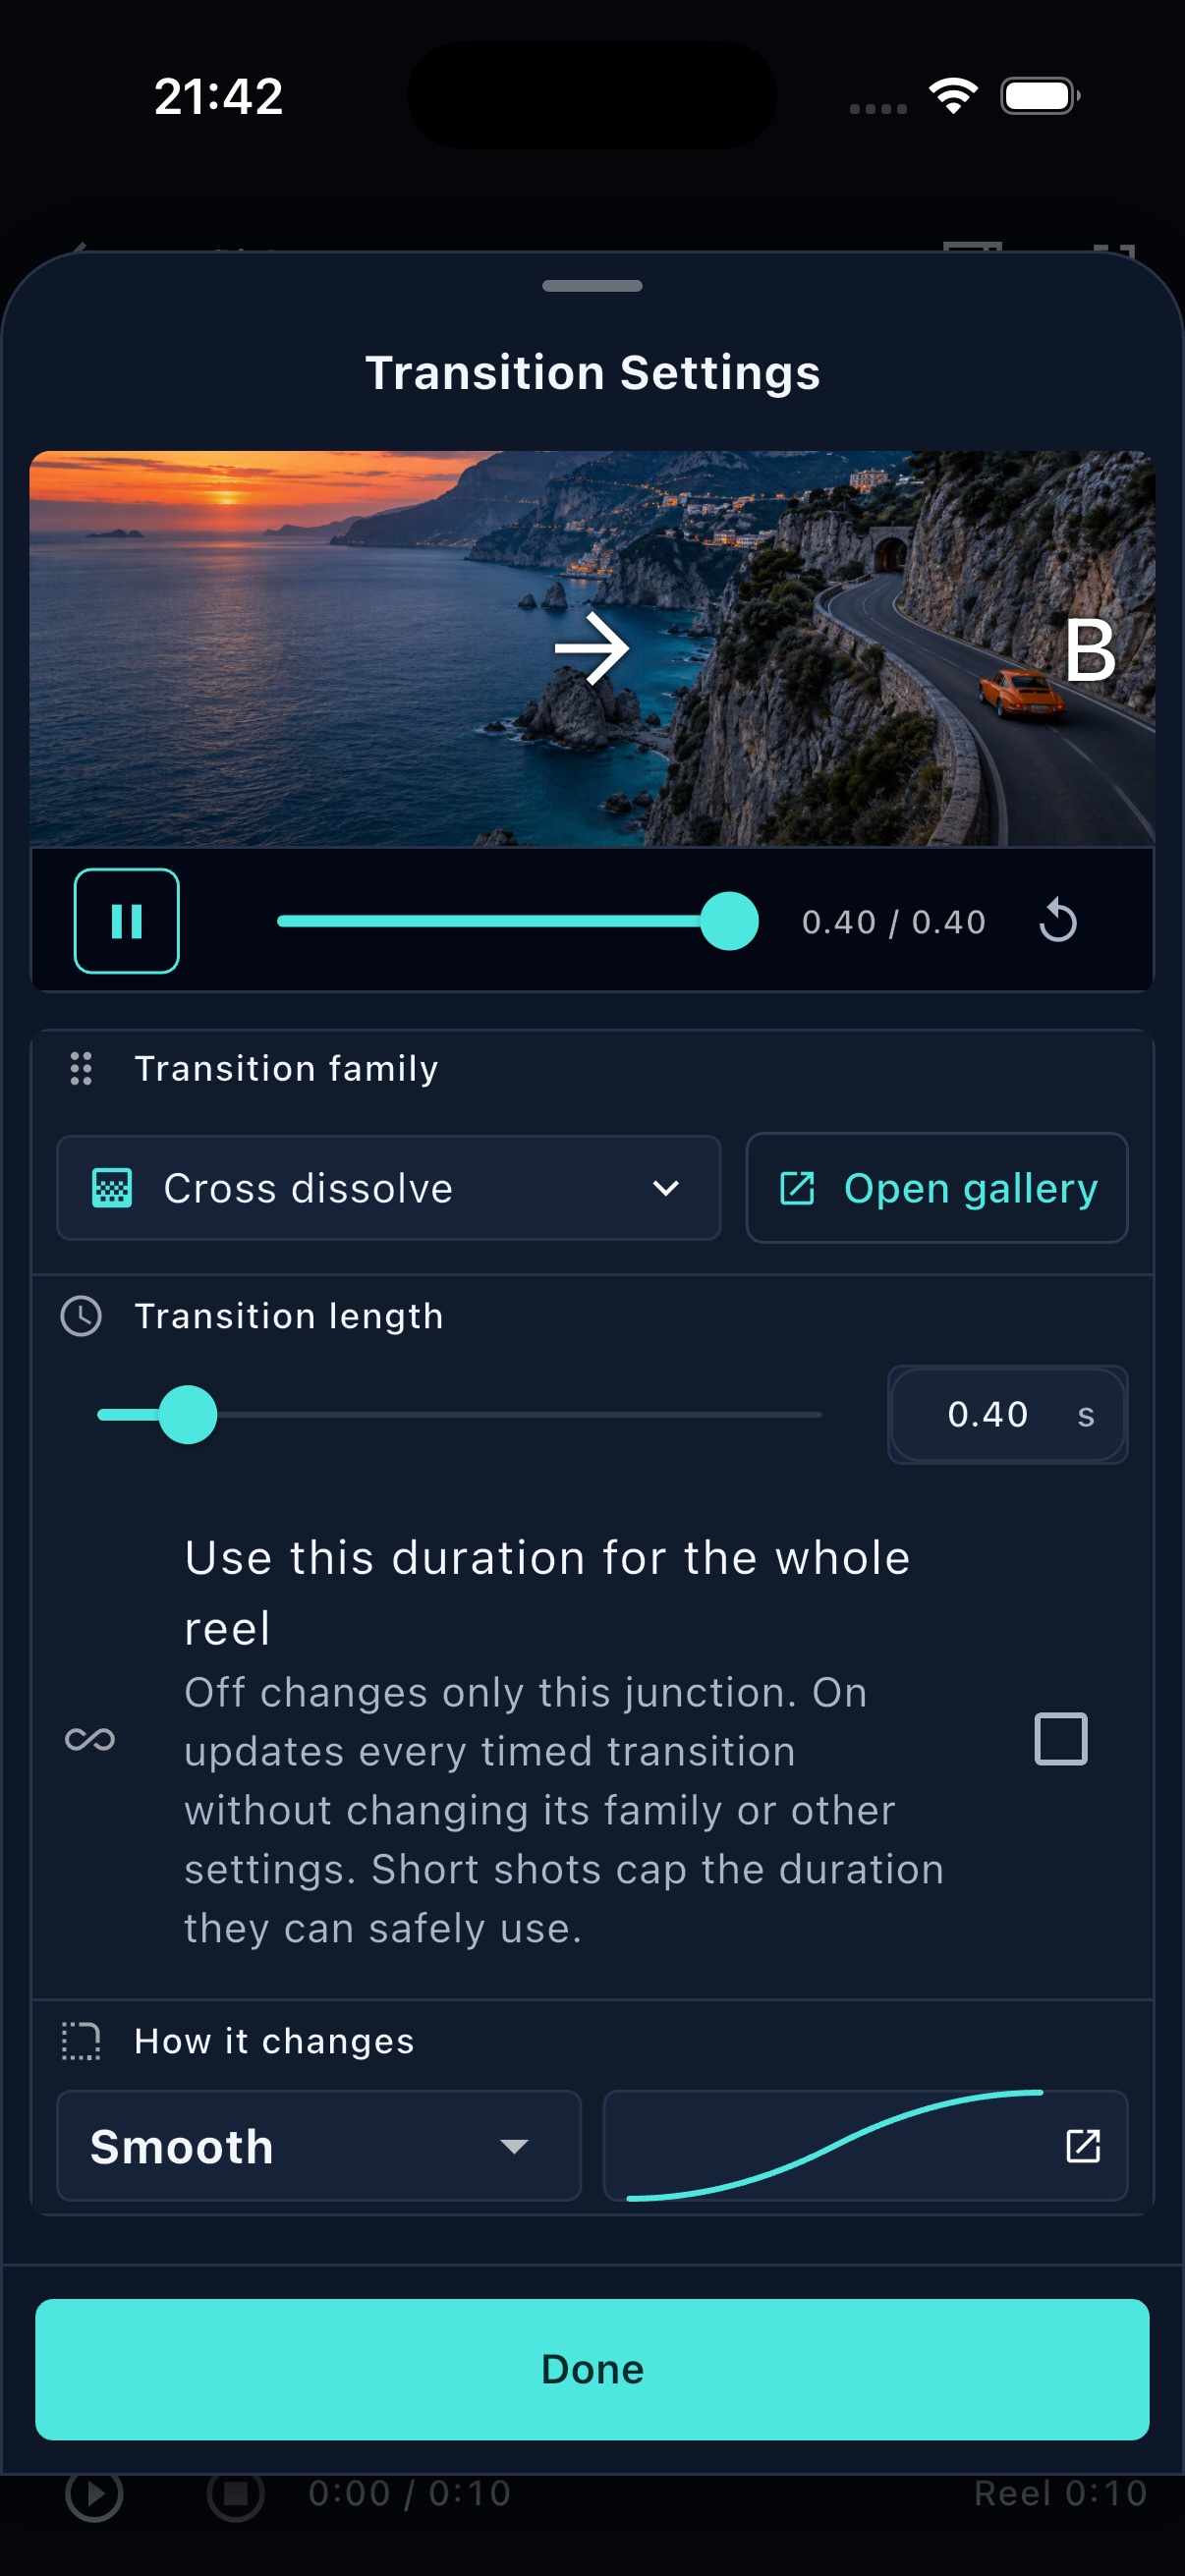
One junction opened on its own: the actual A and B pictures are the preview, and Hard cut is the current family.On a phone, the junction opens as a focused bottom sheet with the real A and B pictures above the family and gallery controls. 11 Settings: the global controls
Settings has too many possibilities for one walkthrough, and most creative controls belong beside the picture rather than here. The important global groups are editing defaults, getting started, appearance, storage, privacy and diagnostics.
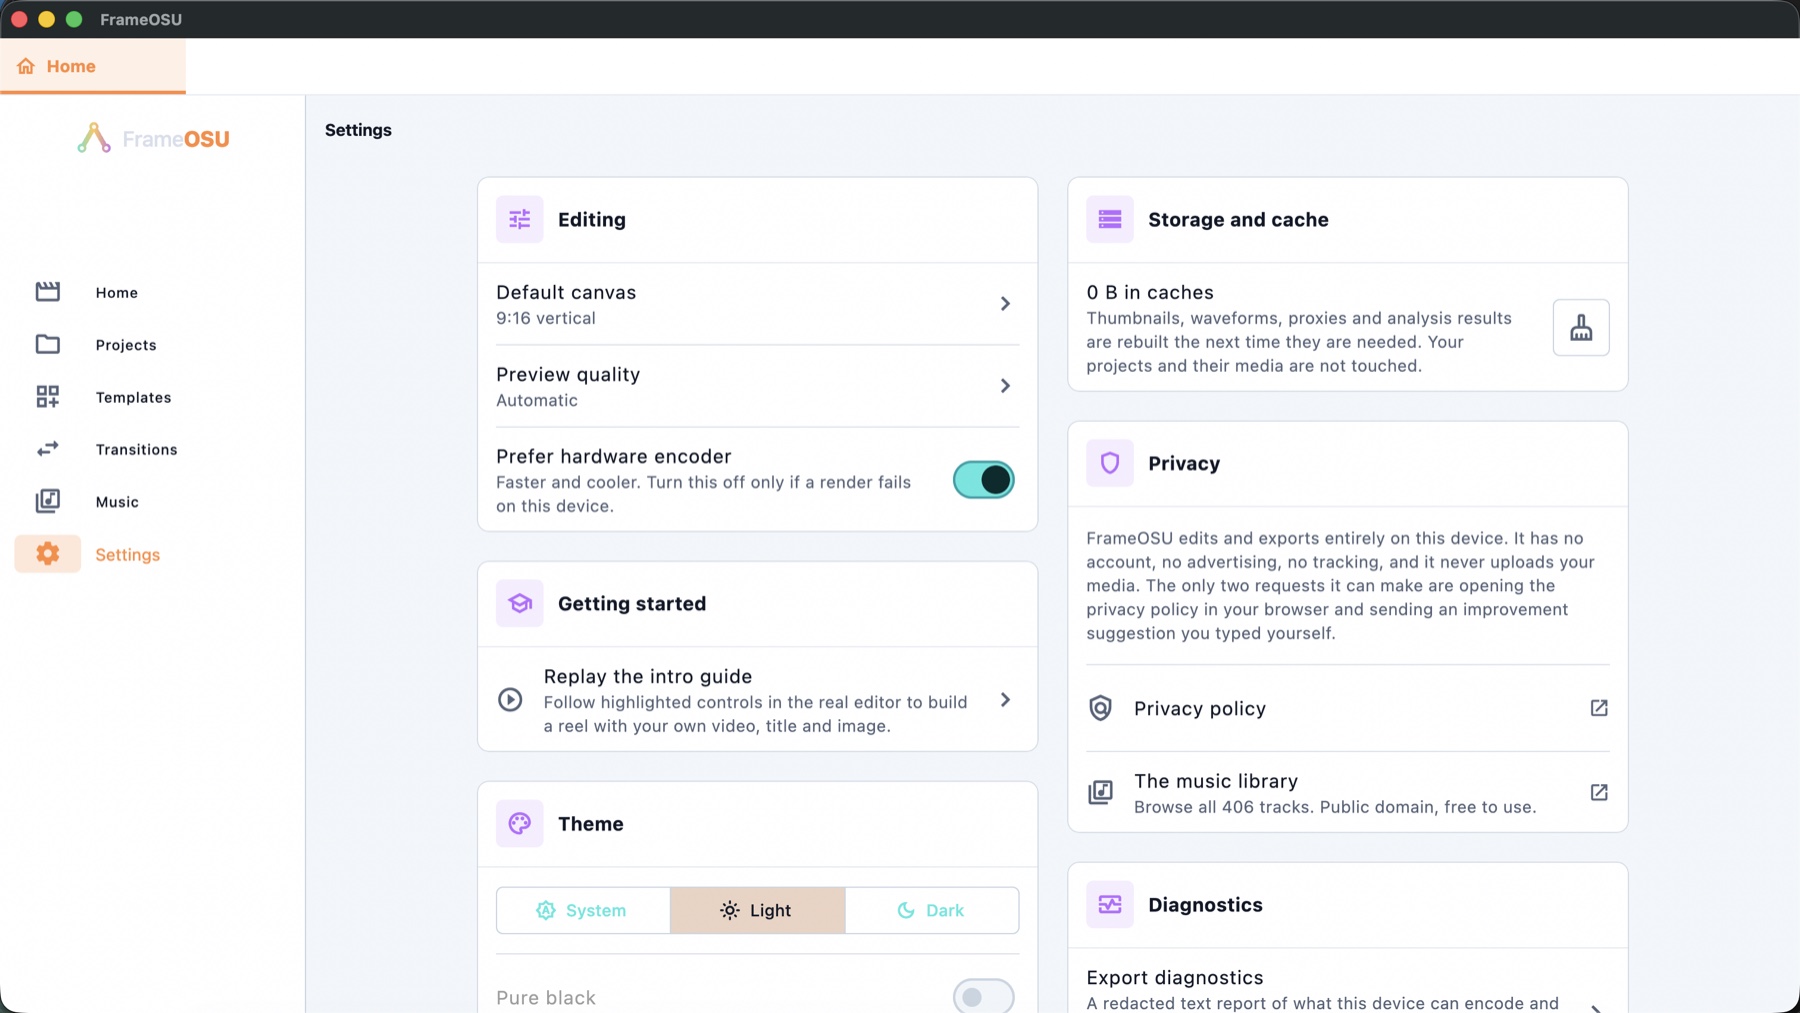
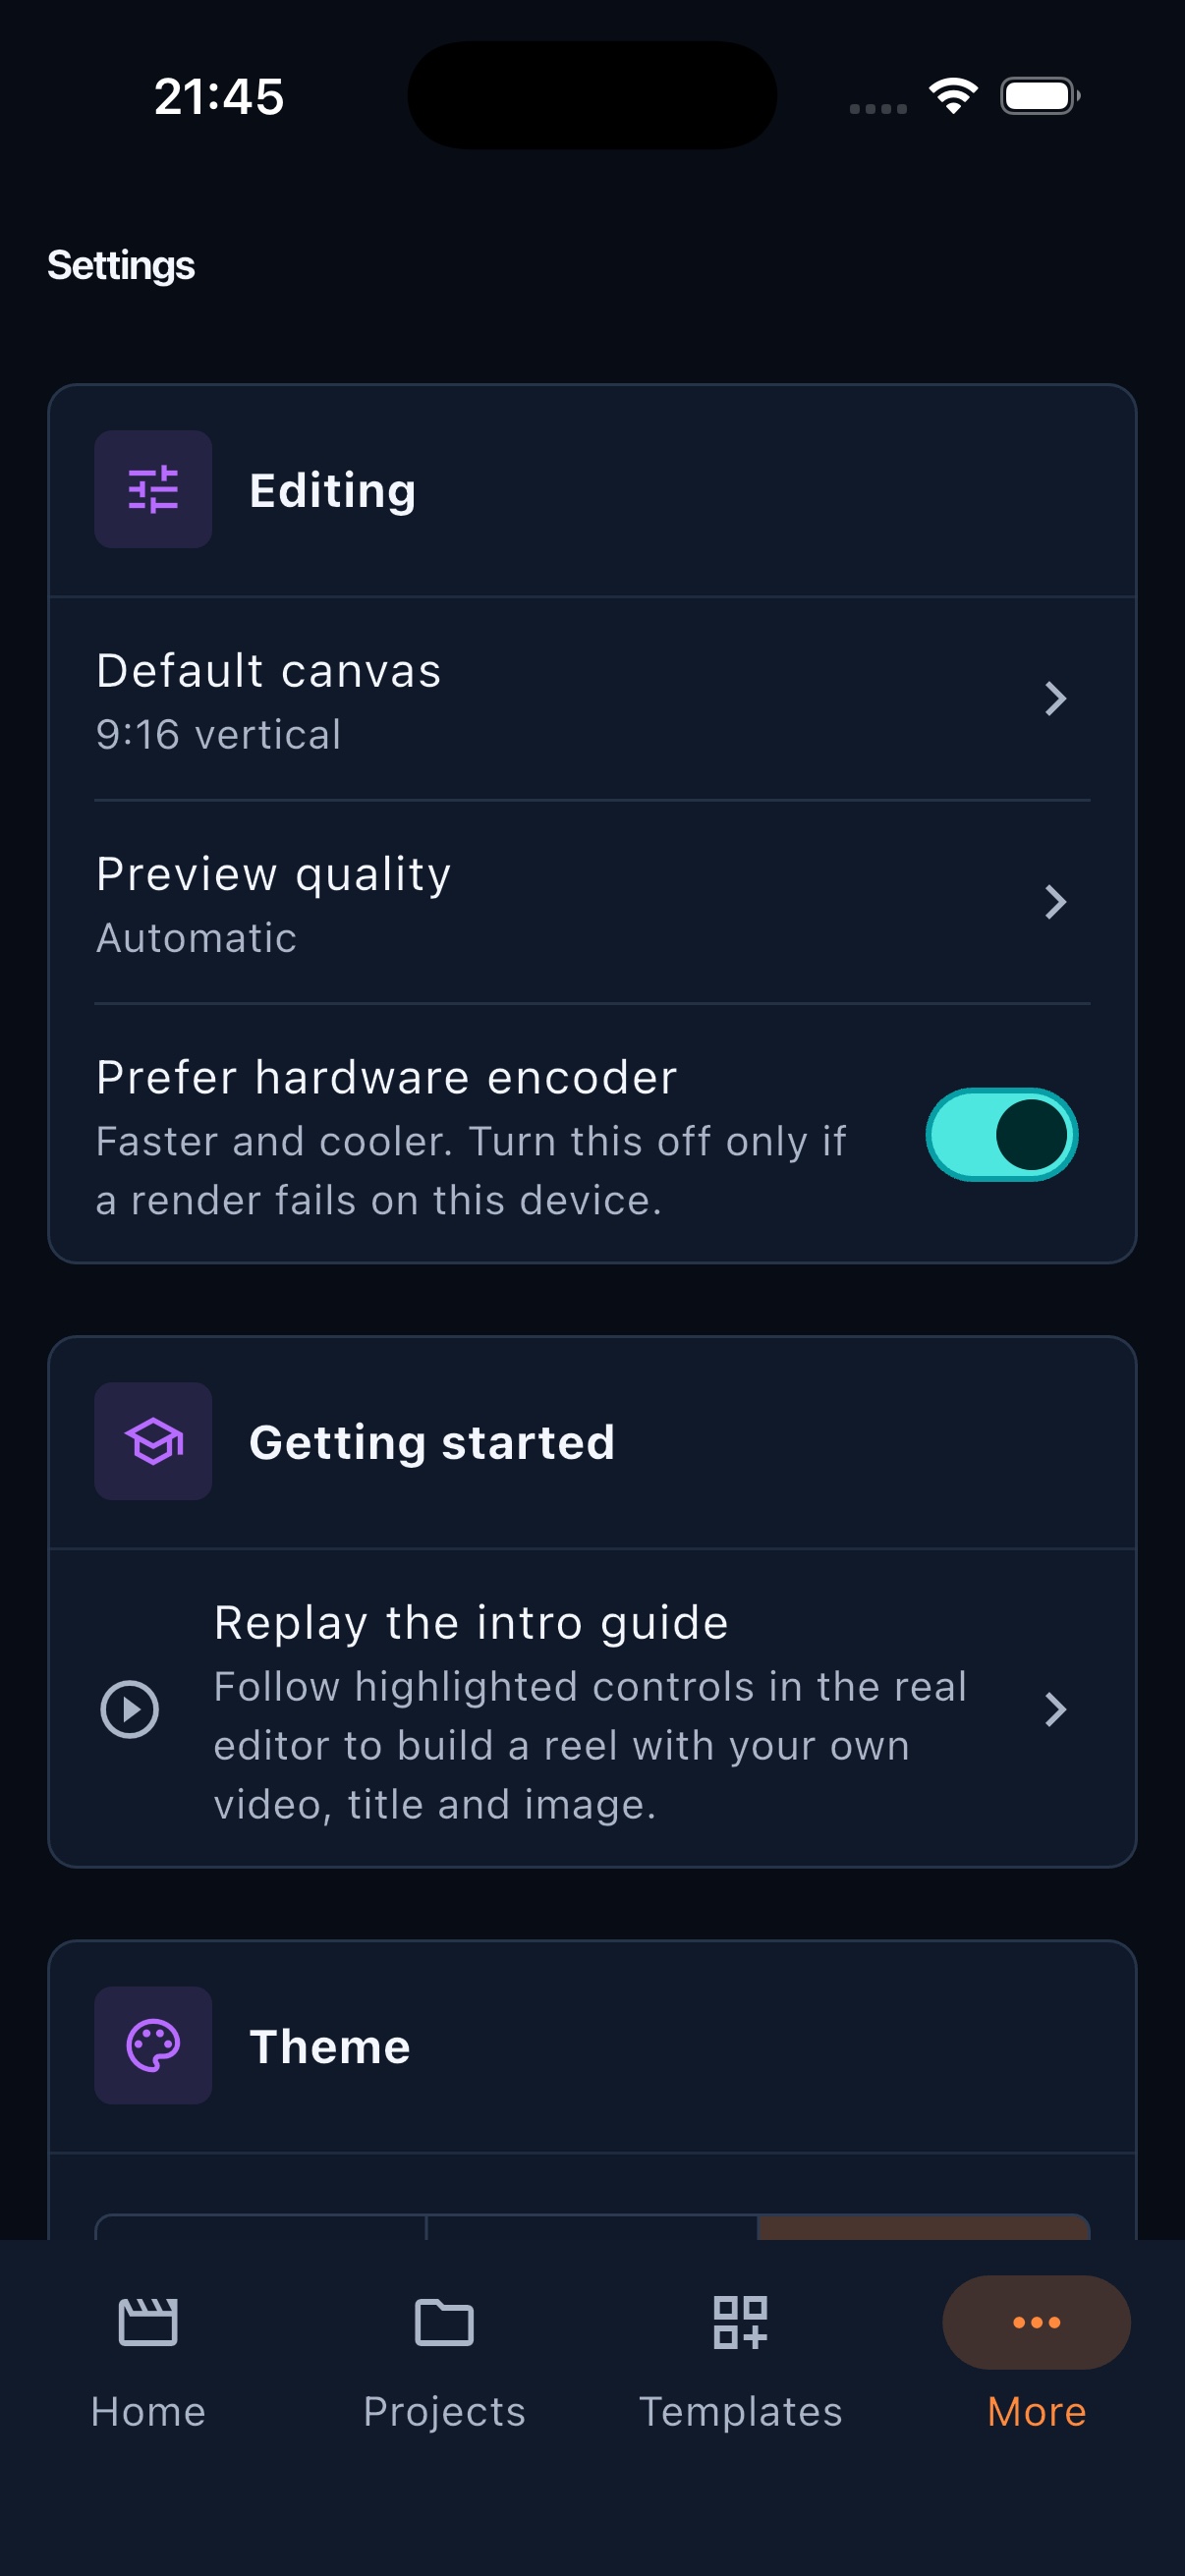
The top of Settings. It covers app-wide defaults and maintenance; the many part-level possibilities remain in the editor where their result is visible.The top of mobile Settings covers editing defaults and guide replay, with Theme beginning below. Language, accessibility, storage, privacy and diagnostics continue farther down. 12 Export with the facts in front of you
Export is a deliberate final check. Pick the delivery size and codec, inspect the calculated facts, then let pre-flight stop unsupported combinations before a file is written.
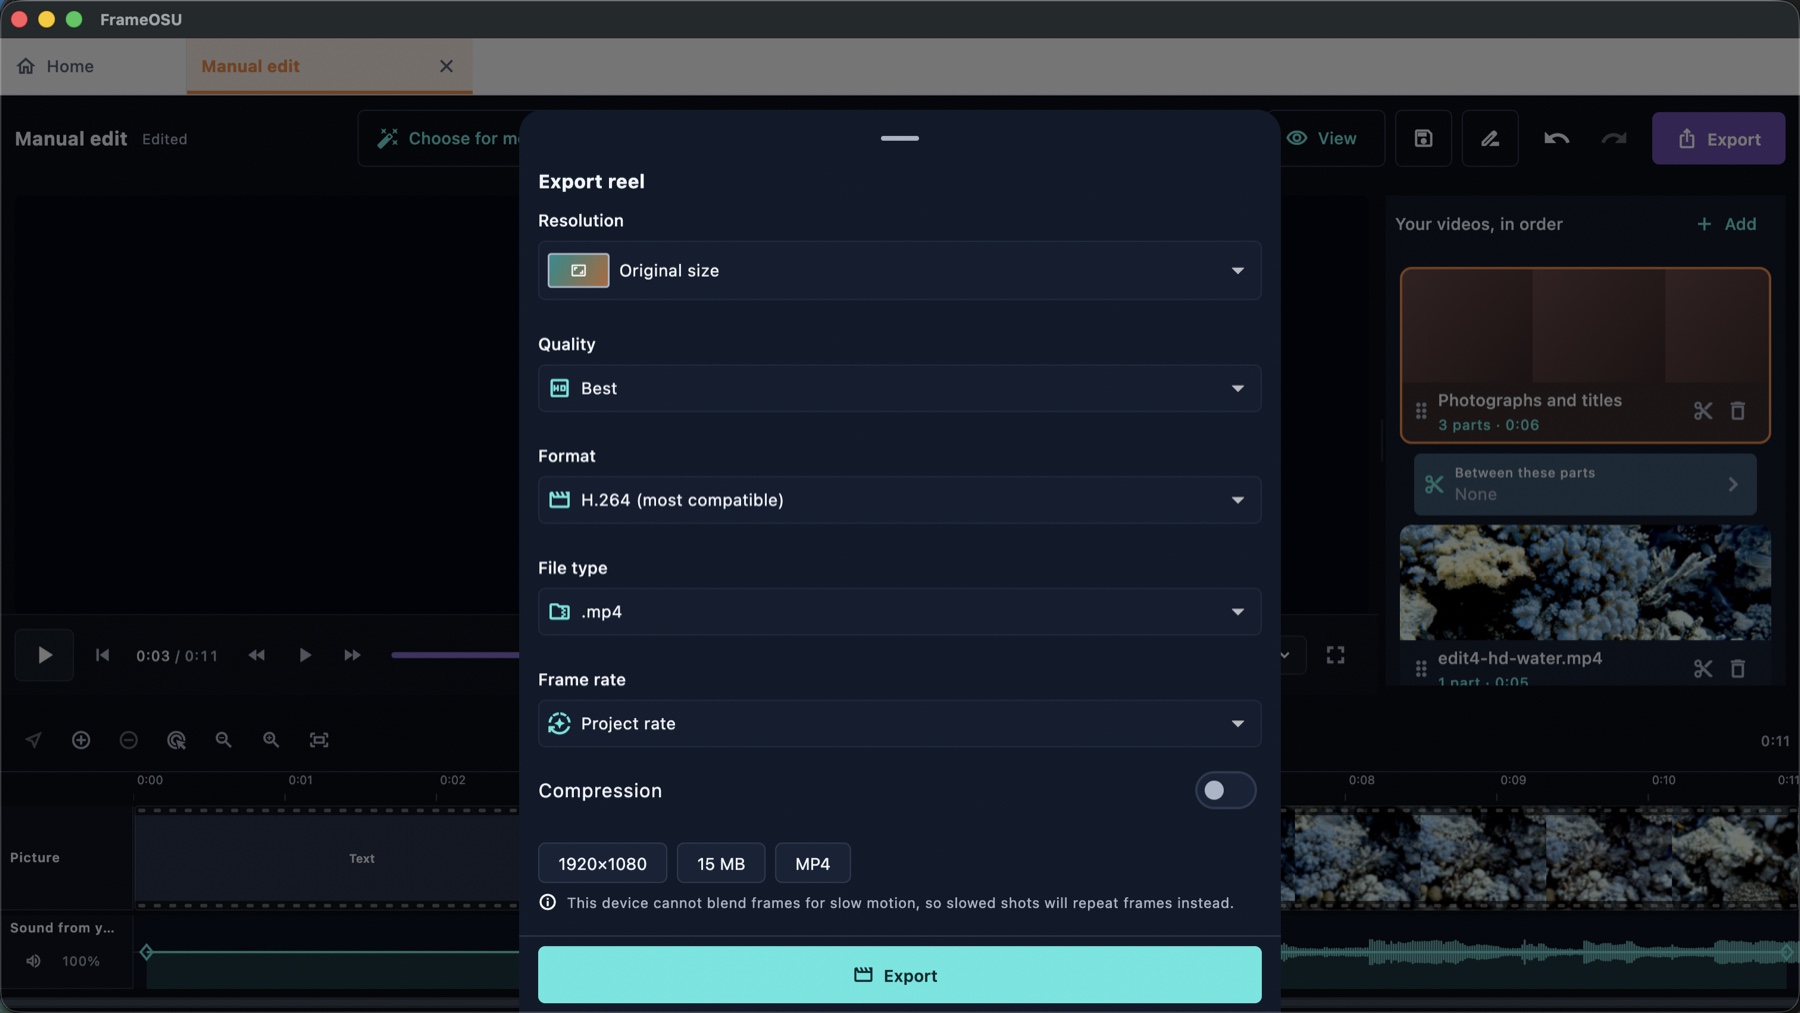
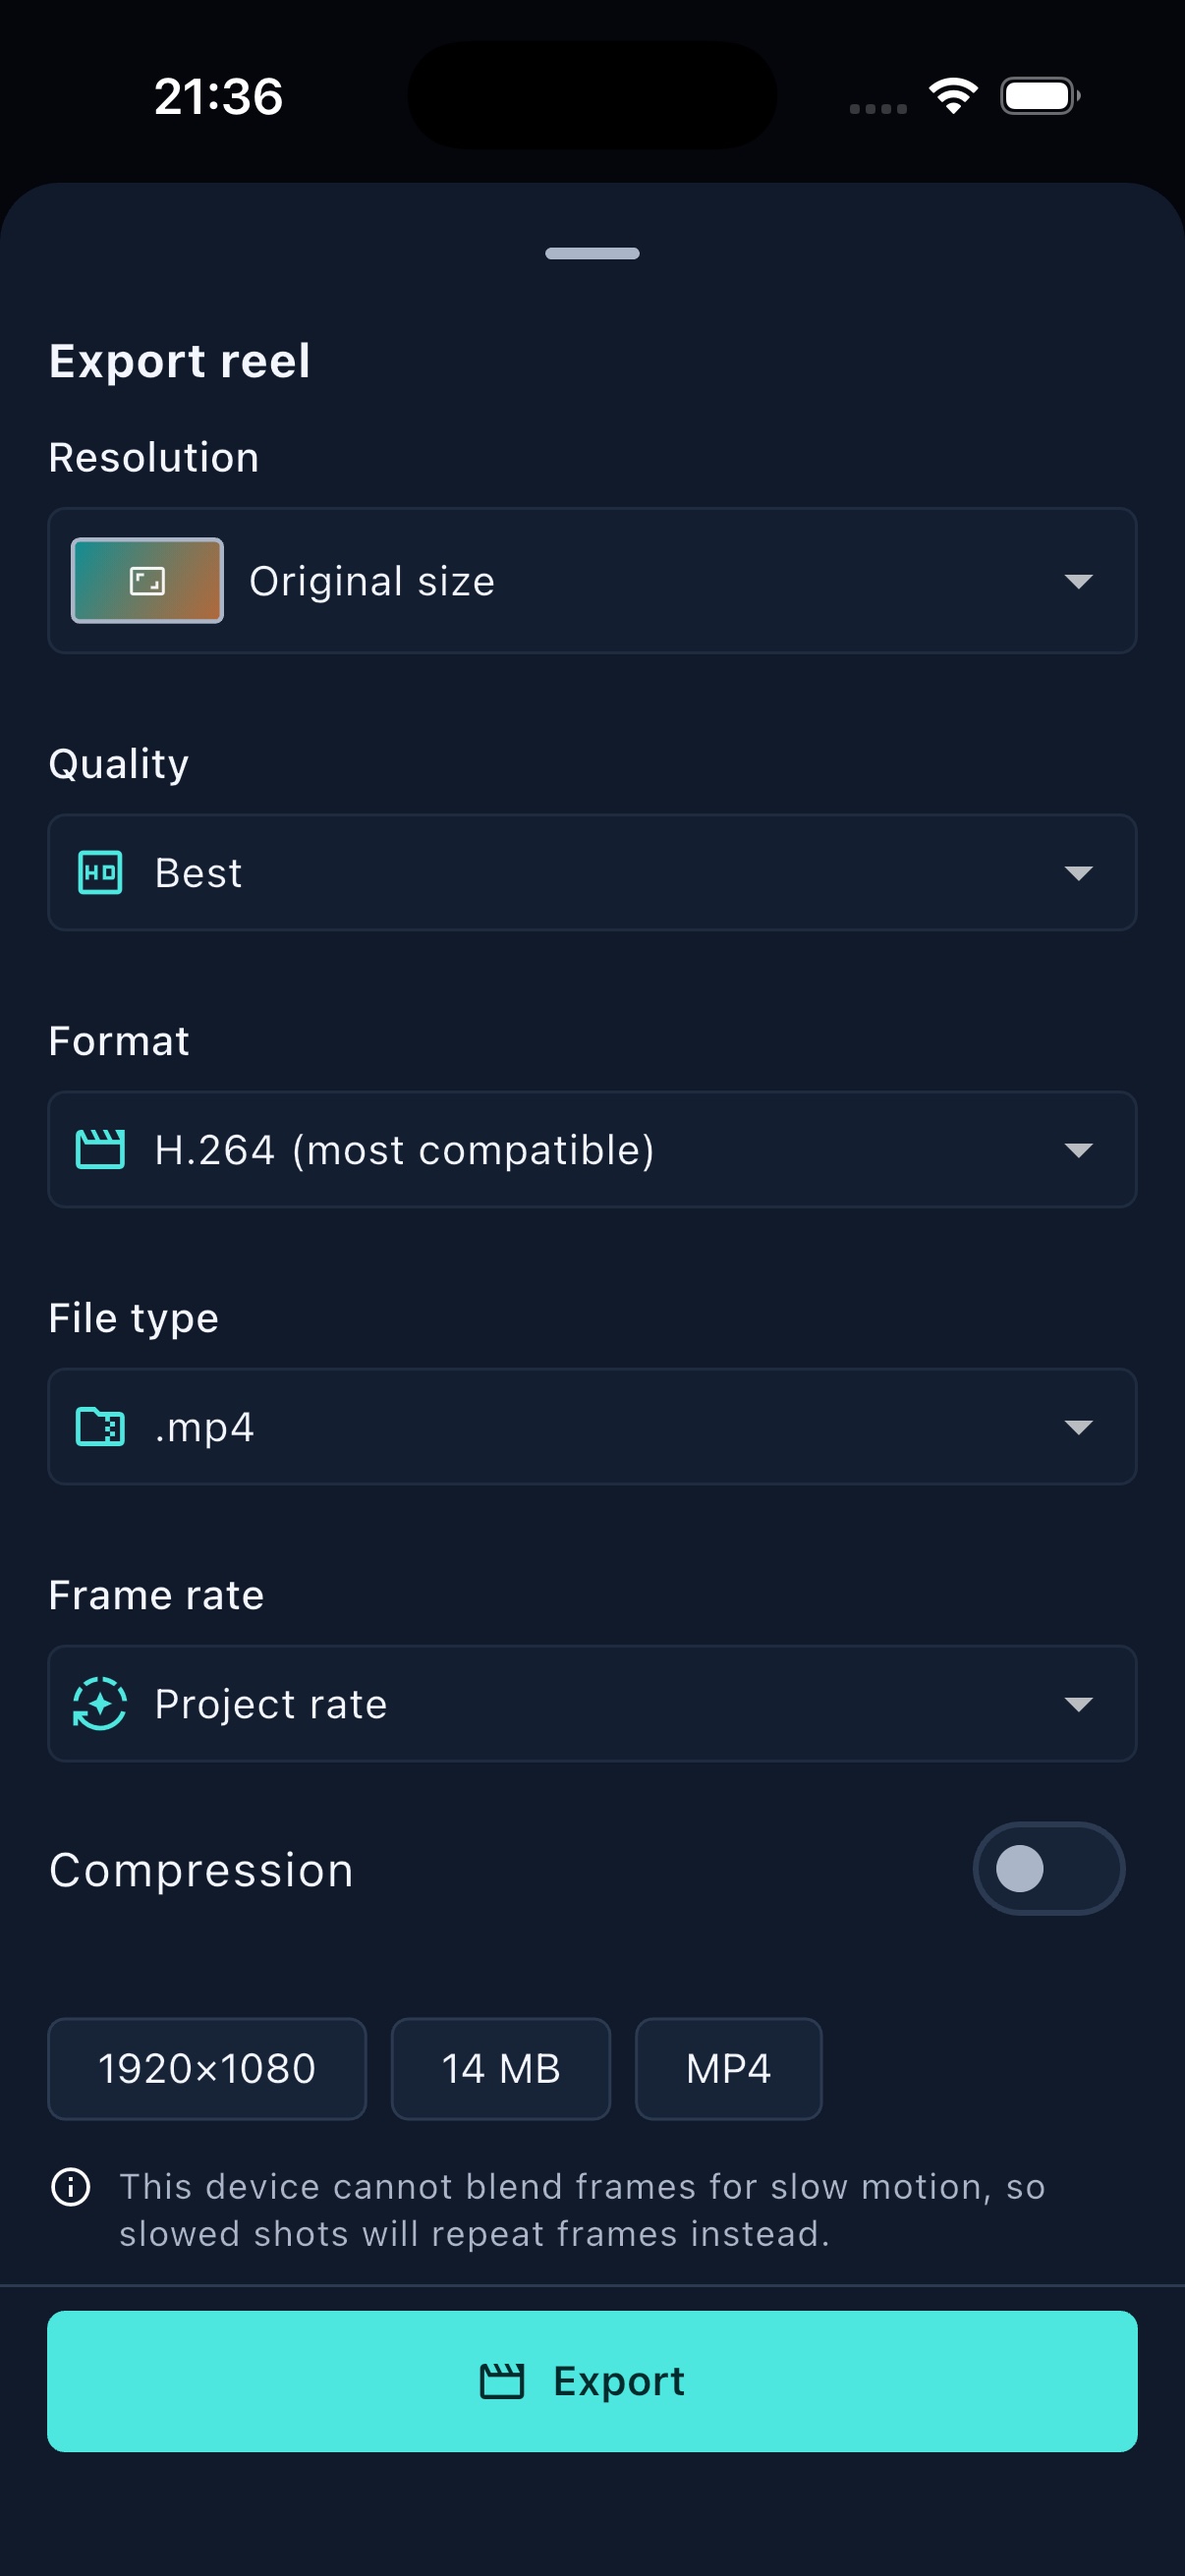
A real export pre-flight on macOS: the resulting resolution, estimated size, file type and device-specific slow-motion note are visible before rendering.The phone uses the same deliberate pre-flight in a full-height sheet: delivery, codec, file facts and the device limitation are visible before Export. 13 Build a first cut with Auto Reel
Auto Reel analyses the clips on this device and turns them into an ordinary, editable reel. Give it a target, music and a creative direction; the result remains a sequence of parts and junctions you can change.
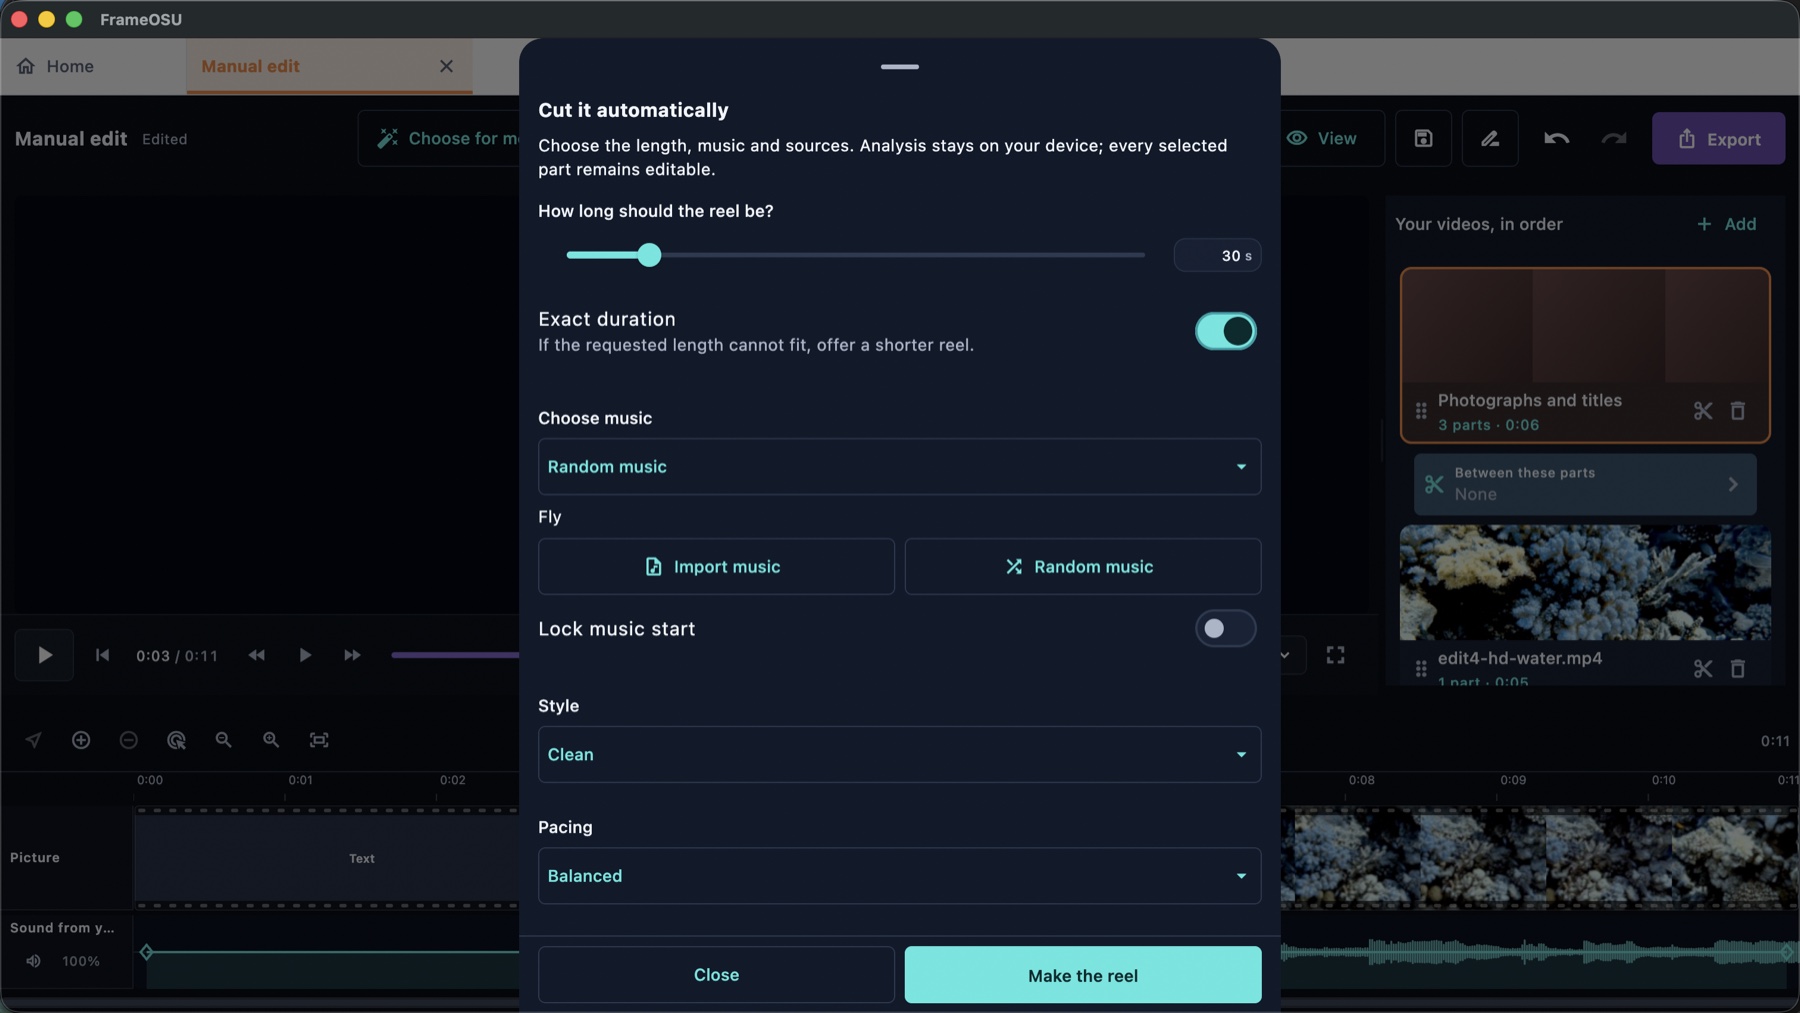
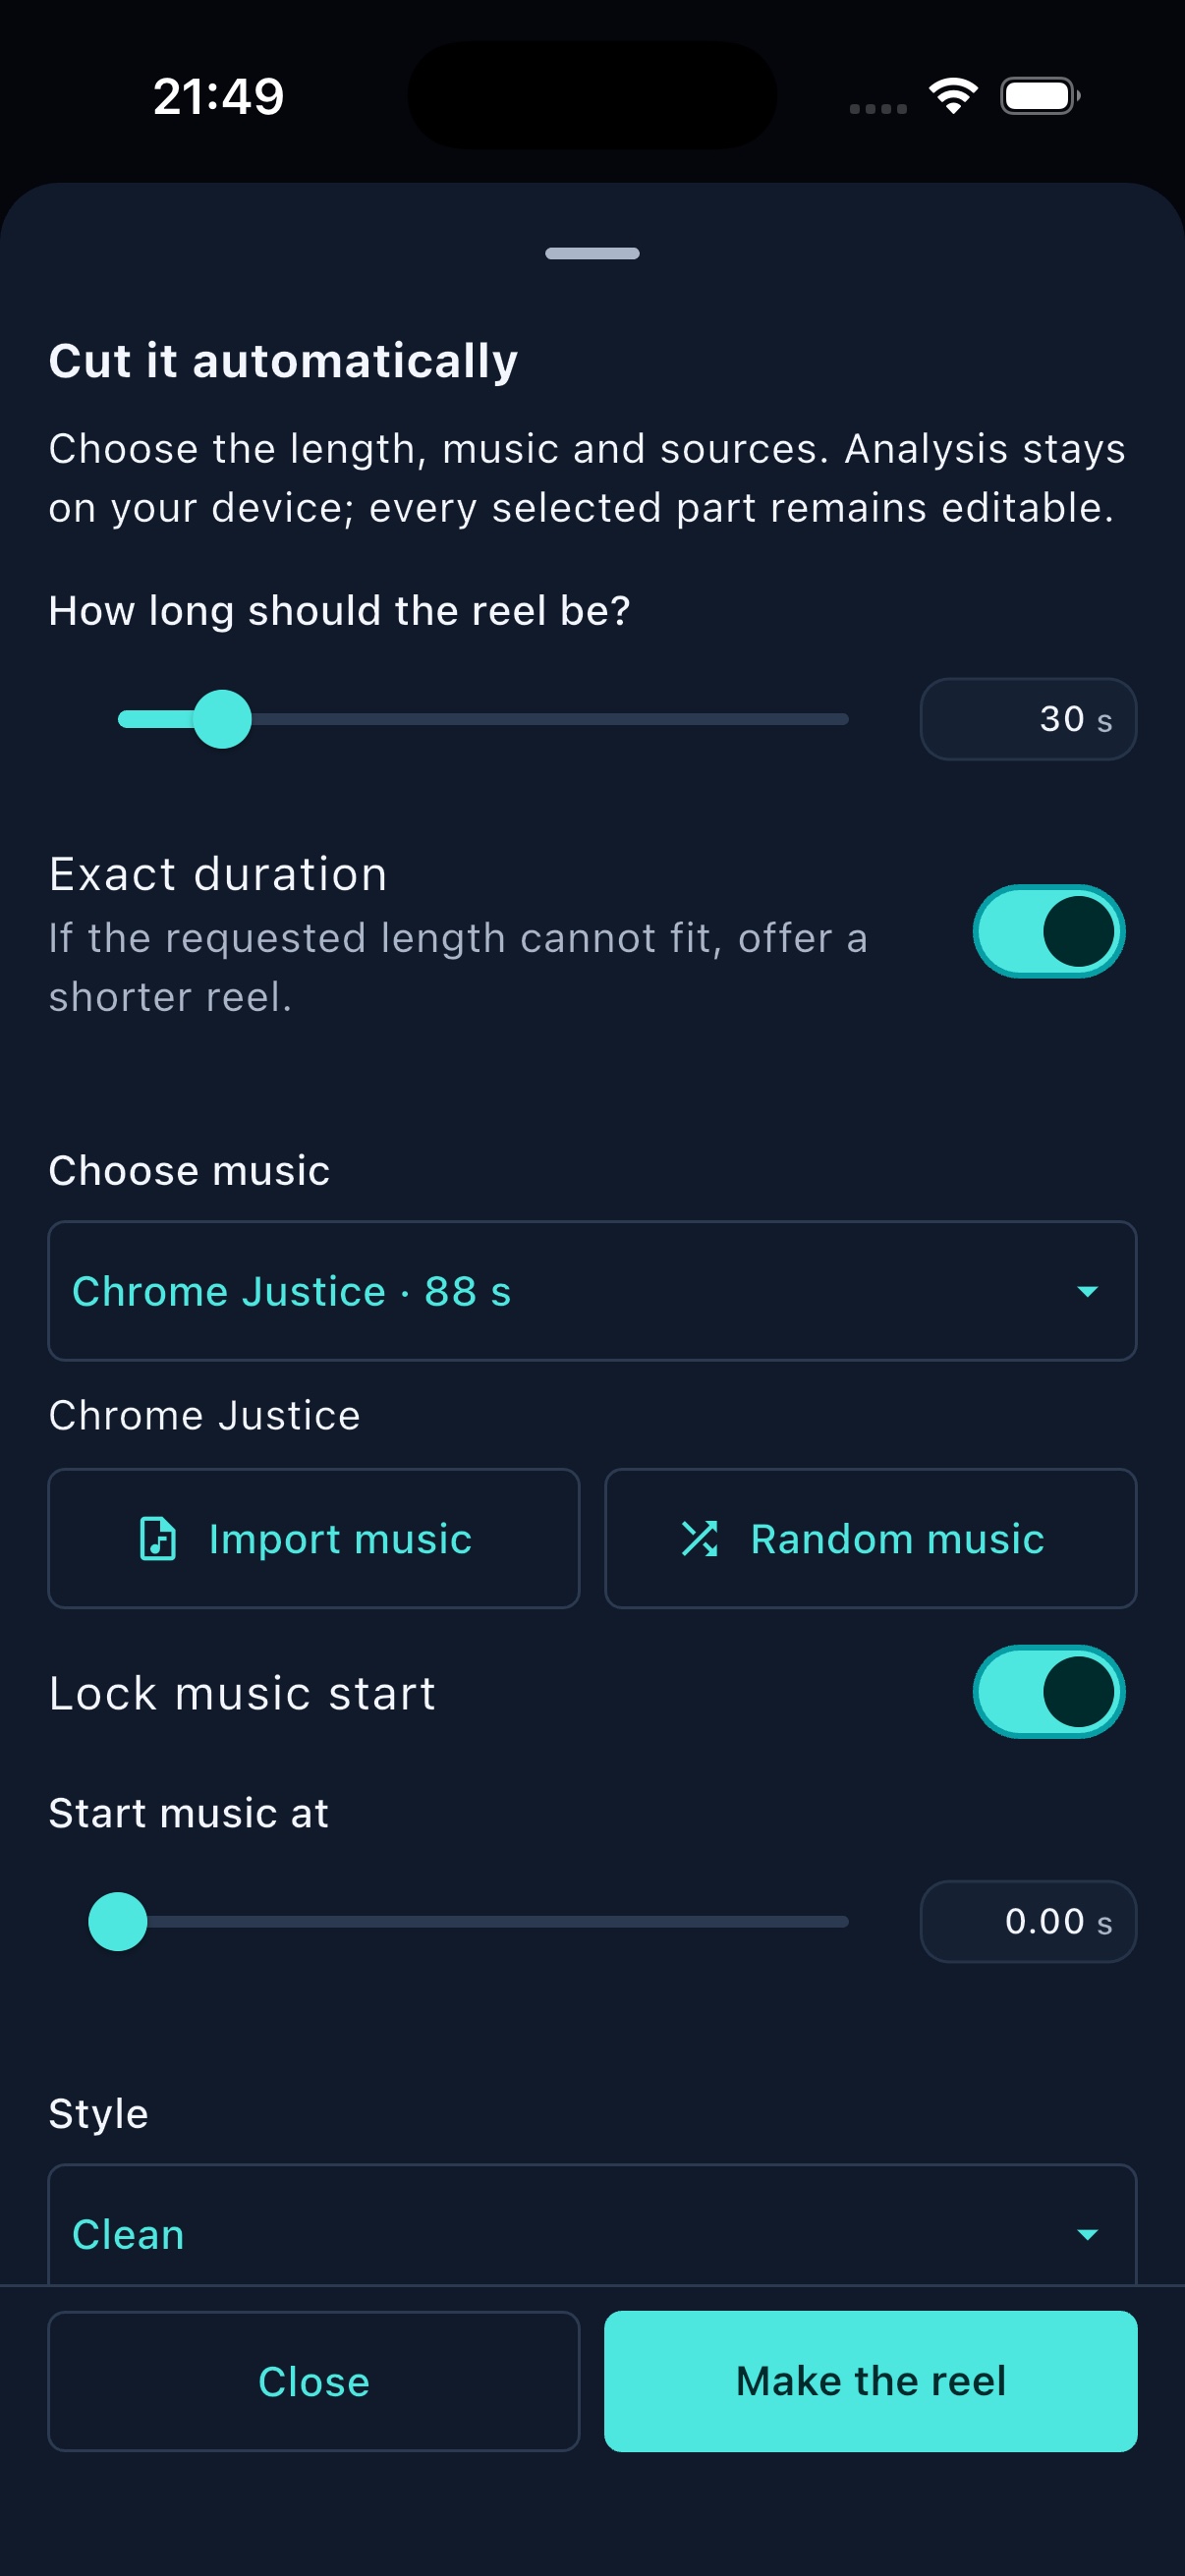
Auto Reel is configured before it cuts: thirty seconds, an exact target, a music plan, Clean style and Balanced pacing are visible here.The phone keeps the main Auto Reel decisions and the Make the reel action in one sheet; pacing and the finer controls continue below Style. 14 Start from a template
Templates are ready-made editing prescriptions. They can set structure, timing, canvas, music, titles and style choices while leaving unspecified shelves alone, so they give the reel a direction without flattening every decision.
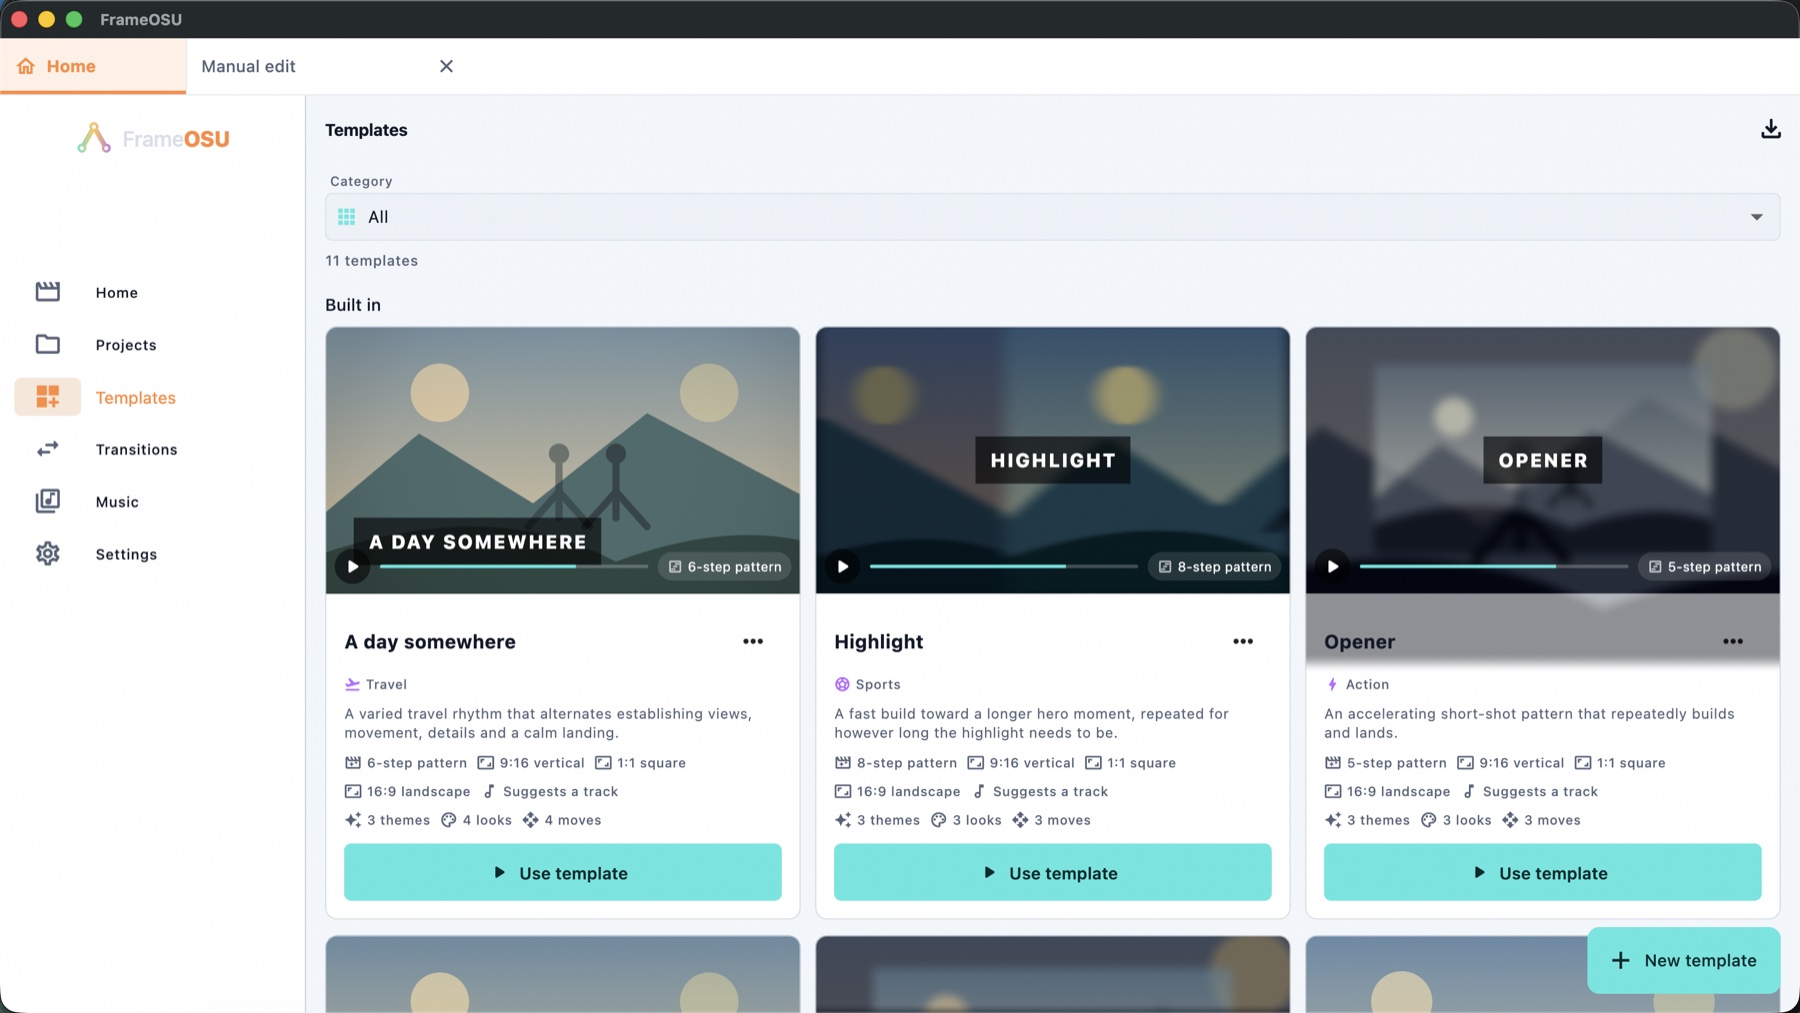
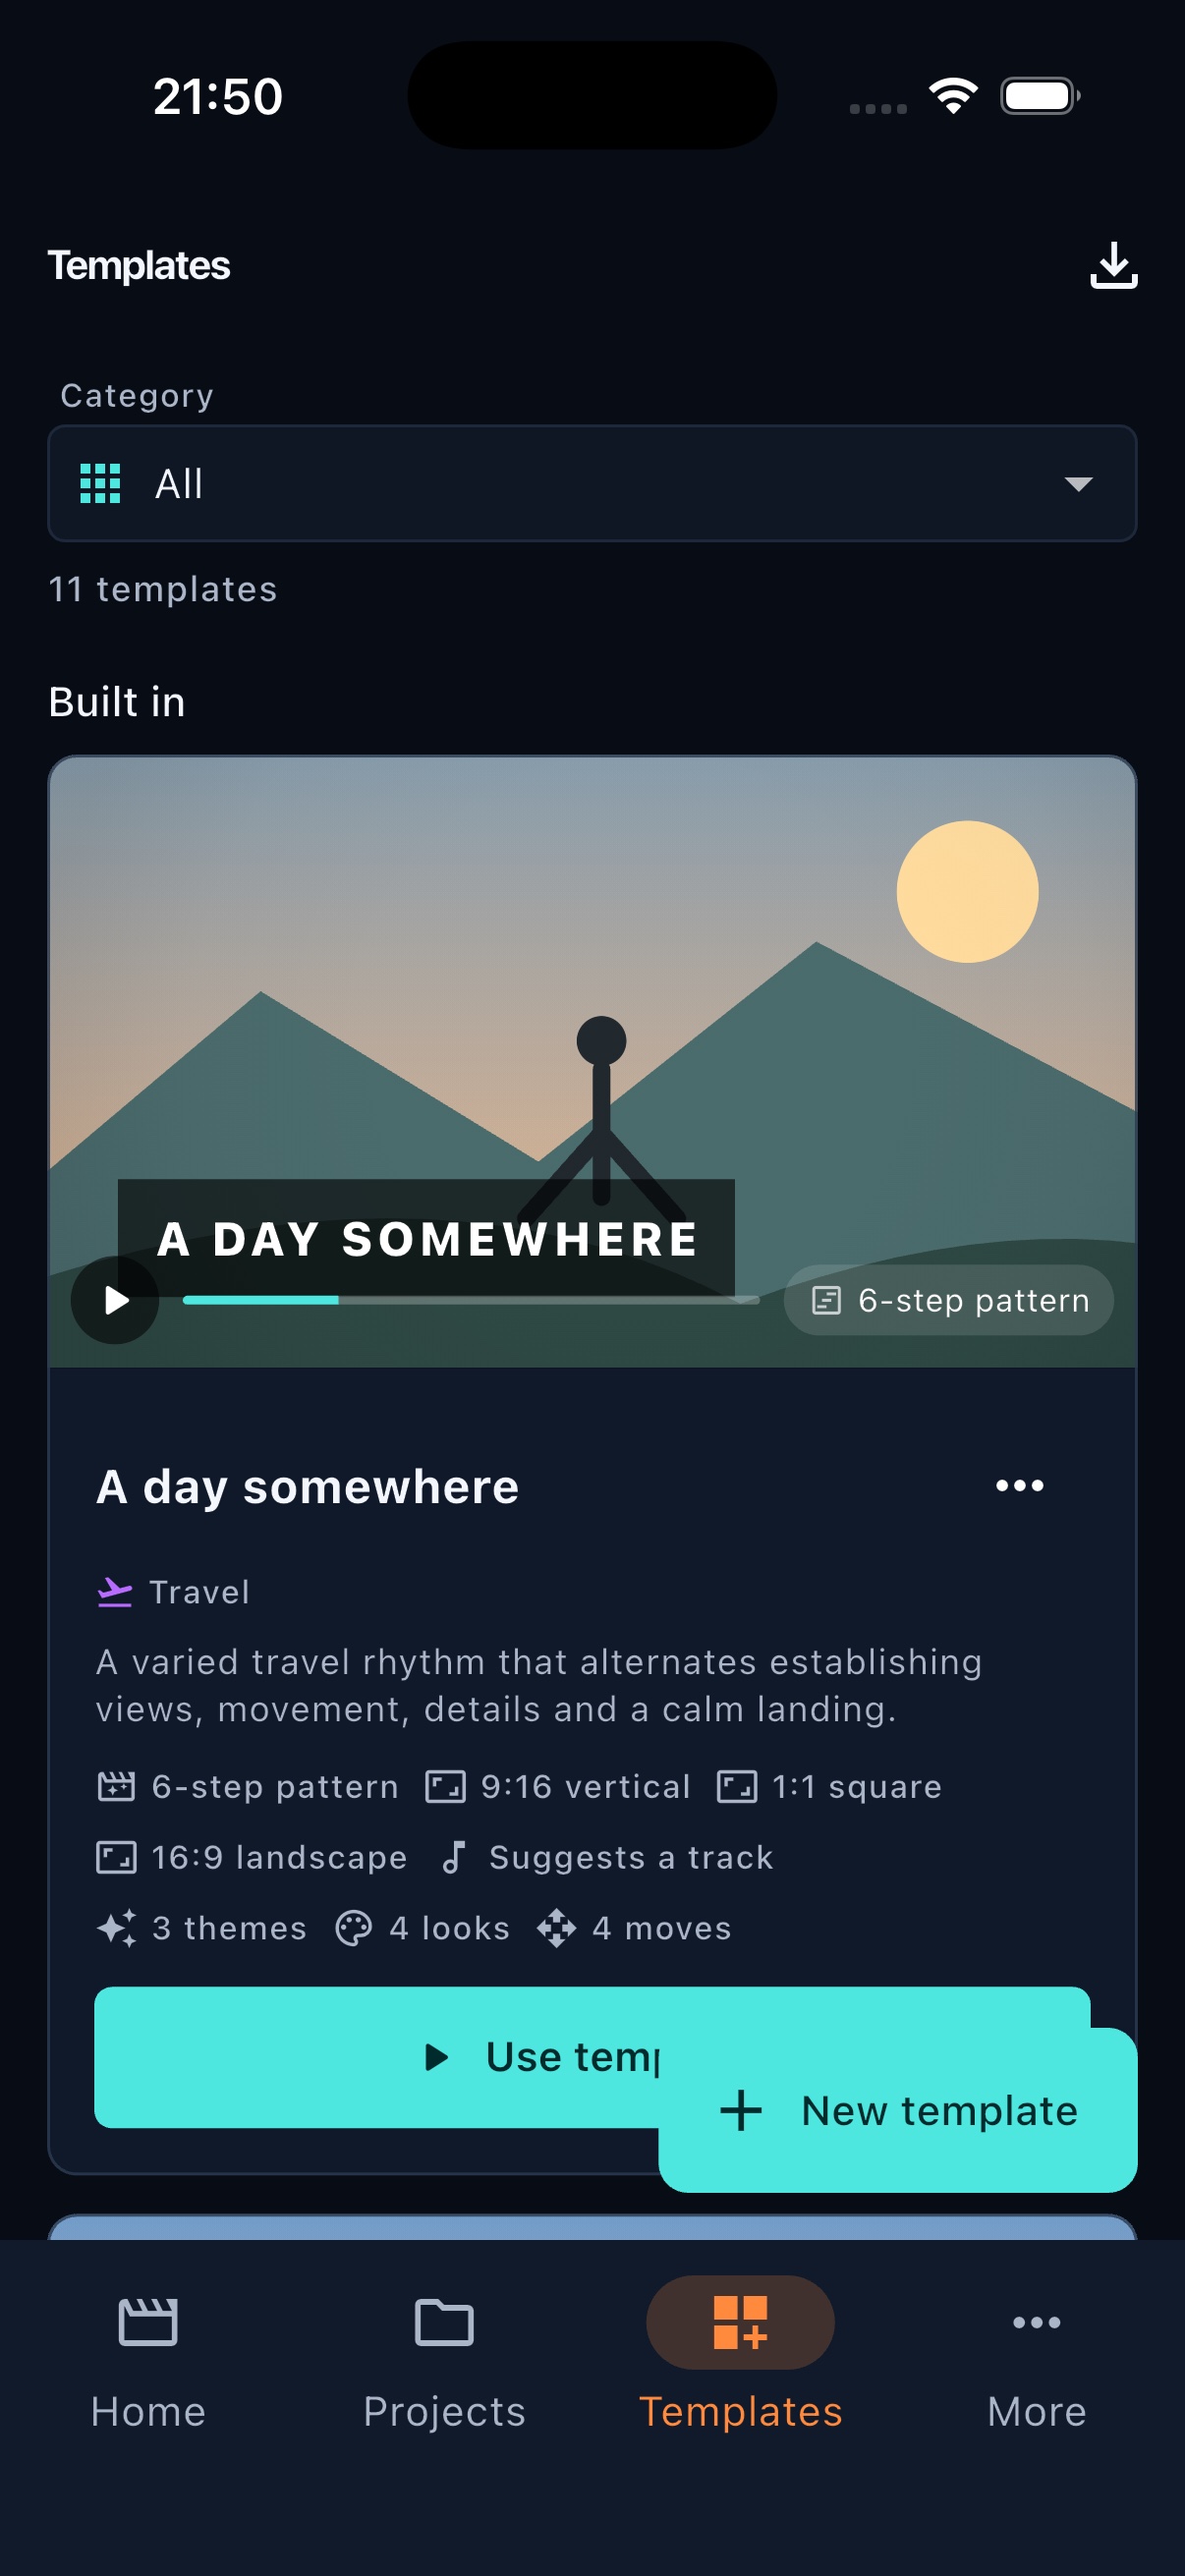
The desktop library places several recipes side by side, while each card still exposes its pattern, canvas support and creative shelves.The phone gives each template a large preview, a compact inventory of what it supplies and direct actions to use it or create another. 15 Create reusable transitions
The transition library keeps built-ins and your own presets together. A custom transition can choose a family, duration, family-specific controls and an easing curve, then be reused without changing the locked built-ins.
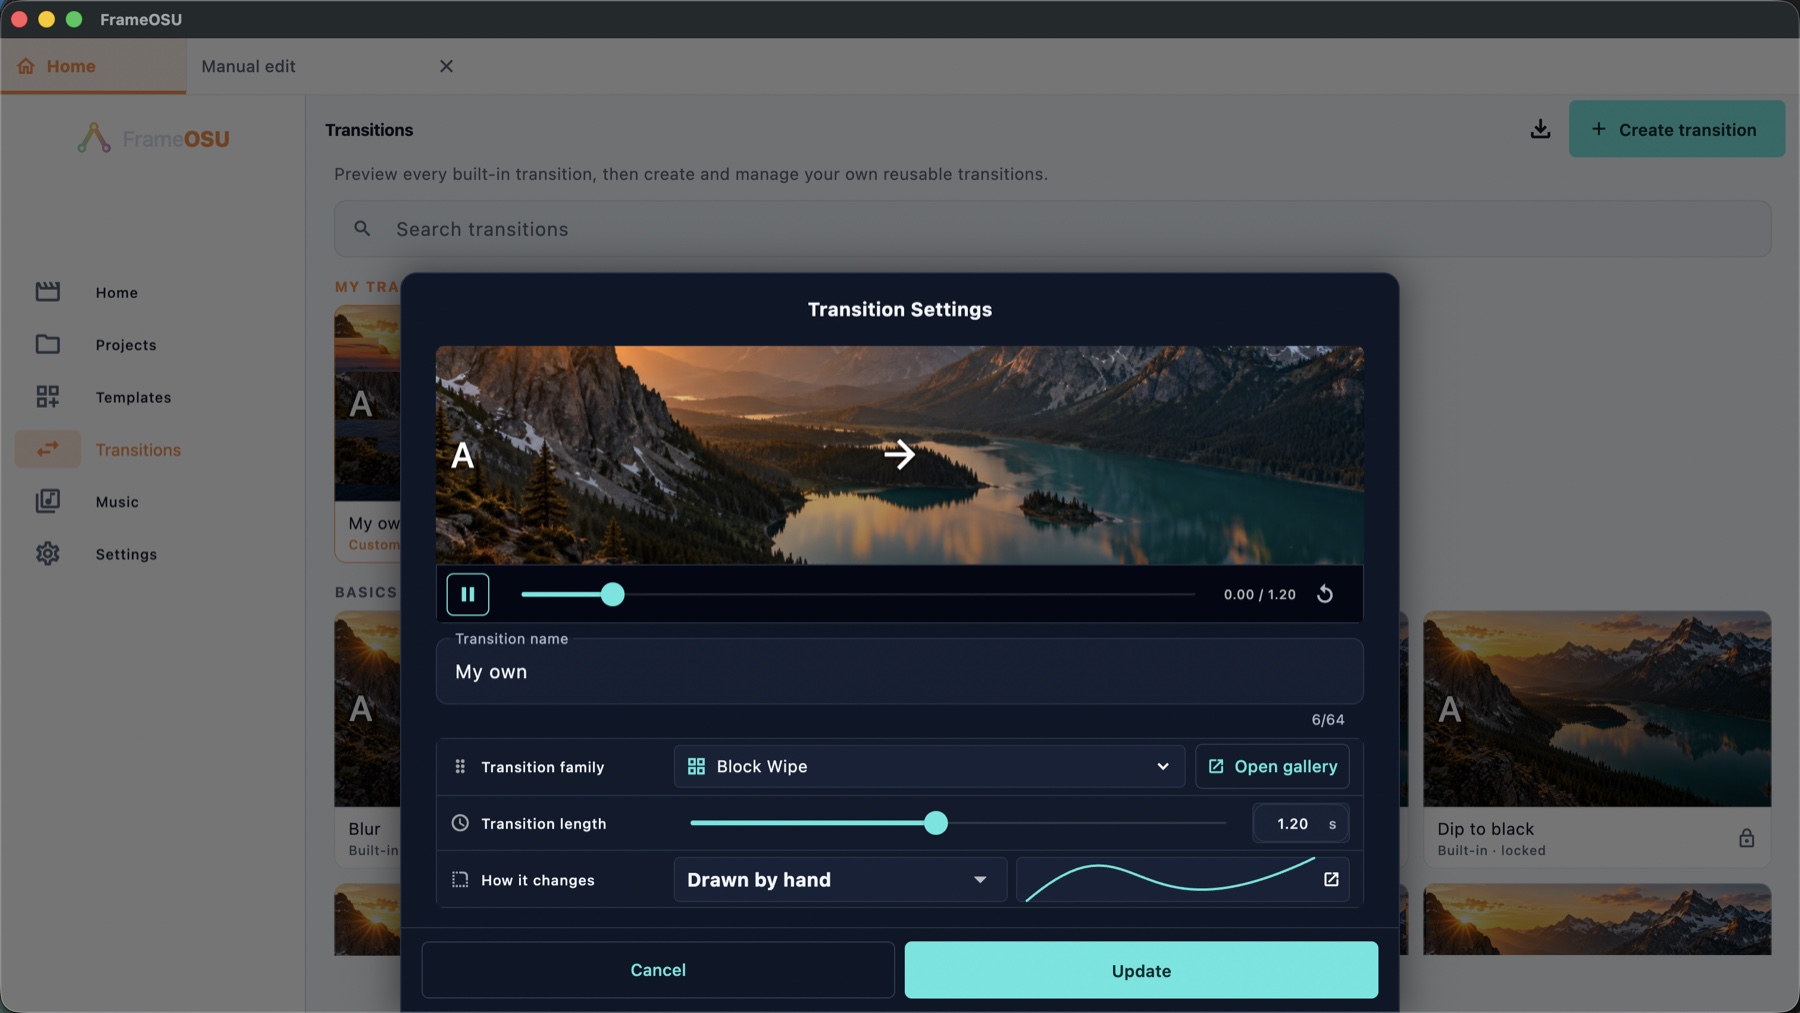
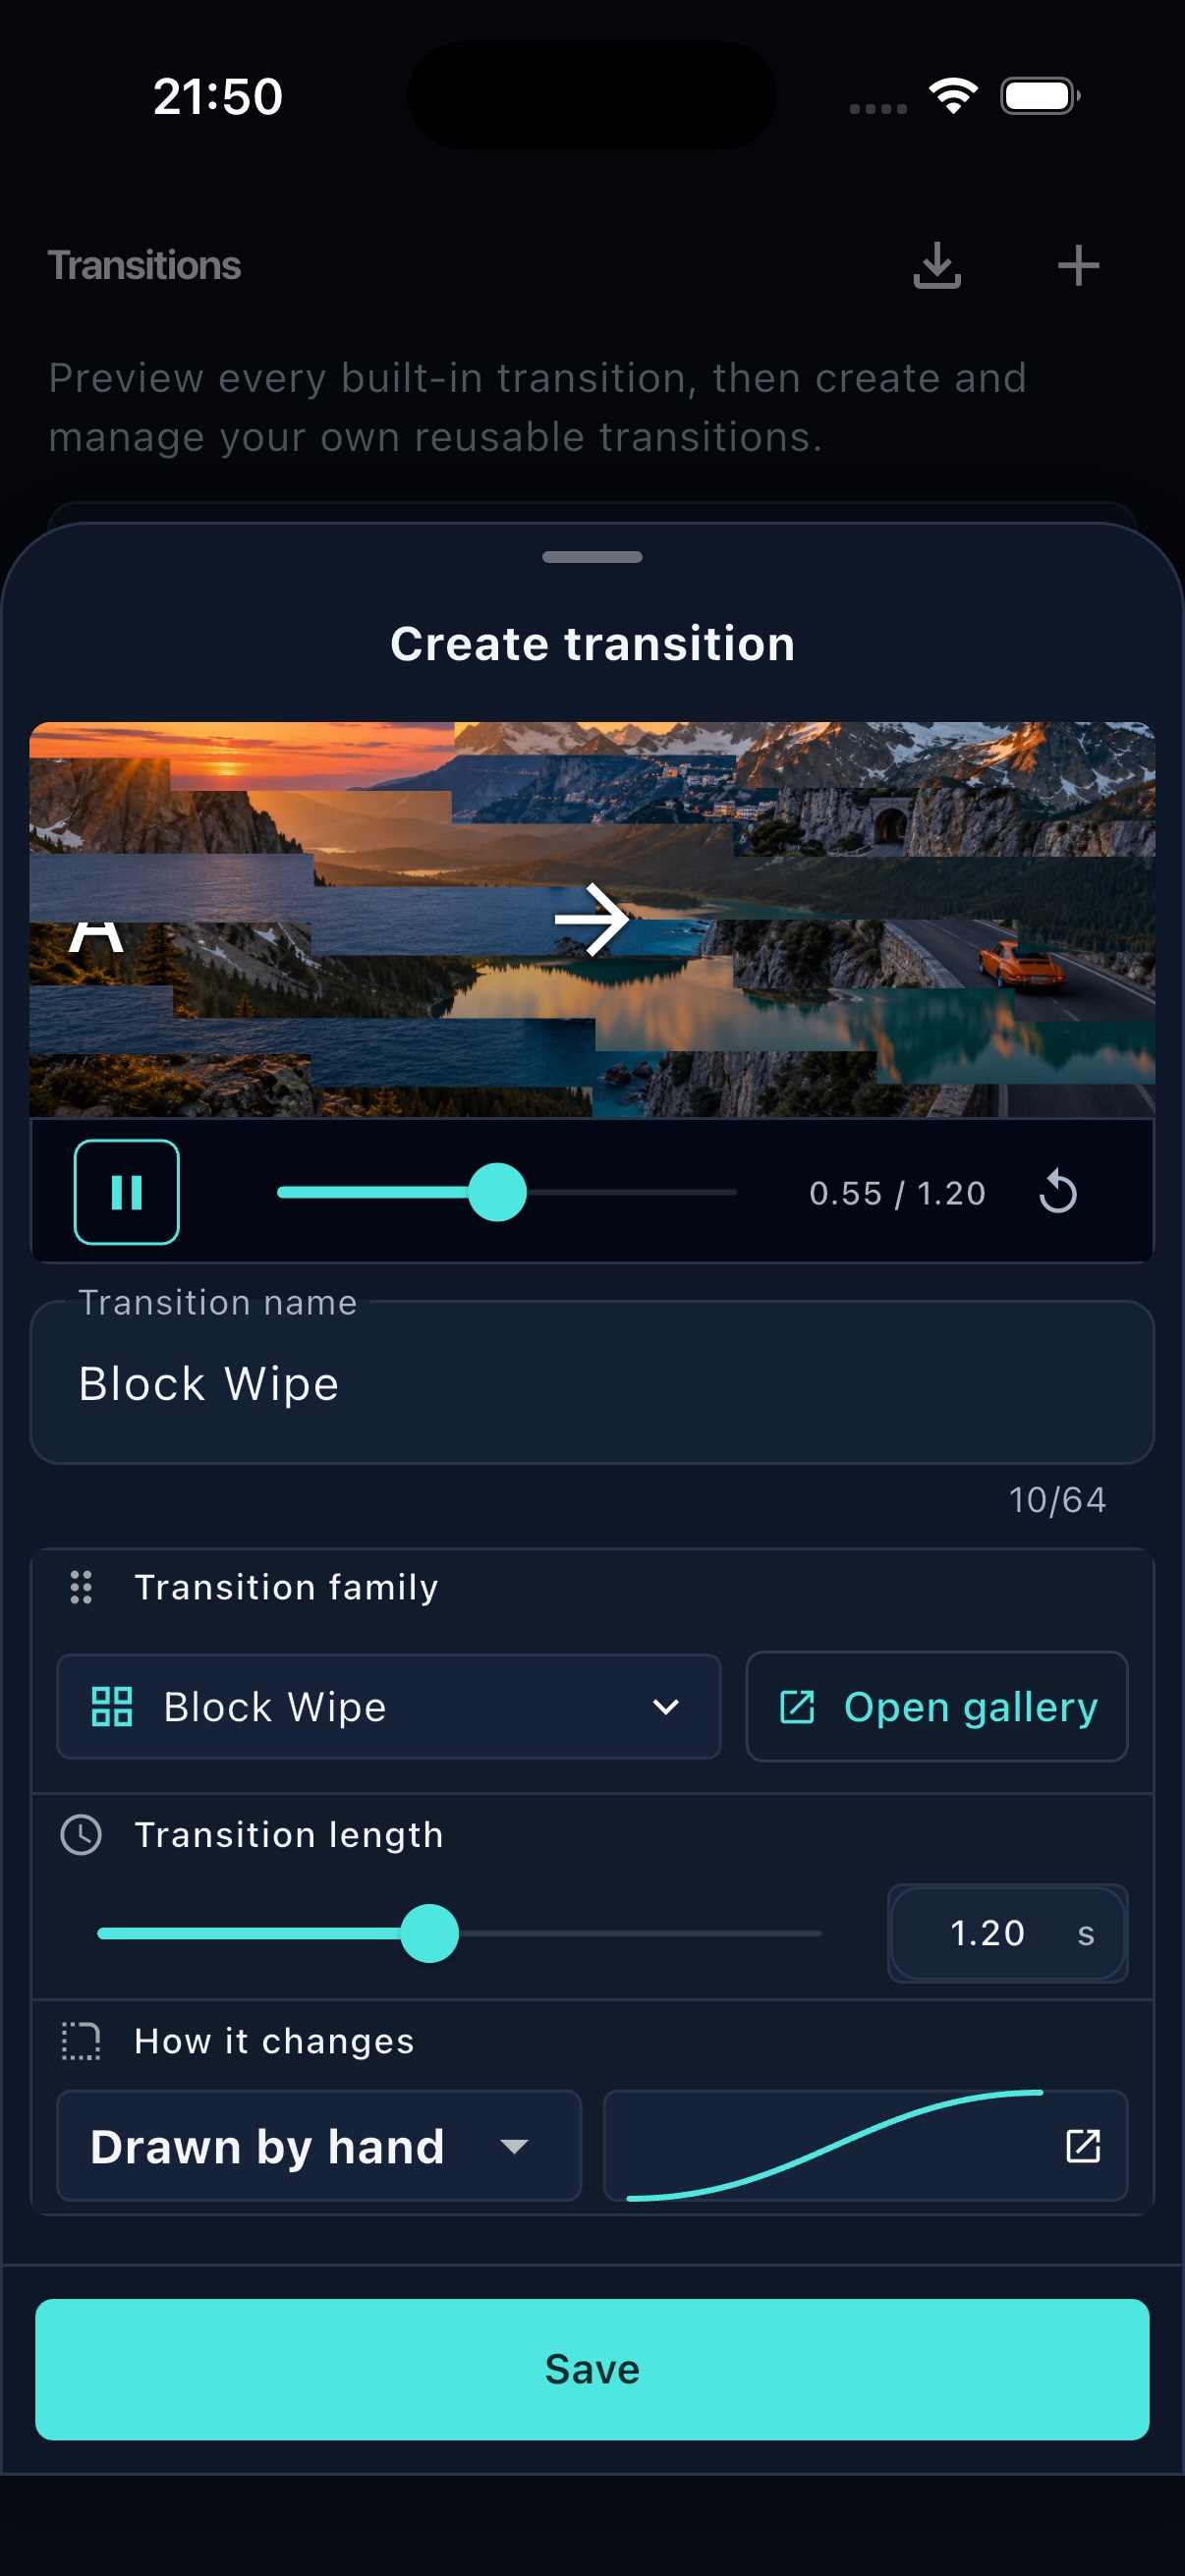
A custom Block Wipe open on macOS. Its name, family, 1.2-second duration and drawn easing curve can all be saved back to the library.The phone fits the complete custom-preset editor into one sheet: preview, identity, family, timing, easing and Save.